Today, the domestic market provides a huge number of different types of incubators, both Russian-made and imported. Breeding birds is a responsible business that requires appropriate knowledge and equipment. As many poultry farmers say, one should not strive to buy expensive foreign incubators, as there are high-quality domestic products. In this article, we will talk about domestic incubators of the Russian production "Neuska Bi-1" and "Neseka Bi-2".
Incubator "Laying": device and equipment
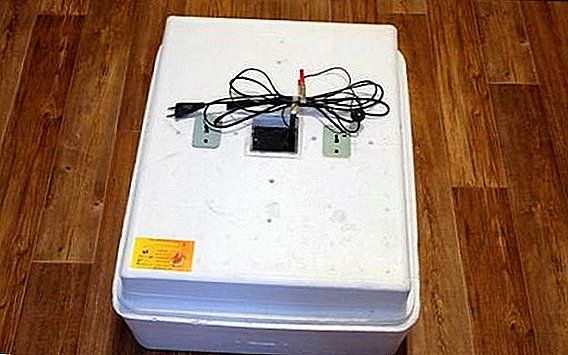
Incubators "Laying" are designed for breeding offspring of geese, ducks, pheasants, chickens, etc. The instrument case is made of foam plastic, which makes them lightweight, transportable and, at the same time, have good thermal insulation. Each of the devices is equipped with a window for viewing the container, an evaporator, a temperature meter, a psychrometer. Some of these elements may differ by modification depending on the type of auto-incubator.
More information about such an incubator: Blitz, Cinderella, Ideal hen, as well as how to make a chicken house, a chicken coop and an incubator from the refrigerator
Bi-1
Autoincubators of this type are found in two variations: 36 and 63 eggs. The model with a smaller capacity is equipped with incandescent lamps, the model Bi-1-63 uses special heating elements. Changing the temperature inside is very simple: for this purpose, a special thermostat is built into the incubator. In addition, both models of Bi-1 are equipped with the function of autoturn eggs.
Did you know? The ancient Egyptians, about 3000 years ago, tried to build incubators for birds.
The incubator "Layer Bi-1" has a psychrometer (for humidity control) and a thermometer (for temperature measurements). Both of these sensors have a digital data display system (only in new versions of incubators). Any models of Novosibirsk-produced auto-incubators are powered by a 12-watt battery. Under normal conditions, the incubator can function for 20 hours.

B2
The main difference between the incubator Bi-1 and Bi-2 is the volume of the container for eggs. The second model is designed to breed a large number of birds in one procedure. Car incubators with the designation "2" have two variations with respect to roominess: 77 and 104 eggs.
The automatic incubator "Layer Bi-2" is equipped with a more powerful and improved thermostat that allows you to maintain a constant desired temperature throughout the volume. The temperature error in the device does not exceed the permissible 0.2 ° C. For offspring of poultry, eggs of which have non-standard sizes, you can use special lattice dividers. This model of the domestic device in an operating mode consumes 40 watts.
The Novosibirsk company also offers its consumers an incubator of the series "Bi-2A Bird". It is equipped with a digital thermometer and psychrometer, but is powered by a 60 watt battery. In addition, the Bi-2A is equipped with additional dividing grids.

Specifications
Technical data specified in the "Laying" incubator instruction manual:
- It is powered by 220 V (50 Hz). A 12 volt supply to the temperature regulator is fed through a converter.
- Power consumption is 12, 40, 60 or 65 W (depending on the model of the device).
- The boundaries of permissible temperature control: + 33 ... +43 ° C.
- The permissible error of setting the thermostat does not exceed 0.2 ° C.
- The weight of the incubator varies from 2 to 6 kg.
- The change in temperature gradient inside the container does not exceed 1 ° C.
- Type of temperature controller - digital or analog.
- The frequency of coups in incubation raw materials is 2-7 hours.
Advantages and disadvantages
When comparing incubators "Laying" with analog devices, the following advantages can be distinguished:
- acceptable price;
- universality of design;
- small size, minimum weight;
- high degree of thermal insulation.
- absorption of unpleasant odors;
- fragility of the device.
Important! The temperature sensor must be positioned vertically in relation to the incubator cover!
To prevent the first of these points, the manufacturer calls for the use of abrasive cleaning agents after each use of the incubator.

Preparation for work
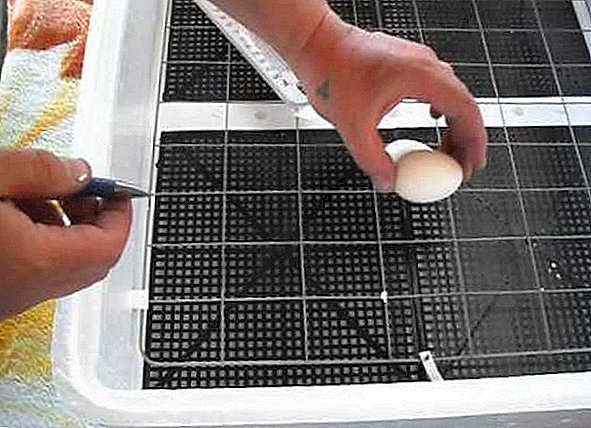
Immediately after purchasing the device, it must be unpacked and checked for operability and compliance with the specified configuration. Then insert the grating divider at the bottom of the housing. Further, according to the instructions, install the AUP (automatic device for turning the incubation material) and the cover.
Now the device is ready to work, so the next step will be to connect it to the 220 V network. After this, we tune the temperature mode to average values (around + 36 ... +38 ° C) and wait for 20-30 minutes. When the auto-incubator reaches the set temperature, the indicator flashes, which will indicate that the device is on the main operating mode. Now you need to connect the battery power, following the rules of polarity (do not forget to disconnect the device from the mains 220 V).
Incubation Preparation
If you are new to the poultry industry, and have never dealt with incubators before, then you should carefully study the operating instructions for the Laying Device. After that, you can begin the process of preparing for incubation, which involves the adjustment of the temperature regulator, as well as the selection and laying of eggs.

Thermostat adjustment
The adjustment of the temperature regulator takes place in several stages. For such a procedure, you must use a medical thermometer. First make sure that your thermometer shows plausible data (you can take a few pieces and compare with the example of your body temperature). Then put the thermometer in the bottom of the incubator in a position from which its performance will be ideally viewed.
Next, you need to turn on the autoincubator in the 220 V network and set the temperature controller sensor to the desired value (it is preferable to set the incubation temperature, which is +37.7 ° C). Wait 15-25 minutes, when the indicator on the device flashes, after which you need to check the thermometer indicators. If the difference between the set and the obtained temperature is more than 0.5 ° C, then it is necessary to carry out temperature adjustment using the thermostat knob.
Did you know? Industrial production of autoincubators in the USSR began in 1928.
After the desired temperature is set in the auto-incubator, replace the medical thermometer with the one supplied with the device. Compare the readings, and if there is a difference in them, then consider it in further procedures.
Egg selection
Collect eggs for incubation as often as possible. If they are not immediately removed to storage, there is a risk of hypothermia (in winter, spring, autumn) or overheating (in summer). Freshly harvested eggs are stored in a specially equipped place at an air temperature of + 8 ... + 12 ° C and humidity - 75-80%. There should be no drafts and regular or temporary lighting in the storage area.

You can store eggs before incubation for no more than 7 days. Duck and goose eggs can be stored in optimal conditions for about 8-10 days. It is important to understand that prolonged pre-incubation storage leads to the fact that harmful microorganisms begin to penetrate into the eggs.
Read about the intricacies of incubating chickens, goslings, turkey poults, ducks, turkeys, guinea fowls, quails.
When selecting eggs, make sure that the shape and condition of the shell is correct. An incubation material suitable for breeding young animals should have a smooth uniform shell of medium thickness and density.
It is possible to make a more detailed analysis of eggs for incubation with the help of an ovoscope. Using it, it is necessary to select eggs that have an air chamber of normal size. In addition, they should have a yolk that does not stick to the shell, with a smooth contour of the contours.
Egg laying
In no case do not carry out the shell disinfection procedure before laying the incubation material. Such procedures will lead to the fact that the antibacterial or other drug will seep through the shell and into the egg. And this will lead to the fact that the offspring may never hatch.
Important! If there is a regular temperature drop of up to ± 10 ° C in the room, then expect an incubator temperature drop of up to ± 1-2 ° C.
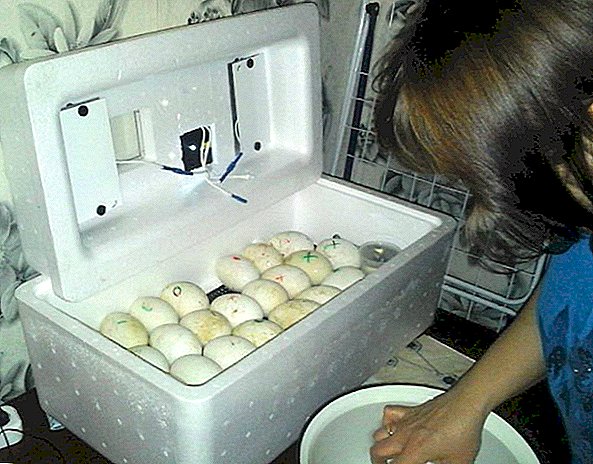
Eggs that are prepared for the tab should be marked on both sides with the symbols "O" and "X". This will help you control coups and not get confused. After laying the incubation material, a thermometer is inserted and the incubator lid is closed.
Incubation rules
For a successful breeding process, the following rules must be followed:
- Regularly monitor the temperature inside the incubator. Also, do not forget to replenish water supplies (if necessary, disconnect the device from the mains supply beforehand).
- Make sure that the AUP system does not crash and overturns the incubation material at each time point of the specified interval.
- Sometimes swap eggs inside the incubator. Those that were near the wall, change with those that were in the center. It is necessary to do this, since inside the system there is a temperature gradient difference throughout the volume (in the center, the temperature can be a fraction of a degree higher than at the edges). And remember that it is better to roll the eggs, because during lifting you can damage the tissue of the embryo.
- Two days before the end of the incubation, egg turning is prohibited.
- During the entire incubation period, it is necessary to double-check the development of eggs. This is done with the help of an ovoscope and an electric lamp (150-200 W). At 7-8 days when examining the egg with the help of an ovoscope, a small black speck should appear in the yolk. On the 11-13th day, the whole egg should be dark. Such indicators are signs of normal biological development of chicks. If the egg remains light on the second viewing, then this is a “talker”, and it must be removed from the incubator.
- If during the operation of the auto-incubator the power supply of the network is lost, then it is necessary to use a gasoline generator or move the device to a warm place, covering it with dense fabric material.
- If small chicks break through the shell a day earlier, it is necessary to reduce the temperature of the incubator by 0.5 ° C. With the late appearance of young stock, the temperature increases by 0.5 ° C.
- When the first chicks appear, they need to be deposited in a warm place (+37 ° C) for about 7-10 days. Heating can be carried out using lamps.
- After the completion of the incubation procedure, the device must be thoroughly rinsed and stored.
The key to successful breeding of chickens, goslings, ducklings, broilers, quails and musk ducks is proper feeding.
Security measures
Remember that the Incubus auto-incubator is a technically complicated electrical appliance, and when using it you should follow some rules and precautions:
- It is forbidden to use abrasives and solutions that are intended for cleaning ceramic and tile products for cleaning the incubator.
- Do not let any synthetic solution into the body of the thermostat system.
- It is forbidden to exert strong mechanical loads on the device, as this may threaten with wire breaks or system malfunction, as a result of which short-circuit or other problems with the mechanism may occur.
- It is forbidden to disassemble the mechanism of the incubator, which is connected to the network.
Did you know? In the early 70s of the last century, more than 1.7 billion autoincubators operated throughout the USSR.
The Incubus autoincubator is an excellent device for beginners who want to breed their offspring. This appliance is capable of performing up to 80% of the work independently, without human intervention. In addition, its value is increasingly attracting novice poultry farmers.