Among the many plants used for making delicious and aromatic tea, few people distinguish stevia, but in vain. This relatively unremarkable plant has good taste data and has a rich composition of nutrients, which makes it an excellent ingredient for the specified drink. We suggest that you take a closer look at the characteristics of this herb, and also find out whether it is easy to grow it at home.
Botanical description
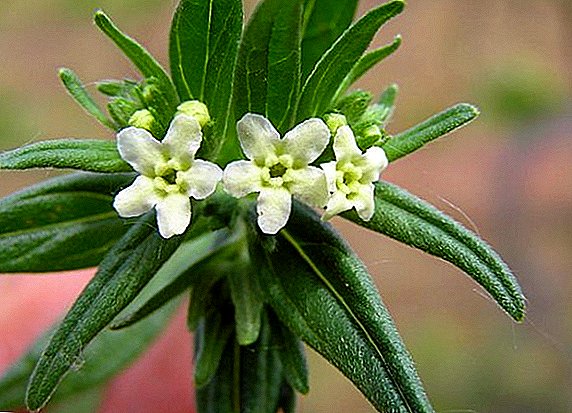
Stevia is a herbaceous perennial of the Astrov family, pollinated by insects in a cross-sectional way. In the wild form can be found specimens reaching a height of 60-120 cm. Externally, they resemble a branched shrub, with simple paired leaf plates. White flowers are small, collected in inflorescences. Seeds are small (only 0.5 x 4 mm).
Important! The leaves of the plant are endowed with healing properties, because they contain flavonoids, vitamins C, A, E, PP, as well as glycosides, polysaccharides, fiber, tannins and essential oils.
When grown at home from sowing seeds to collecting leaves It takes about 16-18 weeks (for a seedling period accounts for 8-10 weeks). Such a sweet grass, grown in a room or in the garden, will be a good alternative to synthetic drugs.

Seed selection
It is possible to find stevia seeds both in free sale and in online stores. Try to select only proven suppliers that have been in the market for a long time. The minimum quantity of seed material in one bag is 7-10 pieces, but at the same time, the producer promises their high germination capacity.
Did you know? For the first time the healing properties of the described plant were noted in 1887 by the scientist from Switzerland Antonio Bertoni, after that his colleagues from other countries became interested in Stevia. As a result, in 1954, the plant began to appear en masse in Japanese greenhouses, because they were the first to cultivate it at home.
Unfortunately, in practice this is far from always true, and half the seeds are empty inside. Therefore, to avoid disappointment after sowing (especially in our climate), it is advisable to pre-check the purchased product, for example, by sailing method. To do this, it is enough to throw each seed from a meter height and evaluate the features of its fall: full copies quickly reach the floor, while the empty ones dive smoothly.

Seed germination
In order to grow good raw materials for therapeutic or culinary purposes, first of all, you should properly prepare and germinate the selected planting material. This procedure can not be called complex, but will have to adhere to a certain phasing of all the actions performed. Germination of stevia is performed as follows:
- In the loosened and heated soil should be made several grooves and placed in each of them for 1-3 seeds, covered with soil or vermiculite from above (the land layer over the seed should not exceed 30 mm).
- Topcoat needs to be moistened, but only very carefully so as not to wash the seeds from the ground (it is better to use a spray bottle).
- Now it remains only to close the box with a plastic lid and place under a fluorescent lamp, which in the first weeks of cultivation should burn constantly (up to 15 hours of daylight decrease only after three weeks of growing stevia). The temperature in the room should not fall below + 24 ... +27 ° C.
Important! Watering stevia during this period should be done as carefully as possible so that the soil is sufficiently moist but not wet. If it is impossible to organize a lower irrigation (it is more preferable in this case), it is possible to pour water on the sprouts themselves, but better with the use of a spray gun.
When young plants reach a height of 12-13 cm, they cut 2-5 cm from the top of the main stem and wait for branching.
Soil selection and preparation
Those flower growers who have already faced with the domestic cultivation of stevia, certainly know about the capriciousness of this plant. It may well not take root in the usual garden soil, so it is better to immediately add to the standard chernozem compost or humus in the calculation of 3: 1. If the land on your site is very clayey, then in an additional order it is worth adding one more part of river sand. An alternative to such a prepared soil mix will be a ready-made purchase composition, in which stevia should feel good. Among the most suitable options for such soil mixtures are the following:
- sand and two-year humus (2: 1);
- sand, land of coniferous forest, humus (all in one piece);
- black soil and sand (5:1).


Hardening seedlings
Like any other indoor plant, when transplanted into open soil, stevia needs to be quenched. To do this, from the place of germination it is moved to small containers in order to regularly take them to fresh air a little later (1-2 hours per day). All pots should be placed in bright sunshine and freely blown by the wind. As soon as the seedlings become stronger and undergo the process of acclimatization, you can safely transplant them into the garden.
Learn how to grow plants such as: juniper, lavender, rosemary, savory, fern Asplenium, room thuja, coffee tree, azalea, kalanchoe, anthurium, geranium, orchid, spathiphyllum, violet, begonia at home.
Transplantation in open ground
Considering that stevia is a heat-loving plant, its landing on the territory of the middle lane often does not bring the desired result, of course, if you do not wait with this venture to the middle or end of June. For transplanting seedlings, the soil temperature should be at least + 10 ... +15 ° C, although the minimum value at which the plant is still viable is considered to be +4 ° C.

In southern countries, stevia is cultivated all year round, but in our climate it can grow only in the summer. With the advent of autumn, it is usually dug up and transferred to a pot to be planted in the spring again.
When choosing a place for future growth, be sure to consider the pH of the soil, which should be close to neutral. In this case, a good substrate is considered to be light, not clayey, well-drained earth, constantly heated by the sun's rays. In the shade and dampness this plant will not be able to grow and will die quickly.
Important! When growing stevia, give it autonomy within a few meters. No close "neighbors" she will not tolerate.
The process of transplanting to the selected site involves the following actions:
- Carefully remove the plant from the pot, keeping the soil around its root system.
- Move the grass into a previously prepared indentation in the open field, sprinkle with soil and lightly tamp.
- Sprinkle the substrate with spray water. (it is not recommended to use a watering can).
- Grind the root zone with plenty of mulch.because the roots of the plant are very close to the surface and can dry out.


To properly equip the garden area, you need to properly approach the issue of planning: make the beds, fences, beautifully arrange flower beds.
Care
Caring for the southern whims can not be called too troublesome, but you have to follow some of the rules. So, the key to active growth and well-being of the plant is timely and proper watering, which is carried out several times a week (weather conditions are always taken into account).

In dry times, the land should be constantly wet, but not very wet, since stevia reacts equally badly to drought as well as to an excess of moisture. 3-4 hours after watering it is useful to loosen the ground, removing weeds from it (the procedure is performed as needed).
After the first feeding, fertilization is continued every two weeks, pouring 4-5 liters of complex mineral fertilizer, diluted in accordance with the instructions on the package, under the plant. In addition, twice per season, you can make and organic, using rotted infusion of fresh mullein, diluted with water in a combination of 1:10.
Harvesting and storage
Most often, the described grass is grown for the purpose of harvesting, so the correctness of its collection and storage does not lose its relevance. This process begins during the flowering of stevia, which can be observed already 16-18 weeks after it was sown (approximately in July), and ends in mid-September.

Cut the grass at a height of 5-10 cm from the surface of the soil and collect in separate bunches in order to hang it in a well-ventilated, covered room for drying. True, stevia can also be dried in bulk, simply by spreading out the torn leaves and the cut sweet tops on paper in one layer. If possible, a lamp or electric dryer is used to speed up the process, but in any case the plant should not dry for more than 12 hours, otherwise most of the sweetness will be lost.
As a top dressing of plants also use: "Chunky", nitroammofosku, "Kemira", "Ammophos", biohumus.
Dried leaves are easily crushed using a conventional coffee grinder, after which they can be moved to a glass container for permanent storage. The finished product is used for the preparation of alcohol tinctures and syrups, which are successfully used in culinary business.

If you are more interested in grass seeds (as planting material for the next season), then you should move on to the harvest by the end of August, focusing on the dark leg of the plant. Do not miss this moment, otherwise a fully ripened seed will simply spread over the plot.
Did you know? Only 2-3 tablespoons of chopped stevia leaf plates will completely replace a glass of regular sugar.
Pests and diseases
Stevia does not have serious enemies on the territory of our state, and parasites familiar to middle latitudes practically do not threaten it.
- The only thing that can be encountered in growing a plant is it's a black leg which in some cases can ruin whole grass plantations at the seedling stage of its growth and development. To prevent infection, you only need to disinfect the soil in a timely manner, piercing the soil in the oven or steaming in a water bath. It is also useful to water the soil with a solution of potassium permanganate.

- Occasionally, greenhouse whiteflies live on plants, but they are more characteristic of domestic plants. With a massive invasion of this pest, the leaves dry quickly and fall off, so it’s worth taking the most prompt measures to eliminate them. This can be done by treating the lower part of the leaf plate with soapy water, then loosen the soil in the pots for a few centimeters and pour in sawdust, peat or humus.

For the extermination of these and other insect pests use drugs "Actellic", "Karbofos" and "Fitoverm".
That's all the tricks of growing stevia at home. As you can see, there is nothing particularly difficult in this process, so you can safely plant sweet grass on your plot without worrying about the problems in its cultivation.