Any experienced bird farmer knows that chicks are a very demanding people, and they not only need to devote much time and attention, but also provide a home in which they can safely and safely grow to the point where they can go into adult life. Such a house can be bought in the store, and you can spend less money and use all your imagination to make it yourself and arrange it. Moreover, such a process will take a minimum of time and effort, and will bring maximum results.
What is a brooder
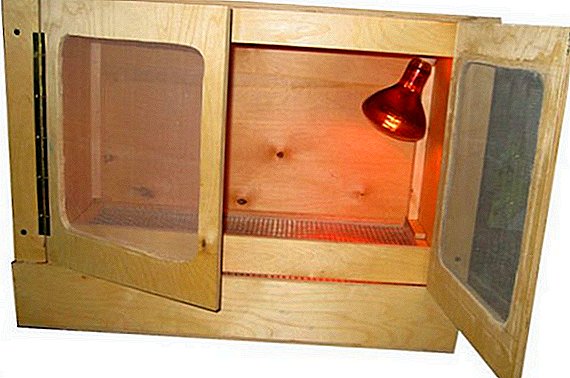
Brooder - a small room, which is intended for rearing. Such a house for birds is equipped with artificial lighting, additional insulation, as well as drinkers and feeders.
Did you know? Quail - a bird that has a very fast metabolism. The chick grows to its maximum size in 2 months.
In these artificial "nests" the chicks spend their first days, develop and prepare for adulthood, so the life of every child will literally depend on the proper arrangement of the brooder. The design usually has the shape of a drawer with 2 doors in the front and a bottom litter tray. 
Making a brooder
Brooder is very easy to make with your own hands. It does not require a large amount of materials and special skills, but this house will help to grow more than one generation of healthy, strong birds.
Necessary materials
The size of the temporary house depends on the number of small beaks, as well as on the time that the chicks spend there. In a brooder with dimensions of 700 × 500 × 500 mm, 100 quails will easily fit and will be able to develop there until 2 weeks of age, after which the young will have to be moved to a bigger dwelling.
Important! All materials used must be environmentally friendly, safe, and also pre-treated for pests.
Or you can immediately make a large brooder so that quails can live in it before adolescence. 
For the manufacture of a good brooder you will need the following materials:
- plywood (thickness at least 10 mm, size depends on the desired size of the finished house);
- wood beam (section size: 20 × 30 mm);
- grid (cell size not more than 10 × 10 mm);
- PVC sheet;
- self-tapping screws;
- hinges for fastening doors.
We recommend reading about the best breeds of quails, as well as the most important thing in breeding quails at home.
Instruction
Before the immediate collection of quail houses (for example, consider making a brooder 50 cm high, 50 cm wide and 70 cm long).
Video: build quail trap It is necessary to prepare all parts of the future structure:
- From the prepared plywood sheet it is necessary to cut: 2 side walls (60 × 50 cm), back wall and ceiling (70 × 50 cm), doors (2 to 35 × 50 cm).
- Make a frame for a pallet from a bar (a rectangle on which the grid will be mounted, measuring 70 × 50 cm).
- From the grid cut a piece of the same size as the floor of the future brooder.
We advise you to read about how to make a cage for quails with your own hands.
After preparing all the details, it’s time to start assembling the future house.
To do this, you just need to correctly assemble all the prepared parts:
- Carefully connect the side walls and the back panel with the prepared screws. The sides of the structure must be 10 cm longer than the wall in order to make the slats for the pallet.

- On the remaining 10 cm below, using wooden sticks, it is necessary to fasten 2 slats on each wall parallel to the floor and wide in the pan so that the pan can be pulled out like drawers in the bedside tables.
- Screw the ceiling to the finished frame.
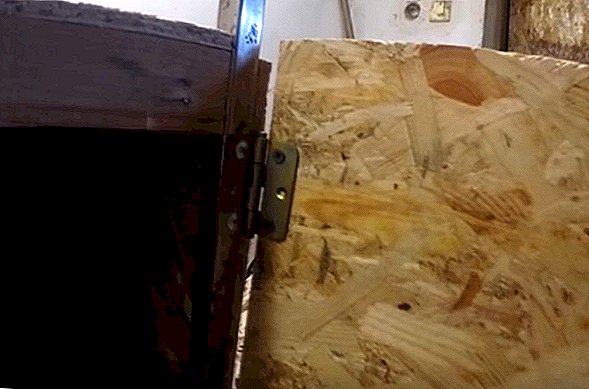
- Using hinges to attach the door, check their reliability.
- Attach a mesh to the pallet frame. It is necessary to lay a sheet of PVC under the netting (to make it easier for the chicks to walk). Slide the pallet into the design so that you get a one-piece box with front doors and a pull-out tray at the bottom.
id: 83483
- In the ceiling, make holes for additional lighting (the first week - around the clock, with an intensity of 20-25 lx, the next days - 12 hours at 5-8 lx) and install special safe heaters (the first week the chicks need a temperature of at least 36 ° C, the second - 28 ° С, in a month - 25 ° С).


We recommend reading about when the egg-laying period at the quail comes, how many eggs the quail carries per day, as well as how to keep laying quails at home.
Useful tips
The only objective "critics" of the finished brooder are exclusively its inhabitants. Therefore, when the birds are already planted in the building, it is necessary to pay a lot of attention to the babies and monitor their behavior.
Quail immediately evaluate the quality of work and show all the flaws, for example:
- If quails are too hot, the bird will lie on the floor, spread its wings and breathe heavily. In this case, an urgent need to reduce the temperature and increase the supply of water.
- If the bird is cold, the kids will refuse to eat and will gather in heaps in the corners, trying to keep warm. In this case, it is necessary to urgently raise the temperature and continue to monitor the correct mode.
- If the kids shed their feathers, it means that the design is not hermetic and there is a draft. It is necessary to patch the gap and insulate the house.

Did you know? Quail is a truly special bird: its eggs do not spoil and are not susceptible to salmonellosis, which allows them to use them in any form without fear.So, having considered the model of the most ordinary bird house, we can conclude that it is very simple to build it and it will require a minimum of materials, and the construction will serve more than one year and will help grow more than one generation of quails. The main thing is to strictly follow the calculated sizes, and in the absence of experience of such painstaking work it is better to draw a drawing in advance.