Before sowing seeds for seedlings, it is necessary to prepare the soil, choose a suitable container.
Sowing material also needs stimulating procedures.
Preparation of cucumber seeds for sowing on seedlings ensures maximum germination, the seedlings grow strong, healthy and viable.
Today we will consider such questions - the ground for cucumber seedlings: composition, how to prepare the land with your own hands? How to prepare cucumber seeds for planting, is it necessary to soak them, and how to germinate cucumber seeds for seedlings?
Soil preparation
Cucumbers like a light, nutritious soil. Purchased mixes do not fit. They have a lot of peat, which is too acidic.
It is better to make the soil for cucumber seedlings on their own. It is worth trying one of the following options:

- a mixture of garden or sod land with humus, peat and rotted sawdust in equal proportions;
- turf ground mixed with rotten compost;
- garden or turf soil mixed with humus, vermicult or perlite;
- peat combined with old sawdust, humus, mullein and washed river sand.
For the mixture, it is better to use the land in which grown cucumbers will be transplanted. Light sandy soil preferred, heavy earth mixed with clay will not work. The substrate should have a neutral or weak alkaline reaction.
Before mixing, the soil must be sifted and then calcined in an oven or microwave. This treatment, which lasts at least half an hour at a temperature of 90 degrees, kills harmful microorganisms and insect larvae, which weaken the seedlings.
Another processing option is steaming. The earth is laid out on a fine-meshed grid and is placed above a container of boiling water. Processing takes 30-45 minutes, then the soil is cooled. If heat treatment is not possible, land can be frozenThis procedure ensures a good effect.
Sifted soil is laid out in plastic bags or cloth bags, after which it is placed in a freezer or on a balcony (in winter). The substrate is kept in the cold for several days, then introduced into the room and left for thawing.
TIP! Enhance the nutritional value of the soil will help mineral supplementscontaining the necessary seedlings for nitrogen, potassium and phosphorus.
Wood ash, superphosphate, urea, potassium sulphate or potassium sulphate are introduced into the substrate. All components are thoroughly mixed. Soil mixture can be prepared in advance. Part should be left for later pouring into cups of seedlings.
Seed preparation
For one hundred percent germination and getting strong seedlings before sowing, the seeds undergo a number of activities.
 The preparation process consists of:
- calibration;
- disinfection;
- germination;
- quenching.
Seeds collected during the past 10 years are suitable for planting. It is worth considering that every year germination decreases, copies of nine years ago, it may be less than 50%.
The best quality is demonstrated by the material collected 2-3 years before sowing. To control the process, the seeds collected independently, laid out in bags with the date of harvest.
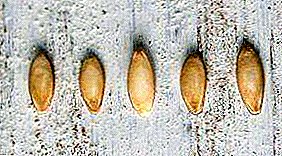
First, the seeds are sorted by hand, hollow and deformed are rejected. In the calibration process, you can sort the seed by size (it depends not only on quality, but also on the grade). It is believed that larger specimens are distinguished by better germination and provide viable promising shoots.
After manual calibration the seed is filled with salted water and mix thoroughly. Benign seeds fall to the bottom, unfit for planting will float. Quality material is removed from the salt solution, washed with clean water and dried, spreading out on a napkin or paper towel.
The next stage of preparation is disinfection.
If decontamination was not done, you will have to do it yourself. It is not necessary to risk the health of seedlings and the future harvest.
Seeds are heated at a temperature of 60 degrees for about 3 hours. You can not overheat them. Then they30 minutes immersed in an aqueous solution of potassium permanganatethen rinsed thoroughly with clean water.
There are alternative decontamination methods. Seed can process with ultraviolet lamp within 5 minutes. The procedure is performed immediately before sowing. If it is impossible to plant the seeds immediately, after irradiation, they are packaged in a light-proof package.
 To disinfect seeds and at the same time feed them with valuable microelements will help ash soaking (2 tablespoons of ash insist in 1 liter of warm water for 3 days). Processing lasts 30 minutes, then they are dried.
Last but very important stage - quenchingenhancing the immunity of plants. First, seeds are germinated in moist tissue. Then they move to the refrigerator for several days.
First, the seeds are placed in a colder zone, then moved to the lower shelves. The seed should not dry out during quenching; the cloth in which it is wrapped is often moistened with a spray bottle.
How to germinate cucumber seeds for seedlings?
IMPORTANT! Some gardeners prefer to plant dry seeds. The main motivation is sprouted material is very vulnerable, tender young shoots are easily injuredthat slows the growth of seedlings.
However, most fans still soak the seeds, trying to speed up the development of seedlings and ensure the germination of seed. If the shoots do not hatch, they can not be planted in the ground, do not take the pots with the substrate and a scarce place on the windowsill.
How to soak cucumber seeds for seedlings? Soft water is used for soaking.: rain, thawed or boiled. Do not use hard chlorinated tap water. Pouring seeds is not worth it, wet cotton fabric works much better.
Some gardeners use cotton wool, but this method is not safe. Tender shoots can get entangled in long fibers, it will be very difficult to remove them without breaking them.
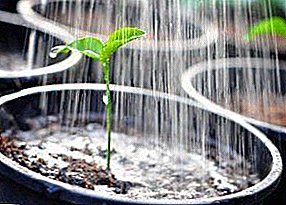
The seeds are wrapped in a cotton cloth or mat that is richly moistened with warm water and then placed in a plastic bag. It will not allow moisture to evaporate and provide the necessary heat. They will sprout in 3 days.
 Instead of a package, you can use a glass jar with a tight lid, creating the effect of a greenhouse. A jar of seeds is placed in heat. Do not place it on the heating devices.trying to speed up the spitting process.
To improve germination before germinating cucumber seeds can be soaked in an aqueous solution of growth stimulant. Processing lasts 10-12 hours. The procedure is especially important for expensive and rare varietal seeds, it guarantees almost one hundred percent germination of seed.
Preparation for sowing can take a lot of time, so you need to start it in advance. Decontaminated soil, enriched with nutrients, can be stored for a long time, and the seeds must undergo the necessary procedures immediately before sowing. It is impossible to neglect important preparatory measures, because the future harvest depends on them.
Useful materials
Check out other helpful articles about growing and caring cucumber seedlings:
- How to grow on the windowsill, balcony and even in the basement?
- Tips for growing in various containers, particularly in peat pots and pills.
- Find out the planting dates depending on the region.
- The reasons why the seedlings are pulled out, the leaves dry and turn yellow, and what diseases are affected?
- All the secrets of picking, watering and feeding young shoots.