If you have long thought about building a greenhouse on your site, it's time to decide on the type of roofing material and frame.
Against the general background, a galvanized profile for greenhouses, which is characterized by high performance characteristics and ease of installation, takes a favorable position: it can be assembled in just a couple of hours!
The advantages of the greenhouse
As the roofing material can be used as various types of films, and polycarbonate, glass. As for the frame, a choice of models from wood, plastic and metal.
The cost of construction is low. Moreover, the light metal profile treated with a galvanized coating guarantees the following advantages:
- High rigidity structures, and as a result - its stability.
- Tightness (with proper training).
- Strength.
- Durability.
- Opportunity create a greenhouse of any width, length, height.
Such material, unlike wood, for example, is not affected by fungus, mold, respectively, care for the greenhouse needs a minimum.
Profile selection

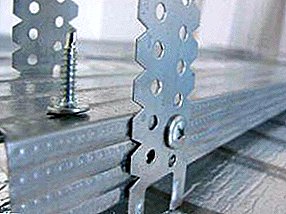
The profile for the greenhouse galvanized happens the following types:
- with U-shaped cross section. Very easy to mount. Allows you to equip the greenhouse with additional power elements, which significantly increases the stability and reliability of the structure. Maximum load per m2 - 150 kg;
- with a V-shaped cross section. It is characterized by high rigidity and low cost, but with minor distortions of the finished structure, the long elements do not show themselves from the best side: without special training, in a very snowy winter, the frame under a mass of snow can literally form. Maximum load per m2 - 110 kg;
- with W-shaped section. It is deprived of almost all the disadvantages of the two types of profile mentioned above. Very durable, slightly torsional. The maximum load per m2 is up to 230 kg;
- with square or rectangular cross section. If the pipe wall is made of steel with a thickness of 1 mm, it will easily resist high loads.
Galvanized profile pipe for greenhouses has another classification, namely:
- Arched. From the name it is clear that they are used to create complex structures of the arched type.
planar. Used for finishing ceilings, walls. - Wall. Designed for arranging interior partition walls. Characterized by increased rigidity.
Let us examine in more detail each of the types of products.
For ceilings, walls
CD - planar profile, bearing, which assumes the main load and is used in the formation of the frame. Height - 60 mm, width - 27 mm. The length can be represented by different manufacturers in such sizes: 30 and 40 cm ...
UD - guiding profile. Forms a framework of an obreshetka, is established on a contour of a wall covering. That is where the carrier profile of the CD is laid. The width of the product is 28 mm, height - 27 mm. As for the length, you can find products for 3 and 4 m. Depending on the manufacturer, the wall thickness varies from 0.4-0.6 mm.
IMPORTANT! Buying a metal profile whose thickness is 0.5-0.6 mm, you can use it to form a suspended ceiling system. In turn, the elements of thin steel (0.4 mm) are suitable only for wall cladding.
Partitioning
UW - guide profile. It is presented by such standard sizes: 150/40 mm, 125/40 mm, and also 100/40 mm, 75/40 mm, 50/40 mm. Length - 0.4 m. Designed to install bearing profiles, forming a pier in the installation plane. Mounted on the floor, walls, ceiling, that is, around the perimeter of the partition.
CW - rack or carrier profile. It is presented by such standard sizes: 150/50 mm, 125/50 mm, and also 100/50 mm, 75/50 mm, 50/50 mm. Compared with the previous type of profiles, they have large dimensions. For example, the length can vary from 2.6 - 4 meters. Used to form the frame. In the process of installation, as a rule, a step of 40 cm is observed, and the seams of GCR sheets should fall on its surface.
Partition profiles are significantly different from planar, primarily in cross-sectional shape. For example, in the CW-profile, manufacturers have provided an H-shaped notch, which is designed for laying cable lines.
Another feature is that two longitudinal ribs also roll back on the partition walls, which significantly increases the wall stiffness.
Preparatory stage
Based on the tasks that you face, you can choose a simple or complex shape of the greenhouse. Consider the most popular and popular.

Greenhouse profile for drywall by Mitlayder. It solves the problem with ventilation, which is in arch type greenhouses due to the presence of a two-level roof and large transoms.
The wall. In another way, it is also called single-pitch, since its construction involves using the facade of a house or an outbuilding as one of the walls. This significantly saves money not only on construction work, but also on heating: if you perform a blind connection with a residential building, in winter time the heating expenses will be insignificant. It is better to install a wall greenhouse on the south side of the house.
Gable in the shape of "A". Its upper part is not curved, so you can use hard materials. For example, polycarbonate panels or glass.
The dimensions of the future building are directly dependent on your goals and needs. Therefore, first of all, determine the number and location of the beds.
Regarding the location of the greenhouse, you need to take into account several factors, namely:
- Convenience approach to construction.
- Light mode.
- Evenness of the plot.
- The direction of the prevailing winds and more.
Anyway, the light mode is the determining factor. The fact is that the greenhouse itself must be located on a territory well illuminated by the sun, for the growth of plants is nothing more than the rays of the sun are the main source of nutrition.
If you build a structure in a poorly lit place, alas, it will be impossible to grow light-loving plants in the winter season. It is in particular about cucumbers, tomatoes, peppers, etc. As an option - the site can be additionally equipped with artificial light sources. But it will significantly increase your expenses.
If we are talking about designs of spring type, you can choose a site that is well illuminated by the sun in the morning. In the afternoon, the greenhouse should remain in the shade.
 For the winter galvanized greenhouse, the best choice would be an open area, without trees and economic structures, since in the cold season the angle of incidence of the rays should be approximately 15 °.
Why exactly 15? Because the light will fall into the greenhouse with sloping side walls at an angle of 90 °. This ensures maximum penetration.
If you intend to build a permanent winter greenhouse, the determining factor in the choice of the site will be the direction of the prevailing winds.
It is necessary to maximally protect the structure from cold gusts of wind, which greatly increase heat loss in the winter season.
Preference is better to give a perfectly flat surface. Pre it also needs to be prepared:
- remove trash;
- to level the soil, but not to condense: in this case, its fertility and structure can be disturbed.
What tools to prepare?
Before you start building a greenhouse, prepare the necessary materials and tools, namely:
- measuring tape for measuring;
- galvanized profiles for drywall under the frame. Their number must be determined on the basis of the area of the finished structure. Need to prepare and rack, and guide profiles. The average standard will do;
- a set of special screws for metal. It is better to give preference to models with a flat head: they are much easier to attach to a plasterboard profile;
- screwdriver;
- straight knife or straight shears for metal;
- Bulgarian;
- polycarbonate sheets (act as the main material to cover the frame). Their size may be standard, but the thickness - at the level of 5 mm. Separately, you need to buy collapsible sheets for the roof (if necessary, they can be customized). A solid sheet of polycarbonate will do for walls;
- plummet;
- ready door package;
- rubber lining under screws and screws;
- building level;
- electric jigsaw for grinding (if you need to remove the notches on the edges).
How to build a greenhouse with your own hands from galvanized profile: step by step instructions
Before taking any measurements, you need to select the drawing of the future greenhouse. You can use one of the ready-made options presented in the network. We offer your choice of several options for photos and drawings of greenhouses from the profile for drywall with your own hands:


Having approved the plan, determine the width, height and length of the structure. Specify as accurately as possible the expected joints of profiles and polycarbonate sheets. In the future, it will save you a lot of time.
Laying the foundation. Blocks / stones (depending on budget) in the corners, in the middle of the side walls.
We form the tape basis. To do this, dig a trench around the perimeter of the site where you plan to install a greenhouse. The optimum trench width is 20-25 cm, depth - up to 20 cm.
Cooking drainage layer from sand and fine rubble (1: 1 ratio). We lay on the bottom of the trench.
At a height of 35-40 cm we install wooden formwork along the perimeter, fill in free niches with concrete.
We collect farms according to the standard scheme: 2 side racks - rafters - strut - deadbone trail between centers.
At the place of installation, we mount the first farm, fix it with temporary slopes and leave it in this form until the assembly of the whole structure is completed.
Consistently, with bandaging in the ridge, along the foundation, on the top of the side walls, we install all the other trusses, observing step 1 - 0.7 m.
We fix polycarbonate sheets on the frame using bolts. Take extra care when working with the roof. Here, at the level of the skate, you need to cut off a little more material, which is explained simply: cellular polycarbonate may expand with changing temperature conditions, so the presence of a small gap will be more than justified.

First of all, you need to mount the roof, then - the walls. We don’t touch that wall on which the doorway is supposed to be made. Just finish the work with the remaining walls, install a pre-prepared door profile, sheathe the remaining surfaces with polycarbonate.
IMPORTANT! In thin sheet steel roofing screws will not hold, so it is more rational to use bolts.
To the joints of the sheets were sealed, they need to be fixed with a special profile. Overlapping of polycarbonate with overlapping (9-8 cm) is possible on vertical racks.
This is necessary in order to reduce the percentage of snow retention. Otherwise, the entire structure can trite under the mass of snowfall.
You can look at the assembled frame of the greenhouse from the GCR profile on this video:
Thus, the greenhouse with a frame made of galvanized profile has the following advantages:
- high thermal insulation;
- ease;
- durability;
- reliability, structural strength;
- resistance to sudden temperature changes.
It is possible to install such a self-made greenhouse in just a day, and it will be inexpensive and will last for a long time.