The woody actinidia vine is attractive for its tasty fruits with a high content of ascorbic acid, unpretentiousness (planting and caring for it are not difficult), longevity (lives up to 40 years). In the temperate belt with cool summers and cold winters, many garden varieties of actinidia (colomikta, argut, polygamous, purple, etc.) have successfully taken root.
Did you know? The name "Actinidia" comes from the Greek. Ακτινιδιον - beam. Actinidia were first described by Lindley in 1835, and in 1905 the plant was cultivated in New Zealand, and the fruit was called "Kiwi" in honor of the New Zealand bird. I. Michurin since 1909 was actively engaged in the breeding of actinidia.
Planting seedlings of actinidia
 If you decide to plant actinidia on your plot, then sprouts obtained by cutting must be used (actinidia grown from seeds lose their varietal characteristics). You can grow seedlings yourself, and you can buy in a specialty store. When buying seedlings of actinidia, two things should be considered:
- How was the escape (if the shoot grows from the bud - it is obtained from the seeds, if a short trunk with side shoots - the shoot is obtained by propagation from the cutting).
- What sex is a plant (actinidia - dioecious culture, so for fruiting it is necessary to buy seedlings of both sexes).
Important! Acquiring seedlings of actinidia should pay attention to the roots - they must be closed (in the ground, polyethylene, special container). Sunlight, heat, dry air can damage the plant. The most optimal age of a seedling is no more than three years (more “adult” plants are less tolerant of transplanting). The floor of the plant can be recognized only by flowers. Cutting seedlings inherit the floor of the donor plant, therefore it is recommended to buy processes of dead plants.
Optimum landing times
Cultivation of actinidia depends largely on the time of planting. Among gardeners there is no unity on the issue of optimal timing. There are several options:
- early spring, before the juices began to move;
- the end of April - the beginning of summer (after the end of flowering);
- autumn (at least two - three weeks before the start of frosts).
Soil composition
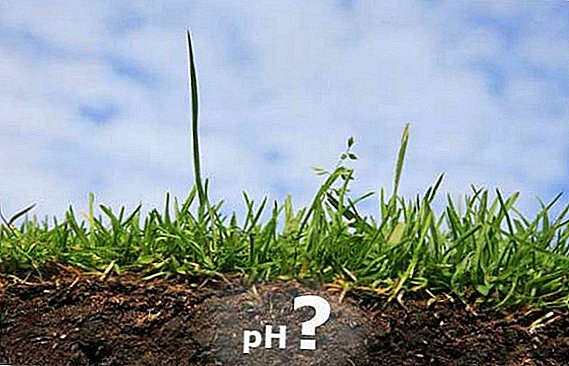
 Actinidia prefer acidic and slightly acidic soils (pH = 4 - 5), but grow well on neutral (with good fertilizer). The least suitable clay soils with high groundwater levels. A necessary requirement for successful growth is that the soil for actinidia must have good drainage. It is advisable to plant plants in elevated areas with natural drainage.
When planting actinidia in advance (two weeks), you need to prepare landing pits (when decorating walls - trenches):
- 0.5 m - width, length, depth (trench length depends on the length of the wall);
- drainage (brick chips, pebbles);
- over the drainage - enriched soil (humus (bucket), charcoal (50 gr.), superphosphate (250 gr.).
Good predecessors and neighbors of actinidia
The best predecessor is black currant (it loosens the soil, does not deplete it). The choice of "neighbors" due to the usefulness of the plant for actinidia. Beneficial effects provide:
- legumes - beans, beans, peas (improve the soil, maintain the desired moisture balance, improve the microclimate);
- black currant, filbert;
- flowers - petunia, gerbera, calendula, aster, etc. (do not dry the soil, decorate).
- adult fruit trees (especially apple trees). Trees with their roots dry the soil. Digging the near-stem circle is dangerous for actinidia roots. The described plant can climb tens of meters up and braid trees, making it difficult to collect fruits;
- young fruit trees (may die from the "hugs" of lianas).

Important! Actinidia need to be shaded before it reaches 3 years of age (sunlight can cause burns of the root system and stems).
Correct fit
Before planting, seedlings of actinidia are prepared as follows: pruned dry or broken shoots, roots are dipped into a clay mash, a pail of water is poured into a pit.
The root neck should be flush with the ground. It is necessary to make sure that no voids are formed, to trample the ground a bit and to mulch with organic matter.
For fruiting for every three female plants should be one male. The distance between the seedlings when planting - at least one and a half meters. Upon completion of planting, it is necessary to water the sapling with 2 - 3 buckets of water and close with direct sunlight with gauze, paper, etc.
Did you know? It is possible to determine where the females are, and where the males are only possible by the colors of actinidia: if in the middle of the flower there is a white ovary with a stigma-ray is a female flower, if the ovary is surrounded by stamens, it is a male.
Basics of Actinidia Care
Proper planting and the complete absence of pests facilitate the care of actinidia. For better growth of the plant and increase fertility, it is advisable to provide it with supports - trellis (galvanized wire between the posts).
Important! Planted cuttings from lignified actinidia cannot be transplanted for at least two years - their root system should be strengthened.
Watering and fertilizing the soil
Watering actinidia - moderate. Excessive moisture should not be allowed (the indicator is the ground at the roots). All actinidia like spraying leaves with water dust (morning and evening).
Fertilizers are selected according to the preferences of the plant (slightly acidic and acidic soil) - potassium chloride, ammonium sulfate, ammonium nitrate, wood ash, etc. Chlorine-containing fertilizers are strictly contraindicated, such as lime and fresh manure.
Before feeding actinidia in the spring, after the snow melts, it is necessary to gently loosen the ground near the roots (3–5 cm). Digging is impossible - you can damage the roots. Feeding is necessary:
- in early spring (they mulch with organic matter and fertilize - for every square meter - 35 grams of nitrogen, 20 grams of phosphate or potash fertilizers);
- the middle - the end of spring (formation of ovaries) (15-20 grams of nitrogen, 10 grams of phosphate and 10 grams of potash supplements per square). In the summer you need to constantly monitor the root neck, fill the ground when it is exposed;
- at the end of the harvest, before winter. Creepers are fertilized with superphosphate and potassium chloride. The roots are additionally covered with a layer of peat and leaves.

Important! Actinidia is sometimes affected by leaf spot and gray fruit rot. Young plants (shoots and especially roots) can be eaten by cats. For the preservation of the roots, the planted sprouts are enclosed with a metal mesh.
How to trim
Actinidia care involves regular pruning.. Pruning is necessary for a young liana (for its proper formation) and for an adult plant (constant growth of the liana leads to thickening, darkening, and lower yields).
When planning pruning, consider the following:
- The best time for the procedure are the summer months, immediately after completion of flowering;
- in the fall, about a month before frosts (frost periods may vary in different regions) - pruning is not recommended (awakened buds and young shoots will not ripen and the frost will kill them). In the southern areas, sanitary pruning is carried out after the end of the leaf fall;
- in early spring (when the juice is moving along the vine) pruning is prohibited - any violation of the integrity of the plant is fraught with its death.

Important! Each variety of actinidia has its own specific features that need to be considered when pruning. For example, a colomikt over 8 years old annually removes one old branch and replaces it with a young shoot. Kolomikt in the form of a bush does not bear fruit well and needs a trellis. In argut, the main vine is a lifelong, but it must be thinned more intensively and shorter cut (short shoots bear fruit), etc.Trimming young actinidia is associated with plant formation. When the question is solved - where to plant actinidia, you should consider how it will grow. For colomict, the most common fan formation is:
- first year - cut off the aerial part, leaving 2 - 3 buds;
- second year - cut off all the shoots, except 2 - 4 vertical (sleeves). After the end of leaf fall, their apical buds are cut off;
- the third year - the strongest side shoots are selected and tied to the left and right trellis;
- the fourth and fifth year - further garter of the strongest and most fruit-bearing branches, pruning of weak, thin, broken and non-bearing trees.
Winter hardiness of actinidia
 Actinidia varieties grown in our latitudes have a fairly high frost resistance (colomicta can tolerate frost down to -35 ... -45 degrees ° C). The first 2 - 3 years of life for young plants for the winter is better to cover with a pillow of leaves, spruce branches or polyethylene.
It is not cold temperatures in winter that are most dangerous for vines, but spring frosts (young shoots of actinidia, flower buds and buds are most sensitive to them). Lowering the temperature below zero by 8 degrees can destroy a young shoot.
Planting an actinidia near a residential building partially neutralizes the danger of frost, but a problem may arise from the flow of rainwater from the roof.
Harvesting and storage
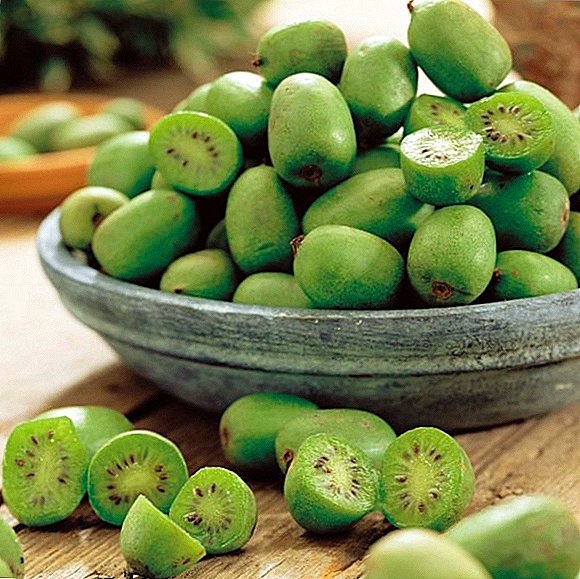
Actinidia brings the first fruits to achieve three to four years of age. Plants of seven years old and older bear fruit regularly (one actinidia can produce from 12 to 60 kg of crop). Harvesting begins at the end of August and continues until frost.
The ripening period of berries of different varieties of actinidia is not the same:
- colomikta - in the middle of August (fruits ripen unevenly and some of them can crumble on the ground). Green fruits can ripen in heat after removal from the vine. For transportation and storage, it is better to pick slightly greenish berries;

- argut and Giralda - the beginning of September (they acquire a bright green color and tender flesh);

- polygamy - September (the color of berries - from yellow to orange);

- purple - the end of September (the berries are not showered, purple).

Fresh fruits are best kept in cool, well ventilated rooms (they strongly absorb odors).
Did you know? One actinidia berry provides human need for vitamin C per day. The colomickt berry contains 4 times more vitamin C than black currants and 13 times more than lemon. In the processing of actinidia berries all the vitamins and active substances are preserved. Pectin in actinidia berries actively removes heavy metal salts and radioactive isotopes from the body.Actinidia berries are stored:
- frozen (wash berries, wipe and freeze);
- dried (washed and dried in the oven (55 degrees);
- as raw jam (ground berries with sugar - 2 to 3);
- dried (washed berries poured with hot syrup, heated 7 minutes, the syrup is drained, the berries are dried in the oven for 15 minutes at 80 degrees.
Reproduction actinidia
Propagation of actinidia is quite simple. Vegetative reproduction has advantages - it conveys the characteristics of the variety, sex, and fruiting on the 3rd - 4th year. Seed propagation provides an opportunity to get more hardy plants, but fruiting - from 7 years of age.
Root offspring
Propagation by root offspring is applied to actinidia of polygam and colomicta.
Did you know? Propagation of root offsprings in argut is impossible - root offspring of this variety is not.
Green and lignified cuttings
 Description of the methods of vegetative propagation of actinidia, one must begin with the fastest and most common - grafting. This method allows you to inherit varietal characteristics and get a lot of seedlings. Used two options - green and lignified cuttings.
Green cuttings (the upper part of the shoot from 10 to 15 cm) are stored in late May - early June (when flowering ends): a cutting with two - three buds and internodes. The bottom cut of the stalk should have 45 °, the top - straight. Stalk:
- they plant for rooting in the landing pit with the substrate (drainage, 10 cm of a mixture of humus with sand and 5 cm of river sand), are kept under the film, sprayed twice a day;
- after 30 days they begin to air, from August they open for the night;
- for the winter, they are covered with a pillow of leaves, in the spring - they are transplanted.
To increase this indicator, the method of wicking is used (a month before planting, cuttings are placed on the ice with the upper ends and closed - the development of the buds stops. The lower parts are warm. After 30 days the roots appear, then the cuttings are planted in the open ground).
Bushes division
The division of the bushes is rarely used in household plots as a method of reproduction of actinidia, but if there is a bush plant on the site (it grows on poor soils, suffered from frost, without support, etc.). Shrubs are divided after leaf fall before frost or in early spring before the movement of juices. Each part of a divided bush should carry stems and roots at the same time.
Breeding taps
 The method of propagation by layering is simple and effective. Under the liana they dig out grooves (7-10 cm deep), the soil in the grooves is mulched with humus, peat, sawdust.
Care for actinidia during breeding by spring taps includes laying the grooves of the lower young shoots, fixing them, falling asleep in the soil and regular watering. The top of the shoot remains above ground. Layers are separated the following year.
Seed propagation
Actinidia from seed germinate difficult. Therefore, in order to somehow speed up this process, apply the method of stratification:
- washed and dried seeds should be placed in a caprone and soaked in water for 4 days, then buried in sand (in a box);
- box to keep warm for 2 months, sand watered. Once a week for 5 minutes from the sand to get the seeds for airing;
- after that, the seed box should be wrapped in a cloth and kept cold in the street for 2 months;
- At the next stage, the seeds are placed in a cool place (not higher than + 12 ° C), watered and aired once a week. After 20-25 days, their cracking begins;
- It remains to plant seedlings in seed containers (ground with perlite 1x1), and with the advent of the third true leaf transplanted into the ground.

Watch the video: 20 Gardening Hacks That Will Blow Your Mind!! Easy DIYs and Life Hacks by Blossom (January 2025).