The drip irrigation system allows dosed irrigation of plants right below the root itself. Spending a little time, you can assemble such a system at home, without the need to purchase expensive components. When careful, drip irrigation from plastic bottles, made with your own hands, will serve for several years.
The advantages of using drip irrigation in the country
The main advantages of drip irrigation are obtaining the required amount of moisture by the root system, as well as minimal physical effort and material costs. This type of watering is of interest to many gardeners and gardeners, as the drip irrigation system can be left unattended.
Watering the beds with plastic bottles has a great advantage - it is almost complete autonomy. So, a person does not need to stand with a hose or carry one after another heavy buckets for watering plants.
Automatic drip irrigation has many advantages. To its effectiveness was high, you need to choose the right drip tape.
Unfortunately, ready-made drip irrigation system, connected to the centralized water supply, is quite expensive. Therefore, gardeners and gardeners have come up with a good alternative - to use old used plastic bottles. Of course, this option is not completely autonomous, since from time to time it will be necessary to add water to the container.

But, nevertheless, such watering minimizes human resources, thanks to which you will be able to pay more attention to other matters or spend time on rest. Drip irrigation using plastic bottles has the following advantages:
- No need to purchase material. Plastic bottles are something that can be found in almost every home;
- Ease of execution. Following simple instructions, everything can be done by yourself, even if you have no experience in creating such systems;
- Saving. Such irrigation can significantly save time and effort that is spent on traditional types of irrigation;
- Easy operation. All that needs to be done is to go around the garden and fill containers with water;
- Rationality watering. Water immediately comes under the top layer of soil, feeding the root system of plants. Also, the water will not spread over a large area and evaporate due to the high temperature in the summer. Thus, home-made watering favors the full development and subsequent strengthening of the plant root system;
- Lack of remoistening. During the irrigation of the hose in the holes often formed the so-called "swamp". Drip irrigation helps to avoid this;
- Reduced weed growth. Also, this system allows not to moisten the excess surface. Thus, favorable conditions are not created for the growth of all kinds of weeds, and this, in turn, facilitates the care of the land plot.

This method of irrigation will be especially useful for those summer residents who, due to circumstances, can come to the country only once a week. In this case, they just need to fill the container before leaving. This amount of water will be enough for the plants to not have any need for moisture while the owner is away.
Did you know? Drip irrigation from plastic bottles can work on the principle of solar distillation, which is well suited for hot summer. To do this, a half 1.5-liter container with water is placed on the previously mixed soil near the plant, and on top of it is covered with a five-liter eggplant without a bottom. When heated, the moisture will turn into steam, which in the form of droplets will settle on the walls, and then roll down to the ground. Thus, the stronger the heat, the better the soil will be moistened.
Variants of manufacturing a drip wetting system
There are many options for how to make such a system yourself. First you need to consider all the options, and then choose the most optimal, based on their capabilities and conditions.
Also, do not forget that you need to carefully select the location of the bottles and the intensity of the water supply. Different systems are suitable for different planting schemes, and this should always be kept in mind.

The easiest way to do it yourself is to pierce a small hole at the bottom of the tank and place it near the plant. It does not require any special preparation from you, but you need to consider the following nuances:
- the hole should be microscopic. To do this, pierce the container with a needle. A large hole will lead to rapid water consumption, which puts an end to the principles of efficiency and autonomy;
- an increase in the number of holes allows you to create a more moist environment;
- the container should be located as close as possible to the stalk so that water will flow directly to the root system;
- Capacity can be a little prikopat next to the plant. This will avoid wasting water;
- the container can be hung directly above the bush, if such an option is suitable for this culture;
- capacity of 5-10 liters allows you to leave the garden without attention for a week, which is especially important for summer residents who live far from the cottage.

The use of plastic bottles for irrigation occurs according to a fairly simple scheme - due to the direct contact of water with the ground. The water begins to gradually infiltrate, and the earth clogs the holes after wetting. After the earth dries again, the holes will open, and water will begin to flow again to the roots of the plants.
Thus, there is a natural regulation of moisture in the soil. If the soil is sufficiently saturated, then it simply will not absorb the excess moisture. After the tank is empty, you will only need to pour water into it.
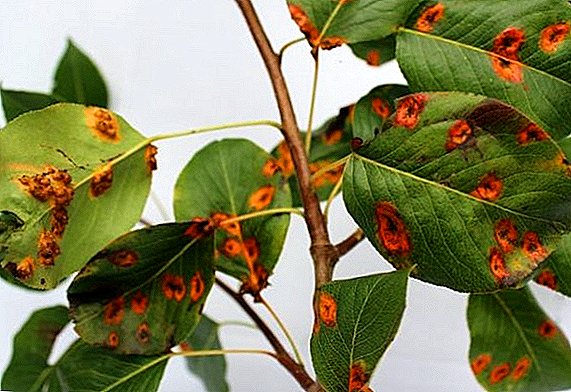
Important! Drip irrigation from plastic bottles is not suitable for capricious plants with thin roots.
How to make drip irrigation (prikannaya capacity next to the plant)
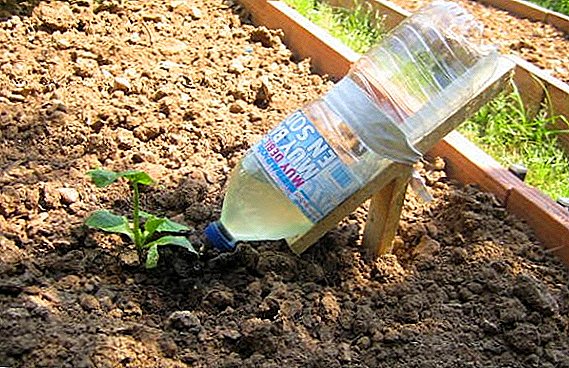
In order to make watering using plastic bottles, dropping them near the plant, you need to follow the simple instructions. Each bottle must be installed with the neck down, prikadop it a little earth for greater stability.
It is also necessary to make one small hole in the bottom of the bottle, in order to facilitate the exit of water (air will press on the water and gradually displace it). The cover must be twisted loosely to ensure gradual water infiltration.

In order for the container not to be blown away by the wind, it must be buried in the soil to a depth of about 10-15 cm. Installation right next to the root will contribute to good irrigation. It should be noted that it is possible to precisely place the bottle only when planting, when the container is buried in the same hole as the seedlings.
If the plants have already grown well enough, then the hole must be placed at a distance of at least 15 cm from the stem of the plant. It is necessary to act extremely carefully, so as not to damage the root system of the plant. If, watering tomatoes through plastic bottles is carried out in clay soil, then when moistened, it can easily get stuck inside the holes.
In order to prevent this, the outside of the cork must be tightened with a simple nylon stocking, or it must be laid down with the bottom of a hole with hay or a piece of burlap. The lid is tightly twisted, and the bottle is set with the neck tilted down and the pit is then covered with earth. The optimum angle of inclination is 30-45 °.
There is another way to organize drip irrigation of cucumbers in open ground. With the help of sewing in the tank you need to make a lot of holes. They are made in 5-6 rows, and the distance between the rows should be 2 cm.

The plastic bottle is buried in an upright position with the neck up in the same hole as the seedlings. The main disadvantage is that the container needs to be filled through the narrow neck. But at the same time the water from the tank practically does not evaporate. Due to the fact that almost all the container is under the ground, even a strong wind will not be able to overturn it. Yes, and the land itself because of this will look more attractive.
Important! Water should not immediately go to the soil. The essence of the drop moisture is the gradual consumption of water over several days.
Bottled Overhead Watering
For creating outboard drip irrigation tomatoes in the greenhouse with their own hands will need:
- any plastic bottle;
- awl or thin nail;
- knife;
- rope or wire.
- cut off the bottom, making it a cover;
- At a distance of 1-2 cm from the cut bottom on opposite sides of the bottle, make two holes. Through these holes you need to skip the rope or wire, which will be attached to the support. In the cap of the bottle you need to make a small hole. In case the flow rate of the water is too slow, the hole can be slightly expanded;
- Hang the bottle over the plant.

When watering tomatoes in the greenhouse through plastic bottles, the suspension system has two advantages: ease of manufacture and the ability to fine-tune the irrigation intensity.
Did you know? One two-liter bottle will be able to moisten two heads of such a thermophilic plant as cabbage.
Stem design
In order to make irrigation of plants in the greenhouse with the help of bottles and a rod, you need:
- Take a plastic tube with a small diameter. The usual rod from a ballpoint pen, which you first need to wash with gasoline or thinner, removes all paste residues and the writing element itself;
- Tightly plug one end of the tube. If it is a stick from a handle, then a match or a toothpick will work well;
- Fasten the other end to the neck. You can also cut a hole of the desired diameter in the plugged cap and install a tube in it;
- Seal the tube attached to the neck. This can be done with the help of ordinary clay, tape and other improvised means;
- Make holes with a needle at the end of the tube. They should be as close to the cap as possible. The number of holes and their diameter is selected individually, based on the required intensity of moisture. A drop of water will flow out for a couple of minutes;
- Cut the bottom of the bottle and set it into the soil neck down;
- Pour water into the bottle.

You can also embed the tube into the wall of the bottle near the bottom. This will not cut the bottle and much easier to move it around the land. Watering in a greenhouse in plastic bottles has a great advantage - due to the length of the tube, the bottle can be placed not very close to the plant.
If you put a bottle between several bushes, then you can move the tube and alternately water the seedlings.
Important! If you choose to humidify with a tube inserted into the wall, then do not forget to tightly close the bottle with a cap. This will prevent rapid evaporation of water.
Drip irrigation do it yourself (buried plastic bottle)
Experienced gardeners recommend trying the option of drip irrigation, in which the bottle is buried entirely in the ground. In this case, you need to make a few holes as close as possible to the bottom. After that, the bottle is buried in the ground, and on the surface there is only a neck through which the water will be poured.

It is worth noting that this method of drip irrigation gives less moisture, and this is not suitable for plants with a long rhizome.
Bottled drip irrigation: all the pros and cons
Like any other type of irrigation, drip irrigation has certain advantages and disadvantages. Among the benefits worth noting the following:
- make drip irrigation using plastic bottles under the force of anyone. The manufacturing procedure does not require the possession of any special knowledge and skills;
- the creation of a drip irrigation system from plastic bottles does not require the investment of large financial resources. This is justified by the fact that plastic bottles are the most common and cheap material for recycling;
- the principle of action of drip irrigation almost completely eliminates the factor of waste water consumption. This is especially true in the case when the site does not have access to the central water supply system;
- water from plastic bottles is distributed as evenly as possible and progressively moisturizes the root system of the plant;
- in plastic bottles, water warms up fairly quickly to a comfortable temperature for most plants;
- The plastic bottle drip irrigation system can be easily installed, dismantled or replaced.
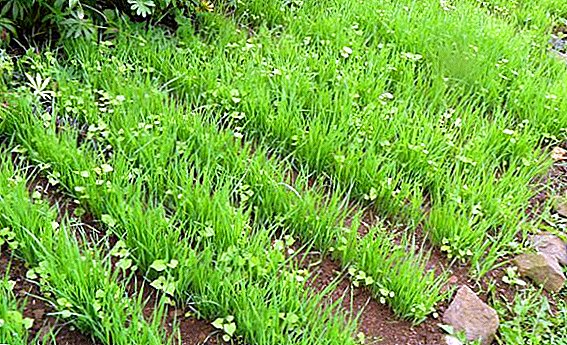
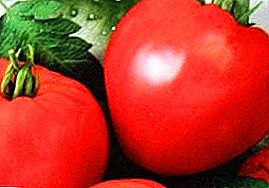
Drip irrigation is also used when growing different plants: tomatoes, cucumbers, strawberries, grapes and even apple trees.
But, along with this, there are certain disadvantages of using a similar irrigation system:
- such a system will not be able to provide high-quality watering a large area;
- drip irrigation from plastic five-liter bottles will not be able to completely replace a full-fledged irrigation, because drip irrigation allows only temporarily to maintain the required level of moisture;
- when used in loamy or heavy soils, the droplet system from bottles quickly becomes clogged and ceases to function.

Did you know? The term of complete decomposition of a liter plastic bottle is more than a hundred years.
Drip irrigation from plastic bottles is a good alternative, and in some cases, a full replacement for traditional irrigation. Trying to apply drip irrigation for your garden or greenhouse will not be difficult, since the necessary materials are almost always at hand.