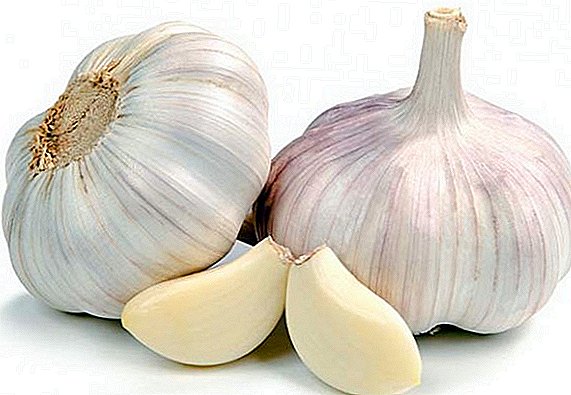
 Many of us use garlic for culinary or even medicinal purposes, but few know what kind of culture is botanical. It belongs to the herbaceous plants of the Onion family, many gardeners in the initial stages of garlic growth can easily confuse it with weeds and remove them from the beds, thereby depriving themselves of the possibility of a supply of vitamins. In addition to the pungent smell and characteristic taste, this plant also has a number of antiseptic properties that help to cope with some diseases. Anyway, information about growing garlic in the open field is probably useful to many.
Garlic: description
Before proceeding to the description of the characteristics of planting and caring for the plant, let us get acquainted with it in more detail. The root system of the culture is fibrous, with a round bulb, slightly flattened at the edges. This is quite a complex formation, in the sinuses of which is formed from 2 to 50 children, called "lobules" or "cloves".
They, covered with white, yellowish, dark purple or pink-purple leathery scales, are the most edible part of garlic, although, if you don’t talk about harvesting the plant for the winter, soon after planting you will have the opportunity to cook using green plant feathers which also have a rather attractive taste and aroma. The leaves (they are also feathers) are rather narrow, grooved, lanceolate and entire, up to 1 cm wide and 30-100 cm long.
They seem to sprout from each other, thus forming the so-called "false" stem (it looks like a stalk of an onion, only it has greater strength). Peduncle of the plant in height reaches 150 cm, and at the end it has an umbellate inflorescence, hidden by a film shell until the very moment the flowers open. The fruit of garlic is represented by a box, and among the plant species, spring and winter species are distinguished. 
Spring garlic
Among the main features of this type is the absence of arrows, which the plant simply does not release. The formation of the teeth of the head occurs in several rows, and for further landing it is recommended to take only the extreme ones, since they are larger.
Growing spring garlic, you must be prepared for the fact that planting and caring for them is somewhat different from similar processes during the reproduction of the winter species. A little later we will talk about the difference in watering, fertilizing or mulching the soil, and now we only note that the smaller heads of spring garlic are stored much longer than winter and can often stand to a new crop.
Among the most popular varieties of this plant are: "Elenovsky" - mid-season non-streaky variety that will please you with large yields, "Gulliver" - has dense flat heads of white color and has an increased keeping quality (up to 8 months), mid-season non-indexed high-yielding variety "Victoria" , which is better than others is able to withstand various diseases.
Did you know? Garlic began to be eaten more than 6000 years ago, and nowadays the plant is most in demand in South Asia.

Winter garlic
Compared with the spring species already described, his winter brother differs in larger heads and rather early ripening. In most cases, gardeners are interested in planting winter garlic, as well as the rules of its cultivation and care for further consumption as it is not suitable for long-term storage.
Arrowed varieties of plants (characterized by the presence of arrows with air bulbs, which is used for reproduction) mature faster than non-shooters, however, additional forces will have to be spent on removing their arrows.
To the most popular winter varieties of garlic include: "Zubrenok" (shoots arrows, boasts a rather abundant and large crop), "Alkor" is the most common variety among gardeners, which is distinguished by medium bulbs and pink-violet scales of teeth, "Lyubasha" - shoots arrows and stands out against the rest of the high and succulent tops, as well as large and flattened bulbs.
When growing garlic, many people wonder how to store it: you can make harvesting of bulbs or green garlic.
However, the most suitable option for long-term storage is the "Herman" - the longest of all winter varieties, although the average heads somewhat push it back in the ranking of popular options. Some gardeners probably also know about the middle-ripening non-shotgun variety called “Doctor”, it has good transportability, and its heads include up to 16 cloves.
How to plant in open ground: timing and planting scheme
At first glance, it is easy to guess how to grow garlic, but if you need a really good and high-quality crop, then you need to sort out this issue in more detail. In addition, we have already mentioned earlier that there are certain differences between planting and further care of spring and winter species. 
When planting garlic in open ground
The first question that should worry you before planting garlic is when and where to plant it.
Exists two options: spring and autumn planting. The first is suitable for breeding in the area of spring species, and the second is designed for winter.
Planting of garlic in early spring should not be carried out later than the first half of April, but given that at this time the soil can be very frozen, it is necessary to prepare the site for spring garlic in the fall. The vegetation period of this species is shorter than that of winter, therefore, so that in a fairly short summer it can form a strong green onion, planting is carried out as early as possible (the plant tolerates spring frosts well).
Important! The soil temperature when planting spring garlic should be within + 5-6 ° C, which is almost ideal temperature conditions. If the earth warms up more, the formation of the roots and the growth of leaves will be very difficult (at too high a temperature the plant stops its growth and development).
As for planting winter garlic for the winter, it is performed from the second half of September until the middle of October so that the plant can form a strong root system before the cold (it should go 10 cm deep into the soil). The most optimal option for such planting is the summer residents consider the time for 35-45 days before the expected frost is the ideal time for planting garlic for the winter. Winter varieties quietly tolerate winter cold. The main thing that the plants did not go to growth.
How to prepare the ground for planting
For garlic, a neutral and fertile soil is needed, but the crop will best grow in loamy soil. In no case should the earth be dry, although it is necessary to avoid planting plants in low-lying areas where rain and melt water often accumulates.
The site for spring planting of garlic should be deeply dug up since autumn, adding 30 g of superphosphate, 20 g of potassium salt and a bucket of rotted humus to 1 m². After completing these steps before planting garlic in the spring, all you have to do is level the selected place with a rake. If spring planting is planned for spring garlic, then the beds are prepared for at least two weeks, digging the ground on a spade bayonet and introducing humus (1 bucket), potash salt (20 g / m²), superphosphate (30 g / m²).

With increased soil acidity, it is imperative to add chalk, lime or dolomite flour to the soil for deoxidation. Fertilizer for garlic is important to make both in the fall and spring, and if useful substances along with deoxidizers are regularly washed out of the garden bed, then you have to water the area with ash solution and periodically feed the plants.
Between rows you should leave a distance of at least 20-25 cm, and between individual plants - 10-12 cm. To plant the crop better in the grooves, but in order not to delay the growth of the roots, try not to push the teeth into the grooves. Strongly compacted earth may eventually push out the clove, and it will freeze.
Unwanted Garlic precursors are onions, carrots, cucumbers, tomatoes. At the same time, it is good to plant it after cabbage, beans, potatoes or green manure. Garlic is an excellent neighbor for raspberries, strawberries, strawberries, gooseberries, roses and currants, as it is able to scare away various pests from them: moles, caterpillars, slugs and drillers, and the plant itself continues to fully develop.
Important! On the same bed you should not grow garlic for two years in a row, and after this time you need to take a break for four years.
Preparation of planting material
Having dealt with the garlic beds (spring or autumn), it's time to start planting material, which also requires some treatment before planting in the soil. First of all, the selected heads should be sorted, putting aside only the largest and healthiest specimens.

Even if you see only one tooth in the head, you need to understand that the rest are not suitable for landing. At the second stage of preparation, all tested teeth should be soaked in Fitosporin for 5 minutes, which will help to avoid the development of fungal diseases in the future. Alternatively, you can treat the teeth with a pink solution of potassium permanganate or soak them in a solution of 1% iodine.
Practically before planting it is useful to additionally fertilize the seed by dipping it in the ash mixture (0.5 liters of ash should be added 1 liter of water and boiled the resulting composition for 30 minutes). With this preparation, all subsequent garlic care will be much easier.
Important! The separation of the selected heads into the teeth should be performed immediately before they are placed in the soil, because otherwise the bottom of the bulbs will dry out too much and the root system will not be able to develop. Nevertheless, it is better to remove the upper shell, since it is in it that the pathogens of infections and diseases gather.If planting garlic is done for the winter, all the teeth should be well dried.
However, it is not always the cultivation of garlic with the use of teeth will be the best option. Sometimes it is more rational to select the best plants in advance and leave arrows with inflorescences on them. As soon as the top “film” bursts on them and the onions acquire a characteristic color, the garlic can be completely removed from the soil and dried. Before sowing the plot, it remains to select only the largest and healthiest bulbs and place them in the ground.
Landing pattern
So, we figured out when to plant garlic with seeds and teeth, but no less important is the pattern of such plantings. In the traditional version, the prepared seed is placed in open ground in separate rows, leaving between them 15-20 cm, with a distance in the row between plants of 8-10 cm. 
However, this is not the only possible landing option, and if you want to get more yield, then you can use other schemes. For example, with a fairly familiar placement of 15 × 15 cm, many gardeners perform a two-layer landing in one hole. That is, one clove of garlic is buried 13-14 cm in the soil, and the second is only 6-7 cm.
Another landing scheme involves placing the plants in rows, but in a staggered manner, at different depths and in different wells:
- the first layer is placed in rows according to the scheme 15 × 15, with the depth of seeds 6 cm;
- the second is planted with the organization of the holes in the center of the squares, which were previously formed by four holes of the first layer (in this case, the teeth should be placed in the ground to a depth of 13 cm).
With the help of such planting schemes, you will be able to more efficiently use the sown areas, which will allow you to collect almost twice the yield in comparison with the usual plant placement scheme. In addition, when planting winter garlic in the fall, the probability of the loss of crops from a frosty and snow-free winter is greatly reduced.
Features care in the open field
Like any other plant, any kind of the described plant requires a careful attitude to itself not only during planting, but also in the process of further care. This means that in order to get a good result and a bountiful harvest you need to know about all the requirements for watering, fertilizing and weeding the crop described.
Watering
In this case, soil moisture and the abundance of irrigation directly affect the quality of the crop, so this should not be forgotten, especially during the growing season of the crop. At the beginning of its active growth and development, you will need about 10-12 liters of water per 1 m² of plantings, and then, as the bulbs mature, they reduce watering. 
From the end of the summer, that is, from August, it can be completely stopped, since the risk of crop rot, which makes harvesting spring or winter garlic simply an extra waste of time, increases. In addition, with excessive soil moisture increases the risk of developing various diseases, which also does not make your life easier.
Fertilizer
Like other plants, fertilizer has a positive effect on the growth and development of the described crop, but it will be possible to achieve a good result only if the dosage of the appropriate type of feeding is observed.
Garlic prefers mineral and organic fertilizers, especially phosphate and potash fertilizers. Top-dressings of winter varieties are carried out in early spring, making compositions on tillergy soil (90-100 g of superphosphate, 50-60 g of potassium sulfate and 60 g of ammonium nitrate account for 10 m²). The second feeding is done with the same amount of nutrients 25-30 days after the first fertilizer. The third time to make these substances is when your crop reaches the size of a walnut.
As an organic fertilizer, you can use manure: pork, sheep, horse, rabbit, cow.
If you are more interested in how to grow spring garlic, then when caring for it, the first feeding is carried out immediately after the first leaves appear on the plant. In this case, the composition chosen for fertilizer should contain a sufficient amount of nitrogen.
You can use a mullein solution (in the ratio of 1:50), grassy infusions, special mineral fertilizers, or even bird droppings, although with the latter one should be very careful. The use of fresh manure is strictly prohibited, because it can cause the development of diseases and reduce the shelf life of the crop. 
Two weeks after the first feeding the second time is suitable, for which you will need liquid complex mineral fertilizers. After the formation of 5-6 leaflets, garlic cloves are laid (approximately at the end of June - beginning of July) and at this time the plant needs only phosphorus-potassium supplements. All dressings should be combined with watering.
Weeding and removing arrows
In addition to abundant watering of the plant, it is not necessary to tighten the planting weeds, since weeds or too much sprouted garlic interfere with its full development. Simply put, weeding and loosening the soil should be done after each irrigation or irrigation of the soil with rain.
For a large crop of garlic, it is also necessary to break the arrows in time. They need to be broken or neatly cut, but not pulled up, as there is a risk of accidentally pulling out the entire bulb or damage to its root system.
To remove the arrows should go when they have already reached a length of 12-15 cm, and the place of breaking should be as close as possible to the sheet outlet. If you remove the shorter arrow, it will continue to grow anyway, which means that the garlic heads will be smaller.
Did you know? In the literature and in the mythology of our ancestors, the Slavs garlic was considered a talisman from vampires and other evil forces, so the garlands of this plant were hung in almost every home.

Open field garlic: features of planting and growing winter and spring garlic
Soil preparation and planting of any crop is the main point in its cultivation, and the final result is largely determined by the correctness of the actions performed (as for garlic, the spring and winter species have their own characteristics in this matter). We describe each option in more detail.
При высадке ярового вида подготовленная почва должна быть достаточно влажной, ведь все зубчики должны легко входить в нее на глубину 4-6 см. Так вы сможете предотвратить выпирание посадочного материала, комфортно разместив его на выбранном участке. Между крупными зубцами одного ряда расстояние должно составлять не менее 6-8 см, а между средними - 4-6 см. При такой схеме на 1 м² у вас будет размещено 50-55 зубцов.
После завершения процесса посадки остается только замульчировать грунт перепревшим конским навозом, который считается самым оптимальным вариантом удобрения для данного растения.
The teeth on the head will grow over 3-4 weeks, but the soil should be wet for two months after germination.
As for the winter type of garlic, just like spring, it is planted in a loose, slightly moistened soil, deepening into the ground by 5 cm (the tooth is located bottom down). The bottom of the groove must be loose, so that the roots that appear can easily penetrate deep into the soil. If your site is mostly light sandy and sandy soils, then you can deepen the garlic up to 12 cm. You do not need to water such plantings.

Important! The first seedlings may appear before the beginning of winter, but do not be afraid of this phenomenon. If the plants have already managed to take root, then they will not be afraid of winter.
It is also worth noting that the size of the planting material also affects the depth of placement. That is, large specimens can be placed in the ground to a depth of 8-9 cm, medium - 6-7 cm. Thus, you will need 45-50 teeth of winter garlic per 1 m² of planting.
If you fully adhere to the technology of planting such plants, then after embedding in the ground, seedlings need to be mulched with peat, sawdust or humus in a layer of 2-5 cm.
With the arrival of spring, the layer of mulch is removed in order to prevent the plants from heating up. To do this, you just need to gently pull the rake, trying not to damage the possible shoots. As soon as the earth dries a little, you can loosen it a little.
Planting days for winter garlic and the subsequent care for it directly depend on the soil temperature at a depth of 5 cm. Ideally, it should be + 12-15 ° C.
Harvesting
The period of harvest of planted plants depends on several factors, and not in the last place is the type of crop: arrowhead or non-arrow.

No matter how carefully you treat your plantings, it will be possible to remove non-needle garlic from the bed only after the last formation of new feathers. Understanding when this moment came is not difficult - the feathers of the plant descend, and fully formed heads acquire the characteristic white color.
As for the arrow-shaped species, it is collected after cracking inflorescences and shedding aerial onions.
On average, when planting winter garlic in the above terms, the harvest for storage begins in mid-August and lasts until the first half of September. If the culture is not collected in a timely manner, it will resume its growth again, the bulbs will disintegrate in the ground into slices and become unsuitable for further storage.
Harvested garlic must be well dried, cut and sorted, selecting the best specimens for the next planting.
Harvesting of the spring species is also started in the second half of August or in early September, when the lower leaves of the plant are already noticeably dry. The bulbs should be carefully dug, slightly brushed off and left to dry.
When the roots and stems are a little dry in the sun, the heads gently clean and braid the stems in the braids. Only the largest heads should be left on the seeds, and they should also be stored separately (they can last up to 1.5 years).

There are several important nuances that are worth paying attention to before and during harvesting the described culture:
- when caring for garlic about two weeks before the intended harvest should stop watering;
- in the process of removing the bulbs from the ground, it is better to use a shovel, as when pulling out there is a risk of damage;
- when you get the onions, gently clean them from the ground, without cutting the leaves, because in the process of drying all the nutritive juices they contain will go to the teeth;
- the first few days after digging, garlic should be dried outdoors in direct sunlight, entering the room only for the night. After this, the plants are tied up in bunches and suspended for storage in a dry room;
- There are two options for preserving the crop - cold and warm. In the first case, the temperature in the room should be kept at + 1-3 ° C, and in the second - + 20-25 ° C. The future harvest will largely depend on compliance with these conditions.
Well, we tried to tell as much as possible all about garlic, paying particular attention to its planting and care. In fact, growing this plant is not as difficult as it may seem at first glance, and simply following simple recommendations you can get a bountiful harvest.


