 The need for a ladder periodically arises in almost every household.
Of course, you can buy it in a store or on the market, but if you have the necessary tools, you can do it yourself.
Consider two types of ladders that can be done at home.
Types of ladders
There are the following main types of stepladders:
- portable option that is used without focusing on the wall;
- rope ladder (suspended);
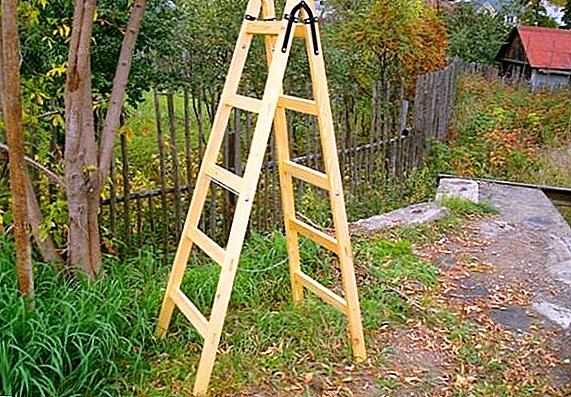
- folding ladders that, when operated, are laid out in a structure similar to an isosceles triangle. Most often it is used in everyday life. In turn, it can be with one-sided or two-sided ascent. Have a supporting platform or without it;
- in the form of a board with planks nailed to it from other boards or bars;
- aviation. Used instead of the ladder to work. Usually painted orange.

There are the following main types of stepladders:
- wooden;

- metal. Commonly used steel or aluminum;

- combined.

For making your own hands is better to use wood. Moreover, the variant in the form of a triangle, used in the household, for apartment conditions was often performed in the form of transformers, when the stepladder is transformed into pieces of furniture - a table, chair, bench or shelves.
Did you know? The image of the construction, similar to a rope (grass) ladder, was found on the walls of a cave near the Spanish city of Valencia and it is about 10 thousand years old. This cave figure also depicted two people climbing up on it with baskets.
Necessary tools and materials
For the manufacture of stepladders made of wood will need such tools:
- saw-saw (hacksaw);
- drill;
- chisel;
- screwdriver;
- sander or medium grained sandpaper;
- hammer;
- roulette, square;
- pencil or marker.
Ladder do it yourself: video
Materials for step-ladder from a bar:
- about 14 m of wooden beam with a width of 50 to 70 mm;
- screws 75-90 mm, stud 8-10 mm thick, 8 nuts, 4 washers;
- rubber for nabeek on legs.
Materials for the chair stepladder:
- a sheet of wood or plywood with a thickness of 15-20 mm;
- loop of piano 40 cm;
- 45 mm self-tapping screws or screws with countersunk heads;
- wood glue;
- paint or stain, varnish for decoration.
Of the tools, besides those listed for a simple stepladder, you also need a jigsaw.
It will also be useful for you to learn how to make a summer shower with your own hands for a dacha, a wooden barrel, a sofa of pallets, a snow shovel, a bathhouse, a brazier, a garden swing, and trellis for grapes.
Stepladder from timber
A stepladder from a bar with a one-sided ascent is a simple enough structure to be made by a non-professional. It will consist of two parts - the main (ladder) and props. 
Step ladder
We cut the existing timber into the required number of parts of the required length, namely:
- 200 cm for supporting legs - 4 pieces;
- 59 cm - 2 pieces;
- 54.5 cm - 1 piece;
- 50.0 cm - 1 piece;
- 45.5 cm - 1 piece;
- 41 cm - 3 pieces.
The received pieces of bars should be ground.
Important! If such a ladder will be used on the street, it is better to carry out the treatment with antiseptic.
Assembling the main part
We take two two-meter support legs and make the same marking on them for the five steps of our stairs. The bottom step must be at least 10 cm from the ends of the legs. Further distance between the steps is 40 cm.
We make in places marked by chisel grooves 1.5-2 cm deep and 5x2.5 cm in size. Then at chamfer bar ends we also make narrowings of the same size with chisel which will fit into these grooves. 
Since our staircase has a narrowing towards the top, all the ends of the steps are slightly mowed down a couple of millimeters. Steps slaughtered with a hammer or mallet. Slightly above the top rung they put and nail an extra crossbar.
Steps put into the grooves and fasten with screws. The distance between the upper ends of 40 cm, and between the lower - 60 cm.
Build backup
The prop is made of the remaining two-meter legs, only the upper (41 cm) and lower (59 cm) crossbars are stuffed on them. The crossbars of the supports and the additional crossbar of the ladder are made in an overhead, rather than mortise manner, so as not to interfere with the construction of the assembly.
Important! The distance between the lower ends is the same as that of the main part - 60 cm. And between the upper ones it is somewhat less - 30 cm. Therefore, the upper step is somewhat shortened compared to the upper step of the main part (ladder).

A jib is installed between the top and bottom crossbeam, which is first measured and cut from the bar.
For the construction of the dacha, learn how to warm the basement basement with your own hands, how to build a swimming pool for the dacha, how to choose garden sculptures, how to make a blind area at home, concrete walkways, decorative waterfall, fountain, flower bed of stones, rock arias, a dry stream.
Screeds
To connect the two parts of the structure, in the upper parts of the support legs, at a distance of at least 10 cm from the top ends, drill holes of 8-10 mm (depending on the thickness of the stud).
Connect both parts with a pin, put on washers and tighten the nuts on the inside of the supports. Select the desired fixed position of the two halves and add lock nuts for better fixation.
For convenience, you can add such a ladder with hooks on which you can hang tools or a bucket. 
Chair stepladder
This version of the stepladder-transformer, when the chair is transformed into a ladder, is very convenient for an apartment. To store such a ladder does not need a pantry, as it plays the role of furniture and does not take place.
Scheme
For the manufacture of a chair, step-ladders should be cut from the board on the patterns prepared in advance, the following details:
- two front sidewall size 20x270x400 mm (A);
- two rear sidewalls measuring 20x325x850 mm (B);
- three slats for backrest size 20x50x400 mm (B);
- rear seat size 20x165x400 mm (G);
- front seat size 20x90x400 mm (D);
- three steps 20x120x360 mm (E);
- six strips 20x20x95 mm (W).
Stool step-ladder with your own hands, drawings: video
Assembly
All the cut parts of the future stepladder are ground, and the sharp ends are machined with a router. Details try on each other, fit.
Now the construction can be assembled:
- make chisel grooves for seats and steps ½ depth from the thickness of the board, drill holes for screws;
- to attach the backrest strips to the sidewalls with screws;
- fluff the grooves with wood glue and install the seats and steps into them, insert the screws into the already drilled holes;
- connect the two parts of the design of the piano loop.
- Double-coat an already assembled item with varnish or paint it.
Find out also what materials for a fence are, how to make a fence from gabions, from a brick, from a shtaketnik, a wicker wooden fence, from a chain-link mesh.
Anti-slip nozzles
To avoid slipping and not to scratch the floor, it is recommended to use special rubber nozzles, called “shoes”, on the legs of the stairs. When choosing such nozzles, it should be taken into account that they will be subjected to a sufficiently strong abrasion and load, therefore, RTI (rubber products) is ideal.
Chair-ladder do it yourself: video
Felt and its analogues will not work in this case, since the ladder is constantly transferred from one place to another, folded and laid out. Rubber structure is better to choose a tougher, softer faster subject to wear.
True soft rubber is more suitable for uneven surfaces, step-ladder with hard rubber "shoes" harder to install on a non-smooth surface.
Did you know? Rubber is obtained by vulcanizing rubber. This method was invented by the American Charles Goodyear in 1839, mixing and heating raw rubber with sulfur. The rubber itself is a hevea milky sap (rubber tree) growing in Central and South America. Native Americans have long used it in the manufacture of dishes, balls, as a sealant.
Sometimes the lower ends of the ladders are simply cut at an angle and stuffed strips of rubber goods on them. 
Safety
In the manufacture of wooden stepladder to adhere to safety and the following rules:
- no need to hold your hands on the unpolished surface of the tree - you can drive a splinter under the skin;
- it is better to wear safety glasses to avoid slivers in the eyes;
- be careful when working with cutting tools, take care of your fingers.
After completion of the work on the production of ladders need to check it for reliability and stability. To do this, it is recommended to test the ladders in different positions. 
When performing various works with a step-ladder, it is recommended to adhere to such safety rules:
- check the stability of the structure before work;
- when working at a height of more than 1.3 m, use a special belt for insurance;
- It is desirable that someone insure the bottom and handed the necessary tools;
- it is not necessary to put a ladder on the steps of the stairs;
- no need to attempt to reach objects that are located more than 1 m from the top of the stairs;
- It is undesirable to use it when working with welding, pneumatic, as well as electrical equipment alone.
With some skills and tools, you can purchase material and make a stepladder yourself from wood. It will not be difficult to make a simple wooden structure, it will require ordinary tools and special skills are not needed.
Making a transformer will require an electric jigsaw and the ability to work with wood.


