A rack for seedlings is not a whim, but rather a necessity for those gardeners who are used to dealing with more than one box of seedlings. Even at the initial stages of their development, cucumbers, tomatoes, eggplants and other cultivated plants do not have enough space on a regular window sill, which means they will have to build several shelves that will be both compact and functional at the same time. We offer to get acquainted with our version of a similar design.
Preparation and planning
If it seems to you that there is nothing complicated in the construction of a rack, then this is not quite so. It will occupy a certain place in the house, and therefore must fully fit into the interior and not interfere with free movement.
In addition, it is important to immediately take into account the width of the future boxes for seedlings, because the optimal width of the shelves directly depends on this parameter. In order for the finished design to fully meet all the stated requirements, it is very important to correctly calculate the size of each individual part and know exactly how to connect it to the others.
Drawings and sizes
You can create completely different racks, but one of the most optimal options (in our opinion) is a rack with a length of one and a half meters and a height of 180 cm. It will perfectly fit the most diverse seedlings, and there will be a place for various tools to care for it.  There are 4 shelves in total, but in order not to bend each time, the boxes can be placed only on two medium ones, and the bottom one can be left for household needs. The distance between all the shelves in our case corresponds to 50 cm (with a depth of 60 cm), and it is better to leave 10 cm between the floor and the first shelf so that small legs are obtained.
Important! Instead of the uppermost shelf, if you are not going to put boxes on it, you can make several horizontal supports, which will then become an excellent place for fixing lighting elements and, at the same time, will hold the entire structure.
Material selection
It is possible to make a rack for seedlings from almost any available material, be it metal profiles, plastic parts or wooden bars.  Each of them has its advantages and disadvantages, but wooden products are still considered the most versatile solution to the problem: they are affordable, easy to process, and when applied with a special coating, they can be used for decades.
In addition, the strength of such racks is in no way inferior to metal varieties, but they usually weigh less. As for the type of wood, it can be either hard (for example, from oak, ash or birch), or soft (pine, spruce, fir). In our work, we chose the pine, because it is more accessible and easier than others to be processed.
Tool preparation
The main assistants in the construction of the rack under the seedlings will be saw (perfectly fit the end, but you can use the usual), drill, screwdriver or a regular screwdriver. Of course, if possible, it is desirable to get a power tool, because it will not only simplify, but also speed up the work.
We recommend reading about how to choose a saw, screwdriver, chainsaw and jigsaw.

Did you know? Screwdrivers have been serving man since the beginning of the twentieth century, but today's popular electric models went on sale only in the early 50s of the last century and since then have not lost their relevance.
Making stands for seedlings
When all the tools and materials are ready, it's time to move on to the direct construction of the rack. In fact, this process consists of two basic steps: cutting parts and assembling them.
We advise you to read about how to grow seedlings using toilet paper, diapers, and whether to buy cassettes and peat tablets for seedlings.
Cutting details
In the hardware store, you can purchase boards of any thickness and width, but you still have to cut them. So, in our case, the width of the boards under the shelves is 10.5 cm, and the supporting parts of the rack are made of 2x3 cm bars.  Having measured the required length on each element, the incision is made with a face or conventional saw. Wooden blocks and boards can be folded in pairs, which will save the total work time. As a result, we have 4 long legs, one shorter (to fix the structure behind) and 8 short squared crossbars.
Three shelves will consist of 15 planks 1.5 m long. If you want to additionally strengthen the rack, you can cut more short bars to fasten them between the bar cross-pieces to the side supports (diagonally).
Did you know? One of the most expensive types of wood is ebony wood, which is often used for decorative purposes. For 1 cu. m buyers can pay from 30 000 dollars.

Rack assembly
Finished pre-cut wooden parts can be compared with the designer, who will have to be folded to obtain the finished product.
It will be useful for you to read about how to choose a lamp for lighting seedlings, as well as how to make the backlight for seedlings at home.
To cope with this task is simple, the main thing: to follow the sequence of actions:
- We take the first two support bars (length 1.8 m) and, stepping back from the edge of 10 cm, fasten the first crossmember between them.
- After 50 cm, we fix another one, and behind it two more, so that the result is a kind of staircase.
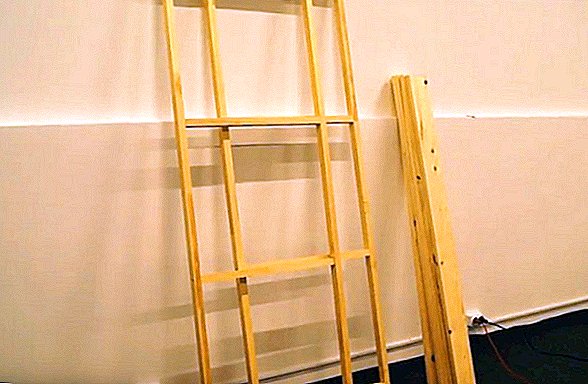
- Similarly, we connect the supporting parts for the second side of the future rack.
- It now remains to connect our "ladders" with shelves consisting of five boards: we fasten the first one at the very edge of the lower crossmembers, and then fasten the following ones in 1.5 cm along the entire depth of the future shelf. Thus, you will have the first, lowest shelf, which in our case will be used for the service tool.

- Similarly, we create the two upper shelves, simply securing all the boards on the side supports.
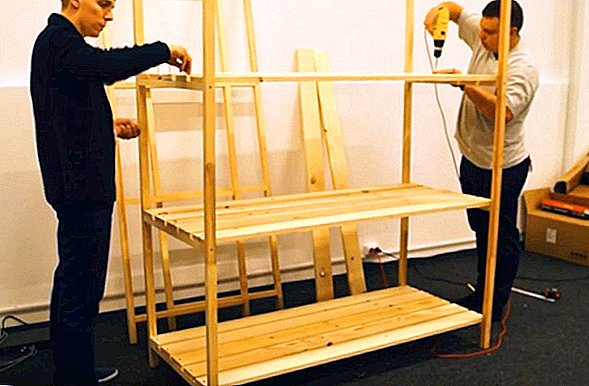
- At the very top, instead of a shelf, we use only one long wooden beam connecting the edges of the rack (like the boards, it is screwed with self-tapping screws). In the future, you can attach lamps to it.
- At the end of the process, in the rear part of the racking we attach diagonally another long bar, which will give the structure greater rigidity and stability.


Important! Instead of screws you can use shkanty, but in this case, the collection of the rack will take much longer. This solution is suitable for people who want to make the design more attractive and are ready to put a little more strength.
Where it is best to place the finished structure
The location for the shelving should be selected taking into account the requirements of future seedlings. If you do not plan to use sources of artificial light, then it is advisable to install the structure closer to the windows or on a warmed balcony, where the air temperature will not fall below +15 ° C.
Familiarize yourself with the nuances of growing and caring for seedlings of tomatoes, eggplant, onions, savoy cabbage, cucumbers, beets, garden strawberries and flowers.
True, for the good development of most garden crops, the optimal values will be temperature indicators within + 20 ... +25 ° С. Do not forget about the practical side of the issue: the rack should not interfere with the movement of people or the care of seedlings.  With proper construction and placement of structures, it fits well into the interior and will help grow beautiful and strong plants, and you will not have to spend a lot of money and effort on its installation. Agree, this is really a worthwhile option for boxes with seedlings.