In order to get a high percentage of hatchability of eggs in an incubator, it is necessary to provide ideal conditions inside the device, such as humidity and air temperature. But there are other, equally important factors that affect the process of incubation, among them a special place is occupied by ventilation. In this article, we will consider the importance of ventilation in an incubator, its main types and the possibility of equipping a self-made incubator with ventilation.
What is ventilation for?
Many people who are just starting to engage in poultry farming and make the first attempts to hatch eggs in an incubator do not attach much importance to ventilation inside the device, which is a serious mistake and the cause of many problems.
Did you know? The first incubators were known 3,000 years ago, at this time in Egypt they built special rooms for breeding chicken eggs.
If you properly organize the movement of air in the heating device, you can achieve:
- active movement of clean air inwards;
- quick removal of CO2;
- uniform heating of the eggs;
- effective maintenance of the required humidity.

It is worth remembering that in devices with artificial ventilation there is no difference in the temperature of eggs in trays located above and below. Sometimes the temperature difference is 4 degrees (if only natural ventilation is adjusted), which is bad for the development of embryos in the egg.
In devices that have only natural ventilating holes, air can overheat and stagnate, this is especially pronounced in the voids between the eggs in the trays.
Natural air exchange is often quite weak, which leads to a lack of oxygen for the embryo, with the result that many chicks hatch weak and can die.
Eggs need fairly large quantities of fresh air, which allows artificial ventilation devices to be provided.
Video: Incubator Ventilation The need for artificial ventilation due to the fact that:
- on the sixth day, the embryo begins to breathe, and the process of inhaling oxygen and the release of carbon dioxide increases every day;
- on the 15th day of development, the embryo requires about 2.5 liters of fresh air;
- From the 19th day each egg should receive at least 8 liters of fresh air per day.
Check out the technical specifications of household incubators such as Ryabushka 70, TGB 280, Universal 45, Stimul 4000, Egger 264, Kvochka, Nest 200, Sovatutto 24, IFH 500 "," IFH 1000 "," Stimulus IP-16 "," Remil 550TsD "," Covatutto 108 "," Layer "," Titan "," Stimulus-1000 "," Blitz "," Cinderella "," Ideal hen "," Neptune "and" AI-48 ".
All the above facts confirm the need to equip incubators with a high-quality ventilation system in order to maximize productivity. 
Ventilation features
Before connecting the acquired ventilation system, it is necessary to consider some features of using a new device in order to create an optimal microclimate for eggs. After laying eggs for three days, ventilation should not be included.
This is necessary in order to maintain a stable temperature inside the device. For eggs at this time, ventilation does not matter, as the embryo does not begin to breathe. On the 4th day after the laying of eggs, it is recommended to start ventilation, setting the minimum ventilation mode.
We recommend to read about how to choose the right household incubator.
At this time, the humidity in the incubator will gradually decrease to approximately 50%. On the 5th day after the laying of the eggs, the embryos begin to breathe, therefore it is recommended to set the average ventilation mode.  After that, every two days it is recommended to gradually increase the amount of incoming air, so that on the 18th day the ventilation functioned at maximum speed.
In addition, from the 15th day of the heating device is ventilated, for this it should be open for 25 minutes and turn off the heating. It is very important to take into account the temperature and humidity indicators of the room in which the heating device is installed.
Important! The air that enters the incubator should be sufficiently clean and fresh, so it is recommended to regularly ventilate the room in which the heater is installed.
For example, in summer, when hot days are established and the air temperature in the room rises significantly, overheating of eggs may occur, due to the fact that too hot air will flow into the incubator.  Also, make sure that the room has a normal level of humidity, which is especially important immediately before hatching. In order to achieve normal humidity in the incubator, the air that comes from the room must have at least average humidity.
Read more about how to disinfect an incubator before laying eggs, disinfect and wash eggs before incubating, how to lay eggs in an incubator.
Types of ventilation
Air ventilation in incubators is implemented in several ways:
- Permanent. To do this, the ventilator works continuously, which allows you to gradually change the air that is inside the device, the process is accompanied by a uniform distribution of heat.
- Periodic. This method involves turning on the ventilation device once a day in order to completely change the air inside the device.
In order to decide which method of ventilation is more profitable and better for eggs, it is necessary to consider them in more detail. 
Periodic
In modern heating devices for eggs, automatic ventilation is provided; for this purpose, a ventilation device is switched on once a day, and the air that was inside the chamber is changed to fresh.
In case you yourself built a heating device for eggs and did not provide for such a function, then you can air it in manual mode. If the device does not have an automatic ventilation system, you can turn on the fan yourself.
In order to perform the ventilation procedure, the heating is completely turned off and the fan is turned on for 15-30 minutes. During this time, the eggs should cool to 34 degrees.
After the cooling procedure, turn off the ventilator and turn on the heating again. This procedure has a positive effect on embryos and stimulates their normal development.  In addition, the advantage of periodic ventilation is a significant energy savings, since the ventilator has a minimum amount of time.
Important! Self-made incubator can also be equipped with an automatic ventilation system, for this purpose they acquire a special controller.
Continuous
The operation of a continuous ventilation system is based on forced-type ventilation equipment. Fans are installed in special air vents, and the fresh air is constantly being distributed in the incubator and at the same time removing carbon dioxide from it.
Video: Incubator Ventilation Types Consider how the continuous ventilation system works:
- Initially, the fan blows air from the heating device; as a result, one stream of air masses passes through the holes located above the impeller and falls outside the incubator. Another part of the air, pushing away from the obstacle - the roof, goes through the air inlets.
- As air moves outward, fresh air is captured and mixed together, then they move through the heating elements.
- The movement of air occurs along the walls in the lower part of the fan, the air flow comes to the tray with water and is moistened.
- After this, the air masses pass through the trays with eggs and give them heat.
- The final step is to get air back into the venting device, so it carries the exhaust gases with it.
As a result of this ventilation scheme, heating, ventilation and humidification of eggs take place simultaneously. In devices with continuous ventilation, it is imperative to carry out the planned cooling of the eggs.  If we compare these two ventilation systems, then each of them has both advantages and disadvantages. For example, a permanent ventilation system is more costly, since it consumes more electricity and requires regular cooling of the eggs by turning off the incubator and airing it.
But compared to periodic ventilation, the constant provides a greater amount of fresh air that is required by the eggs, especially with regard to the last developmental periods of the chicks.
But at the same time, the periodic system does not require cooling of the eggs, as this happens automatically, during the period when the ventilation is turned on and the heating of the incubator is turned off.
The ideal option is considered if a periodic and continuous ventilation system is combined in the incubator, thus it is possible to achieve uniform heating of eggs, constant finding of clean air in the device and better control of humidity. 
What to ventilate
Switching on and off ventilation is automatically possible if there is a controller in the incubator and, of course, the fan itself.
Important! A filter is installed in front of the ventilated device. - This is necessary in order to prevent down from clogging the ventilating device.When choosing a ventilation system, pay attention to the basic parameters that affect the efficiency of the movement of air masses:
- First of all, pay attention to the diameter of the ventilation device, it must be at least 80 mm for a small incubator and at least 400 mm for a large incubator.
- Buy ventilating devices with a possibility of work from a network of 220 V.
- Fan capacity must be at least 40 m3 / hour for a small incubator and 200 m3 / hour for a large one. It is better to choose fans with high performance, regardless of the size of the incubator, but it is worth remembering that the greater the performance, the higher the product price, respectively.
Video: Fans for Egg Incubators The equipment considered will be effective if small home incubators are used. To equip powerful industrial incubators with a ventilation system, completely different equipment is used.
To this end, they supply a supply and exhaust system with a heat exchanger, which makes it possible to achieve effective air exchange and reduce energy costs in the heating process, since the air coming out of the incubator will release its heat in the heat exchanger to incoming air. This equipment is very expensive, so buying it for small home incubators is unprofitable.
Types of fans
Fans are presented by several types which differ in type of a design. Let us consider in more detail those of them that provide the movement of air masses in incubators.
Axial
Axial fan is called, which is characterized by the movement of air flow along the axis of the impeller, rotating with the engine.  Since the movement of air that is sucked in and injected coincides in direction, and the fan itself is simple to manufacture, axial fans are considered the most common.
The biggest advantage of an axial fan is low price, so it is often purchased for ventilation of air in incubators. The disadvantages of this type are not very high performance, given the relatively large size of the device, and the axial fan is quite noisy.
Read more about how to make an incubator for eggs with your own hands.
Centrifugal
Centrifugal ventilators are equipped with rotating rotors, which consist of spiral blades. Air masses, penetrating into the rotors, begin to rotate and, thanks to centrifugal forces, as well as the special shape of the blades, they appear in the outlets of the spiral shells.
Centrifugal fans are characterized by the presence of blades bent forward or backward. Ventilation devices with backward curved blades are 20% more energy efficient, and they also easily carry overloads due to air consumption.
Ventilation devices with blades curved forward are characterized by a smaller wheel size, which makes it possible to manufacture devices of smaller size with much lower rotational speed, creating less noise.
Unlike axial fans, centrifugal fans are characterized by higher productivity, smaller sizes and lower noise levels, although they cost a bit more.
Did you know? The first mechanical fan in the world was a centrifugal device. He was invented and built by engineer-inventor A. A. Sablukov in 1832.
Tangential fan
Tangential ventilation devices are characterized by the presence of squirrel cage rotors, which have an empty center and axial fan blades located along the periphery. The fan cylinder has no walls, but there is an impeller consisting of curved blades.  Air masses are captured by rotating blades and accelerated under the influence of a diffuser, moving in the desired direction. In this venting device, the air moves along the periphery of the rotor towards the outlet, which is very similar to the principle of the centrifugal fan.
Tangential devices are capable of creating uniform air flow over the entire surface of the fan, therefore, in the process of operation, it is as silent as possible. If we compare tangential devices with axial and centrifugal, then the first ones are more cumbersome, but have maximum performance.
How to make ventilation in a homemade incubator
Consider several options for effective equipment homemade incubator ventilation system.
Option with fixing the fan on the ceiling
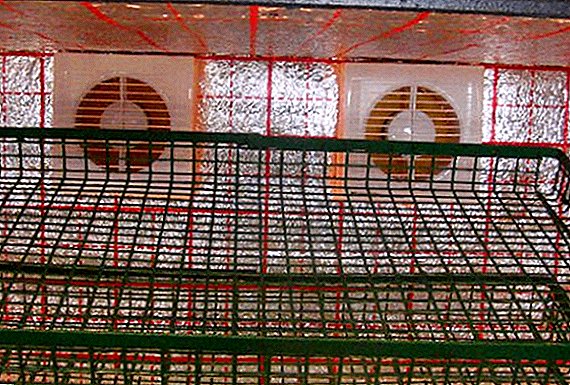
In order to provide a home incubator with a ventilation system, it is necessary to tackle the side walls and ceiling of the device and sheathe them with plastic.
Video: how to make ventilation and ventilation in the incubator Next, you need to make wide holes at a distance of 10 cm from the bottom of the heating device, through which air will pass.
Then in the headlining is necessary to make a hole in which the fan will be installed. In the incubator, holes are also drilled over the venting device in order to ensure normal air exhaust.
Learn how to choose a thermostat for an incubator, and also whether you can make a thermostat with your own hands.
To get fresh air into the homemade incubator, in the side parts should make a lot of small holes. The next step is to attach the fan to the ceiling.
It is necessary to ensure a distance of at least 3 cm between the ceiling and the fan; for this, the space is filled with any linings. The best option to connect the fan is to use an adjustable power supply. In the process of how the voltage power will change, there will be a change in the speed of turns. 
Option with a pipe and two fans
Initially, it is necessary to make holes on one wall of the pipe along the entire length. The same pipe is installed above the water tank between the walls of the home-made incubator so that the holes are directed downwards.
The pipe and container should be at least 5 cm apart from each other. An appropriate hole is made on that part of the home-made incubator where the fan will be located. It is also recommended to make a small hatch that will allow you to adjust the air supply.
It will be useful for you to familiarize yourself with the rules for raising ducklings, poults, turkeys, guinea fowls, quails, goslings and chickens in an incubator.
The second fan should be installed above the water tank; it will create all the conditions in order to increase the humidity in the home-made incubator as soon as possible.  Thus, the provision of incubator ventilation allows you to create an ideal microclimate in the device, thereby increasing hatchability and positively affecting the health of chicks.
Для того чтобы не возникало проблем с вентиляцией инкубатора, необходимо разбираться в видах и особенностях вентилирования, которые подробно описаны в данной статье.