It turns out that in order to breed any poultry, it is possible to do without not only the services of the incubating egg of the hen, but also without the expensive factory-made incubator. The house master is quite able to make a device for incubating eggs, which allows you to successfully remove the chickens with minimal expenditure of funds. How it can be done, read below.
Requirements for a homemade incubator
The main requirement, the fulfillment of which is required from any incubator, lies in its ability to maintain conditions as close as possible to the natural ones created by the bird that is hatching eggs.
Important! The distance between the eggs loaded into the incubator should be at least 1 cm.And all other requirements for incubators follow from here:
- the temperature in a 2-centimeter radius from each egg should be in the range from +37.3 to +38.6 ° С, in no case going beyond these limits;
- eggs loaded into the incubator should only be fresh, whose shelf life has not exceeded ten days;
- the humidity in the device for the entire period up to the laying of eggs must be maintained within 40-60%, and after the inclination it rises to 80% and stays at that level until the chicks are sampled, after which it decreases again;
- great importance for the normal incubation of eggs is their position, which should be either a blunt end up or horizontal;
- a vertical position implies a 45 degree tilt of chicken eggs in any direction;
- horizontal position requires an hourly turn of the eggs by 180 degrees with a minimum turn three times a day;
- a couple of days before the roll over the roll over finish;
- Forced ventilation is desirable in an incubator.

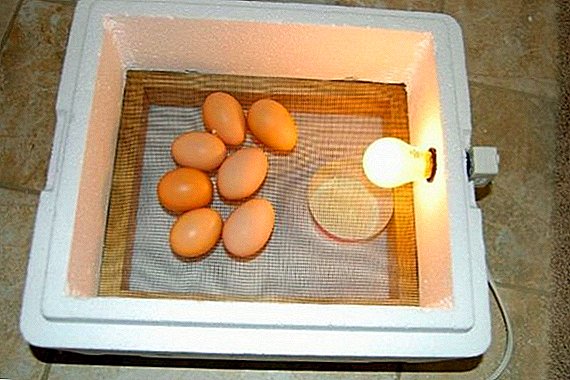
How to make a simple foam incubator
Foam is perfect for this purpose. This material, with its low cost, is lightweight both in weight and in processing, and has an excellent ability to retain heat, which is an indispensable quality when incubating eggs.
Tools and materials
To make a foam incubator for 15 eggs, you will need:
- ten-liter foam thermobox with a wall thickness of 3 cm;
- power supply from a computer;
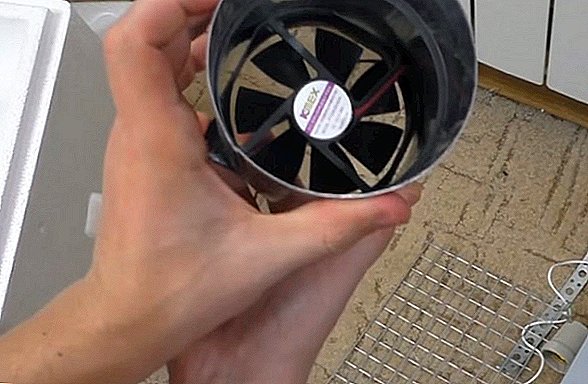
- fan;
- 40W electric bulb for 12 V;
- lamp holder;
- metal connector for pipes;
- metal mesh with cells 2x2 cm and with a bar cross-section of 1.6 mm;
- front mesh;
- plexiglass;
- acrylic mounting adhesive;
- temperature sensor;
- humidity sensor;
- sharp knife for cutting foam;
- drill;
- water tray;
- furniture cable cap;
- thermometer with moisture meter;
- thermal switch

Process of creation
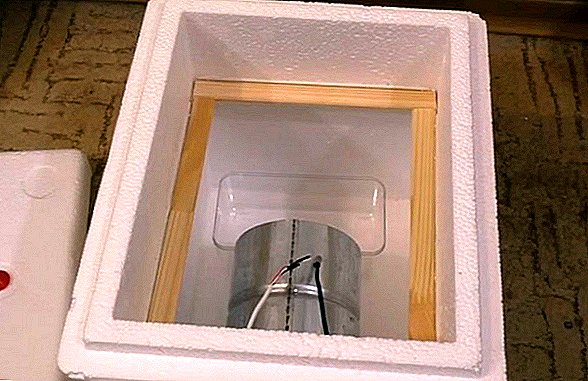
To assemble a home incubator on the basis of a ten-liter thermobox, you need:
- Insert the fan into the pipe connector, having previously removed the ears there from the circumference of the fan casing.
- Approximately in the middle of the pipe connector, fasten the cartridge for the sweetheart in such a way that the light is directed in the direction opposite to the fan.
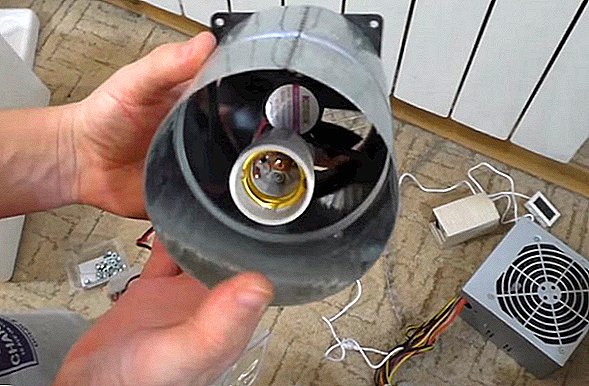
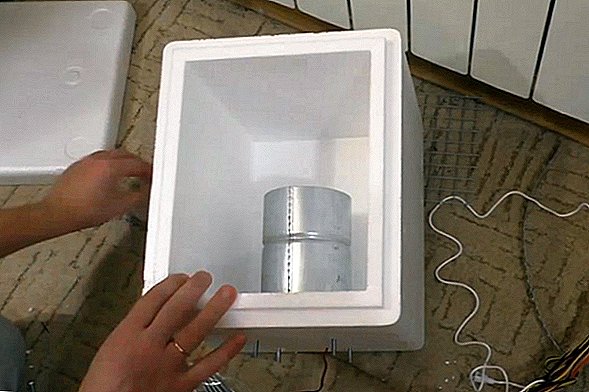
- Inside the thermobox on one of its narrow sides, use four bolts, washers and nuts to fix the connector for the pipes, for which four holes for the bolts and the fifth are drilled in the wall of the thermobox to bring the wires from the fan and light bulb out. Connector for pipes with its contents is located almost at the bottom of the thermal box.
- At a distance of about 15 cm from the top edge of the thermobox inside on its walls around the perimeter, wooden corners should be strengthened with acrylic glue.

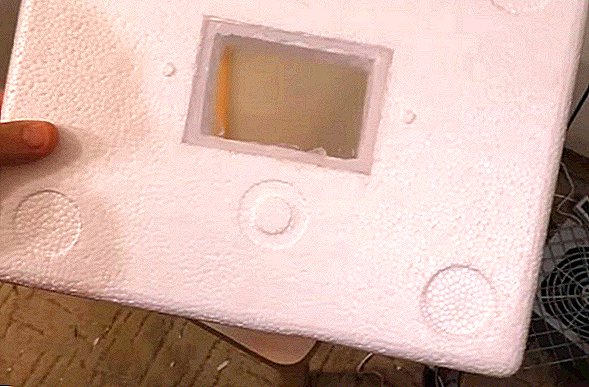
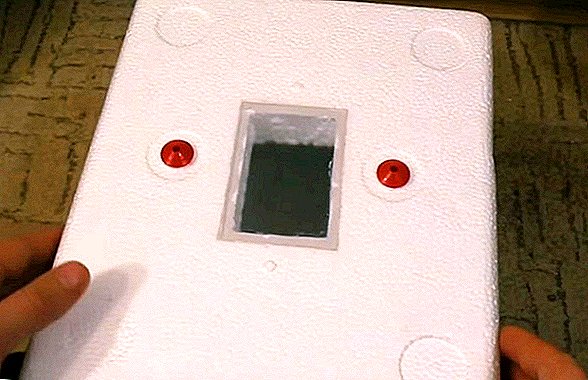
- While the glue will dry for 24 hours, cut a small rectangular hole into which to insert a piece of plexiglass with the help of a knife in the middle of the lid of the thermobox, resulting in an observational window.
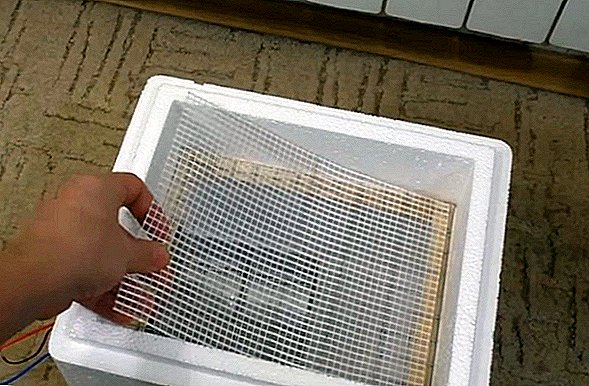
- The grid, cut so as to enter the thermal box with its entire area, is installed on glued wooden corners that had time to harden.
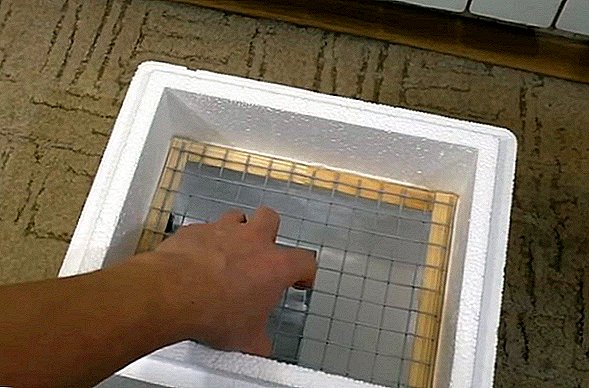
- From above this grid becomes covered by a front grid.
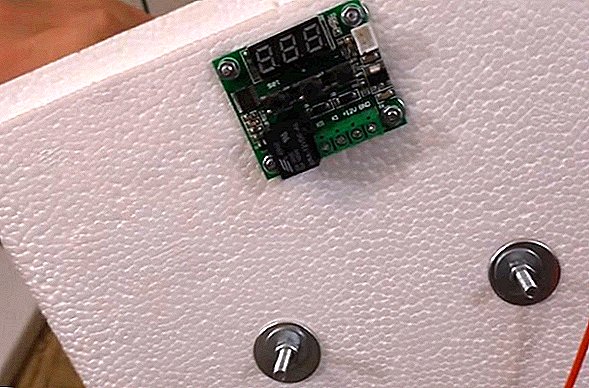
- Outside the thermal box, right at its edge, on top of the side where the wires from the light bulb and the fan go, reinforce the thermal relay.
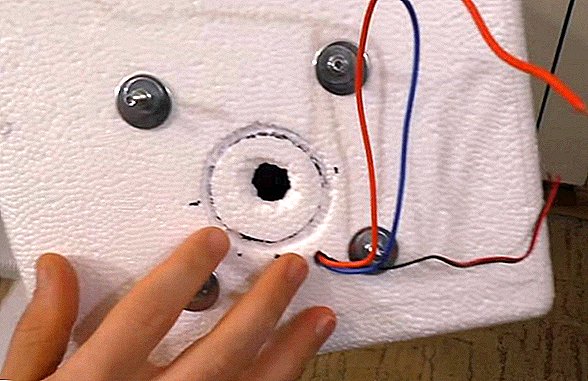
- Opposite the fan in its center, make a small hole for air flow, which is covered by a furniture cable plug, the width of the opening hole in which can be adjusted.
- Install a thermometer with a moisture meter on the same wall of the thermal box from the outside.
- Install temperature and humidity sensors on the grid inside the thermal box, and bring their cables out.
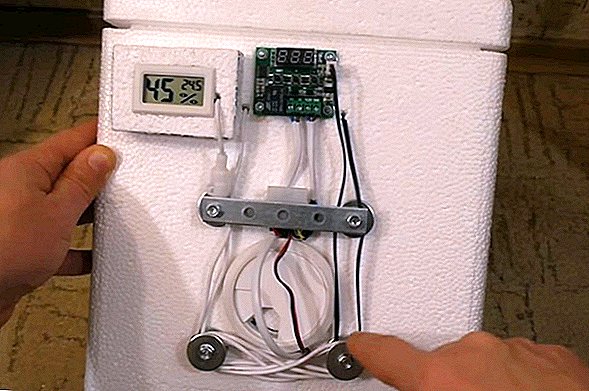
- Fasten the connector to the wall of the incubator, to which all the necessary wires are connected, including power from the computer unit.
- At the bottom of the incubator install a small tray with water to maintain the required humidity.
- In the lid on the sides of the inspection window, make two small air vents.


Important! To better preserve the heat inside the foam incubator, it is recommended to glue it from the inside with thermal insulation covered with foil.
How to make a large incubator out of the fridge with turning eggs
The most popular way to make an incubator at home is to use the case of an old refrigerator, i.e., a unit that was once aimed at producing only cold turns into its opposite, producing now the heat needed for the incubation process.
Moreover, the incubator turns out so "advanced" that it even has a device that turns the eggs in automatic mode. 
Tools and materials
To make this machine, you can use:
- the body of the old refrigerator;
- glass or plexiglass;
- a motor from a device with a gearbox (for example, from an automatic barbecue maker);
- metal gratings;
- timers;
- bicycle chain stars;
- pin;
- thermostat;
- wooden or aluminum frame;
- four hundred watt lamps;
- heat-reflecting material;
- computer coolers;
- construction tools;
- sealant.

Choosing the right housing
This hand-made home incubator design requires an old refrigerator that has a separate freezer.
Read more about how to make the thermostat, ovoscope and ventilation for the incubator.
Then you need to do the following steps:
- Any excess material is removed from the refrigerator case, and a window of arbitrary size is cut out in the door of the lower compartment.
- The refrigerator is washed thoroughly.
- An aluminum or wooden frame is inserted into the cut-out hole.
- Glass or plexiglass is fastened in the frame, and the gaps are smeared with sealant. The result is an observational window that allows you to monitor everything that happens inside the incubator unnecessarily, opening the door to let in cold air.
Did you know? The color of eggs is determined by the breed of hens. The most common is brown shell, and white is most often observed in hens of egg breeds. There are also cream, green and even blue chicken eggs.
- The doors of the refrigerator and, first of all, the places surrounding the observation window should be insulated by means of foil insulation, so that the heat radiated by the heating electric lamps is not lost, but reflected from the foil is returned to the device.
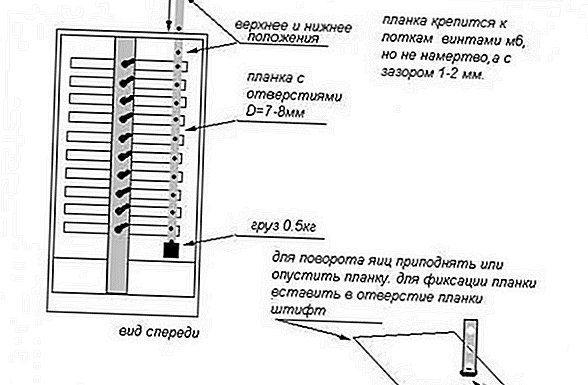
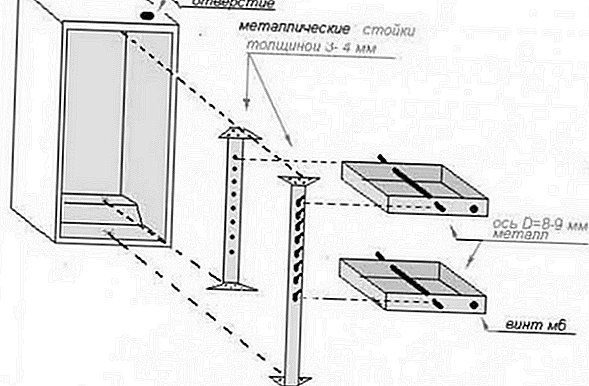
- To place the egg trays, it is necessary to build a rack in profile metal pipes and gratings inside the main cabinet, in which the grids are arranged horizontally parallel to each other and can simultaneously rotate around their axes by 45 degrees.


Creating a swivel mechanism
This is the most difficult and crucial part of the construction of this type of incubator. The turning mechanism should turn over eggs without fail in a given mode, making it not only timely, but also neatly.
We recommend to read about how to choose the right household incubator.
For its installation it is necessary:
- Install the engine on the floor of the camera.
- To put on an engine shaft an asterisk from a bicycle chain transmission.
- Weld the second bicycle star to the side of the lower grille.
- In the extreme position of the grid set limit switches that regulate the operation of the motor, turning it off in time.
- Turn on the engine four times a day, two timers.
Video: mechanism for turning trays in an incubator from the refrigerator
Maintaining heat and humidity in the incubator
The thermostat, which monitors the desired temperature in the device, is installed inside the case at a height of one third of the total height of the refrigerator. Heat sources, which play the role of electric lamps, are mounted in the former freezer, and they are turned on and off with the help of a thermal relay.
Humidity is provided by a tray with water installed on the floor of the incubator, and its level is determined using a moisture meter.
Find out what should be the temperature in the incubator, how to disinfect the incubator before laying eggs, and what are the rules and methods for regulating humidity in the incubator.
Ventilation device
The heat generated by the lamps located in the former freezer is supplied with the help of four fans. They are installed in holes made in the plastic partition between the freezer and the main chambers of the former refrigerator. Their activities are also led by thermal relays. 
Assembly of all components
The finishing operation that completes the process of installing an incubator based on an old refrigerator is wiring the wires that feed each of the devices that provide heating, ventilation and turning of the eggs.
This is especially true when using purchased egg trays with automated turning of eggs. All of them are equipped with their own engine and electronics servicing it, operating at a voltage of 220 V. When installing several such trays, power supply is required for them.
Familiarize yourself with the rules for growing chickens, ducklings, turkey poults, goslings, turkeys, guinea fowls, quails and ostriches in an incubator.
For the manufacture of the incubator, the home craftsmen, in addition to the former refrigerator, also use old microwaves and TV cases, and even basins covered with one another.
Video: Incubator from the refrigerator do it yourself But in any case, all home crafts should meet the general requirements, forcing in any unit to create optimal conditions for the successful breeding of chicks.
Did you know? Many people think that the chick develops in the egg from the yolk, and the albumen serves as its nutrition. In fact, the embryo grows from a fertilized egg, feeding on the yolk, and the squirrel serves it as a cozy bed.