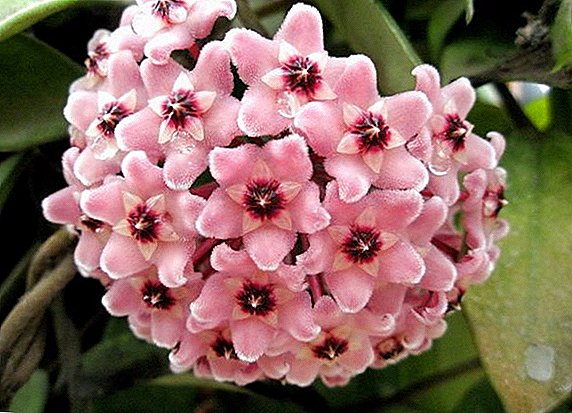
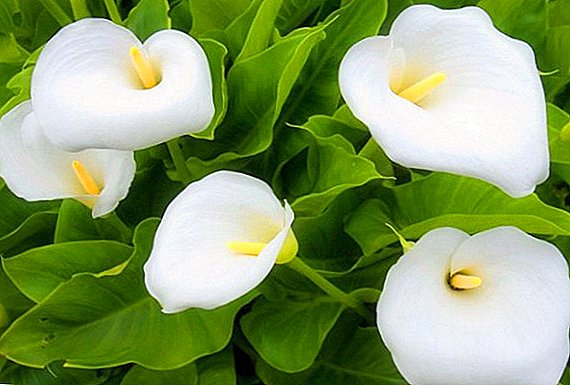
Calla is a perennial herb of the aroid family. Calla is an elegant classic indoor flower and has a distinctive appearance. Home flower Calla can have different shades of bracts, which makes it very popular among gardeners.
Optimum conditions for homemade callas
Despite the fact that calla has arrived to us from South Africa located in tropical latitudes, it is quite a hardy and unpretentious plant. The period of flowering calla lasts from three to eight weeks.
Place for a pot of calla
When choosing a site for calla flowerpots, consider two important factors:
- Calla is very demanding for lighting;
- There are heat-loving species.
 Callas grow well in partial shade - under the influence of indirect sunlight. In the summer it is desirable to keep the flower closer to the window, but in partial shade. In winter, the plants are acutely lacking sunlight. But the right lighting is very important for the growth of calla. When there is a lack of light, white callas can stop blooming, only growing the stems. Colored species in low light conditions can lose their beautiful shade. For the formation of the stems of these flowers, sunlight is required for 12 hours a day. In the daytime, after flowering - the light should be no less than eight and no more than ten hours.
Did you know?All types of callas and all their parts are poisonous. So try to keep the flower away from children and animals. When working with a plant, do not forget to wear protective gloves.
Temperature
Do not forget that the usual habitat of calla are high temperatures combined with high humidity. Therefore, callas require a similar care at home. The required temperature in the room where the callas are kept depends on the season. The most favorable temperature is from 15 to 25 ° C (in the summer of 22-25, in the winter of 15-18 degrees). Sudden temperature drops are destructive for all types of callas and entail the cessation of the flowering of callas. In hot weather, the culture requires frequent spraying with water and additional humidity. Keep the plant on the balcony is permissible only in warm weather. In winter, the calla should be in a heated room.
Features care Calla at home
According to experts, callas in pots are unpretentious and their cultivation does not require any special tricks. The main thing is to create optimal conditions and follow the necessary rules for care.
Watering and humidity
 One of the main stages in the care of callae in pots is the proper watering. If the plant is not watered regularly, it will stop growing. A regular watering and wet soil these flowers perceive very favorably. This is especially important when growing white callas. Colored callas are not so whimsical to moisture. The amount of water depends on the growth period. The main thing is that the soil in the pot never remains dry. The air in the room where the callae are kept must be different in high humidity.. The ideal moisture for calla is 70-80%. Of course, this is difficult to achieve. Therefore, it is necessary to spray calla water more often (twice a day). Also try to wipe the leaves with a damp cloth.
Top dressing and fertilizer
As the calla grows, the roots of the plant fill the pot and quickly absorb all the beneficial substances from the soil. With a constant content of calla in the pot requires timely feeding and complex fertilizer. It is necessary for the proper development of calla.
Important! Remember one important rule of growing calla lilies: the smaller the plant receives sunlight and heat, the greater its need for fertilizing and fertilizer.
 Feeding Calla is made by universal complex fertilizers and is used every 10-14 days. It is not recommended to apply nitrogen fertilizers before flowering. The plant must be fed with urea or make an infusion of egg shells. Procedures are carried out in the period of active flowering calla. When you apply fertilizer, you need to be careful - you can overfeed the callah, so that your plants will die. Symptoms of an excessive amount of fertilizer are yellowed and parched leaves. In addition, from excess nitrogen the plant will intensively grow the leaves, which negatively affects flowering.
Did you know? With a shortage of nitrogen, calla leaves become wilted, lose luster, stop growth. And with a deficiency of potassium leaves, oddly enough, rise up.
Calla care during the rest period
As soon as you purchase indoor callas, the first thing to do is to correctly determine the resting period for the plant. Usually, all callas “sleep” period begins in October - November, and the end falls in February - March. Do not “enter” callae in the resting period too soon. It is not recommended to sharply limit watering or cut the leaves. In this case, the tubers do not have time to fully ripen. Calla lasts a period of two to six months.
 Care for calla during the rest period includes: setting the desired temperature, proper irrigation, lighting, humidity and fertilizing. All this helps the plant to harmoniously go to rest after a long flowering. White callas grow slowly in winter. They bloom in winter and spring, and rest on hot summer days. But the colored callas completely stop their growth, lose their leaves and hibernate (until March-April). That is why in offices, houses and apartments we most often see callas of exactly white color.
Proper transplanting and ground for calla
Do not transplant plants with weak or damaged shoots. In order to quickly adapt the calla to a new environment, it is advisable to use ordinary earth or a composition close to the natural one. Before transplanting, call the roots. This should be done with extreme caution. Do not damage the roots, so as not to introduce new bacteria into the wound. As a result, the new soil will be contaminated.
Important! To reduce the risk of rotting roots, before transplanting new tubers should be soaked in a weak solution of potassium permanganate (potassium permanganate). After this procedure, all defects are visible. If there are growths or dry rot, then you can clean the roots with a knife and disinfect green paint.
 Many owners of this culture often wonder: how to water calla after transplantation. Since calla requires a lot of water, the transplanted sprouts should also be watered regularly. Of course, do not overdo it in this regard. It should be noted that the desired acidity of the soil (pH) should not be higher than 6. Soil for calla should consist of the following components:
- sand (one piece);
- peat (one part);
- leaf humus (one part);
- sod land (two parts).
How to breed calla
House callae are propagated in two ways: division of rhizomes and seeds. The second method is more complicated and lengthy, therefore it is rarely used.
Division of rhizomes
 The division of rhizomes is the most convenient and fastest way to breed calla. The division is usually done in the fall. Tubers must be dense and healthy. So, with a spatula or a sharp knife you need to carefully divide the main rhizome into parts. It is necessary to divide in such a way that each part has enough roots and earth. Each divided small rhizome is planted in a separate spacious pot.
Plant in wet soil to a depth of about 5-8 centimeters. Since planting was done in the fall, new plants hibernate in half-sleep mode. In the early days, callas do not need watering. But after the first week, make sure that the soil does not dry out; gradually increase watering and periodically spray. Also keep an eye on the lighting for the new calla roots. Pots must be protected from too bright and scorching sun.
Seeds
Reproduction of calla seeds is also possible. This method is considered unreliable, since the result will have to wait long enough. In addition, this method does not guarantee successful reproduction. And you cannot be sure about what the result will be. However, multiplying calla seeds with seeds, you will feel like a real breeder. In case of luck, you can get a completely new kind of calla that will bloom on your windowsill.
 If you decided to grow room calla seeds with seeds, soak them for five hours in a solution of potassium humate, a natural growth biostimulator. This is a necessary procedure, as the calla seeds have poor germination and short shelf life. Next, prepare in advance any container or stand. Cover the container with a damp cloth or napkin, spread the seeds and cover with another damp cloth. Put the seed container in a warm place for 6-8 days and do not allow drying.
Important! The mistake of most flower growers is that they immediately put germinated seeds in the ground, where most of them, alas, die. Sprouted seeds are best sown in vessels with the earth and hold them in a warm place until germination. Only after this seedlings can be planted in the soil.As you can see, care for callae in pots does not require much effort. The main thing is to follow all the above rules and carefully maintain the level of humidity of the air and soil. As a result, you will receive abundant flowering of this amazing plant that will delight anyone.