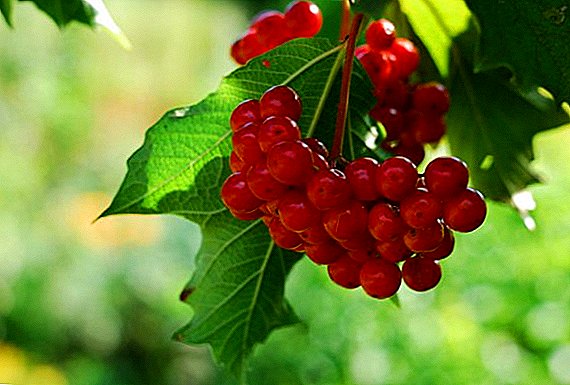
 Decorate the site with a beautiful bush or small tree is a common thing for gardeners. Many factors have to be taken into account: from soil condition to maintenance. But the decisive factor is still the process of division and landing. Let's see how to propagate viburnum.
Reproduction by cuttings
This is the most effective, but at the same time, a rather complicated method. Agronomists know that such a procedure can be carried out in two ways: "speed" and more measured.  The first one is simpler. Preparation begins in winter, and the course of work looks like this:
- In winter, cut off annual shoots of 15-20 cm in length.
- For 2-3 hours they are dipped in water, after which they are placed in a regular bag, tied and stored until spring at low temperatures. To this end, the workpiece is carried out in a dry basement.
- Planting is done when the soil warms to at least 10 ° C to a depth of 10 cm.
- This scheme provides for planting in a row, with an interval of 10-15 cm between the cuttings. At the same time, they are trying to place them under an inclination: one kidney above the ground, the second - exactly at the ground level.
Important! Kalina try to plant away from the usual fruit and berry crops. This is due to the specific effect of its rhizomes on the soil. The bush is especially "conflicted" with walnuts and pears.
- The soil is abundantly watered and compacted. Next "classic" - watering and weeding.
- In the fall, seedlings are transferred to a permanent place.
- During flowering (June - early July) harvest green cuttings. You can take and those who have already begun to harden. The main thing is that they should be elastic. If, when bent, they sprung, and not broken, you were right with the choice.
- The shoot is cut with the first two buds (approximately 7-12 cm) and is divided into cuttings. The lower oblique cut is 1-1.5 cm from the base of the cutting over the kidney (cut at an angle of 45 °), and the top one is already made over the next pair, cutting straight.
- Then from the cuttings cut off the lower leaves. The upper can be cut in half.
- The blanks are placed in the "root" stimulator. The tips are immersed at 1.5-2 cm. The liquid should not fall on the leaves, so be careful. Heteroauxin (100 mg / 1 l of water) remains the best drug;
- Such "trays" are placed in a dark place for 10-16 hours.

- For planting prepare small greenhouses in a shady corner of the site. Direct sunlight such plantations are undesirable. The optimum temperature is + 27 ° С ... + 30 ° С.
- Lay a light substrate. The bottom layer of 10 cm - a mixture of turf soil, peat and coarse sand (in a ratio of 3: 1: 1). Peat can be replaced by humus. The upper layer of 3-5 cm consists of equal shares of peat and sand (here without the "organic").
- Planting is done according to the scheme: 7 cm between the rows and 5 cm between the cuttings. They are placed obliquely, to a depth of 1.5-2 cm and covered with a film or greenhouse frame.
- The next 3 weeks is rooting: at this time the plant is sprayed with water 3-4 times a day. After such a time, the greenhouse is opened on one side, and after another couple of weeks the coating is removed altogether.
Important! Instead of "Heteroauxin" you can use a solution of IMC (indolylbutyric acid). 50 mg of substance are added to 1 l of water and immerse the roots for half a day.
- Shivering overwinter in the same place, they are covered with spruce leaves or dense lutrasil. If there are no such materials, dry leaves will come off.
- In the spring, removing the mulch, they can be moved to a permanent place. But some leave for another season. So seedlings finally strengthened.
- Dig deep holes, leaving a small mound at the bottom.
- A sapling is placed on it, the roots are bred around. The root neck deepens to a maximum of 7 cm. The general planting pattern is 50 x 15 cm. In a couple of years there will be young strong bushes here.
 For all its laboriousness, this method has one indisputable advantage - thanks to it, you can get a large number of plants, and cuttings are better accepted.
Did you know? Kalina is one of the main symbols of folk culture. There are a lot of songs and legends about it. In the old days, a cycle of work was also determined on this plant: for example, they tried to sow barley while it was still in bloom.
Vertical reproduction
This is a simple way that does not require super efforts:
- In the fall on young plants pruned lower branches, leaving them 3-4 buds. The "trunk" is tucked higher.
- In the spring of the same buds grow new shoots. When they reach 8-10 cm, they are spud up to a height of 4-5 cm.
- Scions that have reached 25-30 cm "grab" at the base with copper or aluminum wire and again cut to 1/3 of the height.
- After 10-14 days hilling repeat.
- Until autumn, the shoots will have time to take root, then they are dug up, separated from the mother bush and planted in the allotted place. It is undesirable to process the site of division: garden var or other compounds form a film on the cut, which almost does not allow air to pass through.
- Landing is traditional. The hole is digging, it is moistened, the seedling is first planted slightly at an angle, prikopav root root 5-7 cm.
- Closer to the frost make shelter from mulch.
The biological relative of viburnum is an elderberry: both plants belong to the same family - Adoxaceae.
As you can see, everything is simple, no greenhouses and solutions. They are not needed for the next method in our list.
Reproduction by horizontal layouts
Works begin in spring and cover two seasons:
- 2-3-year-old branches are cut from the bush (some also remove four-year-olds, but not older). There is a stump with 3-4 buds. For the current year, we leave viburnum alone until the next spring.
Important! If many cuttings are prepared, they can be bundled before immersion into the reinforcing solution.
- A year later, the young shoots are cut about 1/5 of the entire length and bent to the soil.
- They are laid in the prepared groove (5-6 cm deep), and fastened with hooks. Please note: such slips do not drop at once! We'll have to wait until the buds beat off the shoots at least 10 cm.
- Then the hole is filled with a substrate of humus and peat in equal proportion. The tops should remain on the surface. The first hilling is done with the powder about half the height of the shoots.
- In the summer they make 2 hilling with an interval of 2 weeks. The maximum embankment height should reach 20-25 cm.
- With the onset of autumn, the cuttings are cut off from the main bush, and the shoots are separated from it, which by then had grown strong and rooted. They are transplanted to another location.

Breeding undergrowth
Another simple technique that does not take much time:
- In the last decade of May - the first days of June, they look at processes that have grown to 20 cm. To stimulate the growth of roots, they are pulled over with a soft wire (at the very base).
- Immediately do an earthing up to a height of 7-8 cm.
- The same procedure is repeated 2-3 times in summer. By the fall should get a 20-inch mound. This year, it is not touched, leaving the bush for the winter.
- But next spring, such a growth is separated from viburnum and transferred to a prepared place. Planting technology is familiar to this plant and does not require any other operations. Just try not to deepen the root neck.
There remains one more approach, which causes many questions for gardeners. We will try to answer them.
Kalina Buldenezh ("snow globe") - a very beautiful view of viburnum, loved by many gardeners. Learn more about breeding and growing this ornamental shrub.
Growing from seed
Enthusiasts should heed the advice of agronomists and consider whether they are ready to take on such work. The fact is that the seeds of viburnum have unimportant germination - only 12-20% of the total sowing germinates. It is desirable to use such material in the first, maximum in the second year after harvest: 2-year germination of seeds of viburnum.  If you are determined to try out such a method, then the actions will be as follows:
- Juice is squeezed from ripe berries, seeds are washed.
Important! Seedlings moistened with a spray, regularly maintaining the moisture earthen lump. The capital bay during this period is not used, so as not to "wash" the seeds.
- After drying, they are placed in a nylon stocking full of wet sawdust. Two months at room temperature will be enough for them to begin to germinate.
- Then they are left to "winter" for a month in the refrigerator at a temperature of 0 ° C ... + 5 ° C.
- After this "hardening" seedlings are placed in cassettes, pots or boxes, pressing the seeds by 3-4 cm. It is enough just to lay them out and sprinkle with the substrate. Shoots appear quickly, then make a pick. It is repeated when the seedling grows to 5 cm.
- In April, when frosts no longer threaten, you can transfer the seedlings to an open area.
- Growing lasts 2 years, and only then such seedlings are transferred to a permanent place. All this time the youngsters are watered, fed with "organic" and complex "mineral water" in moderation, and also mulched.
Did you know? In the Caucasus and in some southern regions, black Kalina can be found. It looks unusual, but its berries are poisonous.
Before planting viburnum, please note that the "seed" seedlings will begin to bloom only for 5-6 years, whereas in vegetative division this period is 2-3 seasons.
Now you know how to propagate viburnum on the site. We hope this knowledge will be useful in practice, and in a couple of years the site will be even more pleasing to the eye. Successful experiments!


