If you decide to breed chickens, then first of all you need to build a cozy house for them, in which they will be comfortable not only in the summer, but also in the winter cold. We offer you a guide for building a chicken coop from scratch, as well as recommendations on how it can be insulated for the winter and what kind of heating to equip inside.
Location selection
The location of the future chicken coop plays an important role, because its future design depends on it, its dimensions and how many birds you can place in it.
Learn more about where to place the chicken coop.
Choosing a place to build a house, follow the following basic principles:
- It is best to place the house for chickens as far as possible from the living quarters and the active recreation zone, so that the smell and sounds do not reach the residents, and the chickens feel calm.
- The place should be on a hill or with a slope, so that the thawed spring waters and storm streams do not stagnate and can leave without hindrance, without harming the soil near the house.
- The selected area should be in a dry, well-lit place with no drafts. This will ensure constant solar heating of the room.
- On the site near the chicken coop should grow shrubs or trees, in the shadow of which the birds will escape from the summer heat and strong wind.
- The place needs to be measured with a reserve in case of a further increase in the number of individuals.
- It is necessary to take into account the location and area of the walking yard, taking into account that 1-2 square meters should be per 1 bird.
- Walking is important to be sure to enclose a fairly high fence (up to 2 m) in order to protect the hens from the attacks of predators and prevent the escape of poultry.
- The building is best located from east to west. The doors of the building should go to the east side, and the windows should look south so that as much light as possible can penetrate the interior of the room. In hot weather, windows will need to curtain or hang shutters on them.
- For regions with a harsh winter, a coop should be provided in the hen house to limit the flow of cold air to the place where the pets stay.
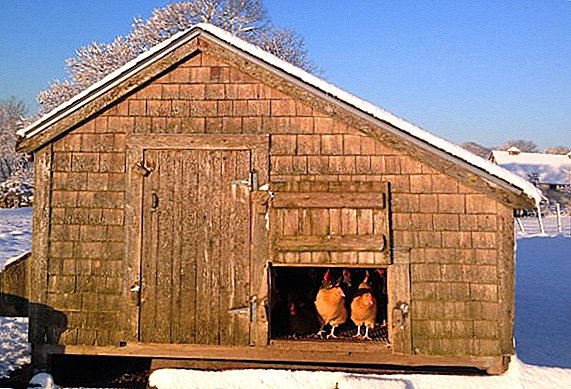
 The roof on the hill will protect chickens from the attacks of birds of prey
How to build
Having decided on the location of the bird house and having drawn its plan, you can proceed to the procurement of materials and directly to its construction.
Important! Erecting a chicken coop, do not forget to carefully measure the level of all vertical and horizontal surfaces, so that the building will eventually turn out to be even and last longer.
List of materials
In order for the construction to be durable, it is important to choose high-quality materials. Before you begin, make sure that you have everything you need:
- For foundation - sand-cement mixture, screenings, gravel, wooden formwork, roofing material. You will also need a fine-meshed grid, level, trowel, tape measure, thin string, iron rods or wooden pegs for marking.
 The foundation for the chicken coop can be made both columnar and tape
 - For walls - wooden bars, flax jug canvas, iron staples, bricks, shell rock, foam blocks, aerocrete, cement mortar, sheet plywood, fiber boards (materials to choose).
 Wood has excellent thermal insulation properties, but the life of this material is rather short.
 - For roof - slate, wood fiber (DVP) or wood chip (Chipboard) plates, plywood sheets, roofing felt or roofing material, wooden slats for rafters, wooden floor beams.
 Despite the presence of a wide selection of modern roofing materials, slate is the best option
 - For the floor - sexual logs (cross-section 100 mm by 150 mm), wooden boards (thickness 2-2.5 cm), timber (10x10 cm), sheets of hardboard or chipboard.
 Keep in mind the litter for chickens and high humidity, so the boards will need additional processing
 - For ventilation - ventilation pipes, wooden dampers on the air vent.
- For nests and perches - sectional dividers of rails, slats for roost, sheets of hardboard, wood sawdust or shavings.
 Hay or straw can be used as a nest filler.
 - Other materials - several brackets for fastening watering devices and feeders, fasteners for connecting parts, nails, hammer, jigsaw, stapler.
 The foundation for the chicken coop can be made both columnar and tape
 Wood has excellent thermal insulation properties, but the life of this material is rather short.
 Despite the presence of a wide selection of modern roofing materials, slate is the best option
 Keep in mind the litter for chickens and high humidity, so the boards will need additional processing
 Hay or straw can be used as a nest filler.
Important! Blanks made of wooden planks and plywood intended for the house should be treated with an antiseptic for wooden products, and also sanded with sandpaper.
Foundation
The process of building the foundation should be carried out according to this technology:
- To clear the area under the future coop from debris and weeds and make the markup using roulette.
- To hammer pegs into the ground at the 4 corners of the future structure and to stretch the string.
- Dig a ditch for the foundation along the entire perimeter of the structure, with a flat bottom (check the level), 30 centimeters deep.
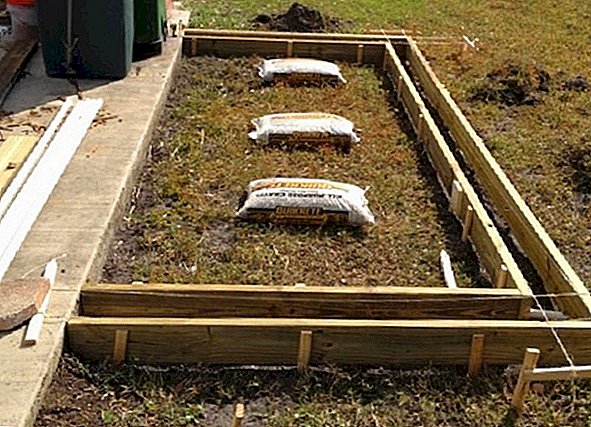 The chicken coop can be attached to other households
 - Lay out the bottom of the pit and the side of a fine-meshed metal mesh, which will serve as protection from rodents.
- Inside the perimeter of the future building, clear a flat platform and deepen it by 25 cm, checking the level.
- Expose the formwork with a moat, fill there with an even layer of gravel and pour sand-cement mortar. The height of the foundation can be arbitrary.
 It is advisable to pour water on concrete, especially in hot weather.
 - Allow the concrete to harden and hold for 5-7 days.
 The chicken coop can be attached to other households
 It is advisable to pour water on concrete, especially in hot weather.
Learn how to get a flea, ferret, rat out of the hen house.
Roof and walls
For the construction of the roof and walls use the following materials:
- Natural coquina stone (18x18x38 cm). It has a low thermal conductivity.
- Foam concrete. D400 brand blocks (20x30x60cm) are best suited. Eco-friendly building material, safe for people and animals.
- Brick (25x12x8.8 cm). Used hollow or corpulent. It has low thermal conductivity and long service life.
- Wooden beam (section 10x10 cm or 10x5 cm). The warmest and most environmentally friendly building material.
 Foam coop is built very quickly
But it is best to use wooden bars for the construction, so that the hen’s barn is warm and eco-friendly:
- On the entire surface of the foundation for waterproofing the floor and walls to place the roofing material in two layers.
- On top of the ruberoid lay the first layer of wooden bars, connecting them at the corners with the help of fasteners, sawn with an electric jigsaw (the grooves should be half the thickness of the bars). For greater strength, the junction of the bars is reinforced with iron straps.
- On the first layer of the bars, install and secure the sex lags (10x15 cm), laid on the edge, with a distance from each other from 50 cm to 1 m.
- Before laying the second row of bars, lay a strip of linen-jute cloth on the first and subsequent layers in order to fill the gaps between the rows. This will ensure even coverage in the future, even when the building shrinks.
- In the same way fit the following rows of bars.
- The walls rise to a height of about 170 centimeters.
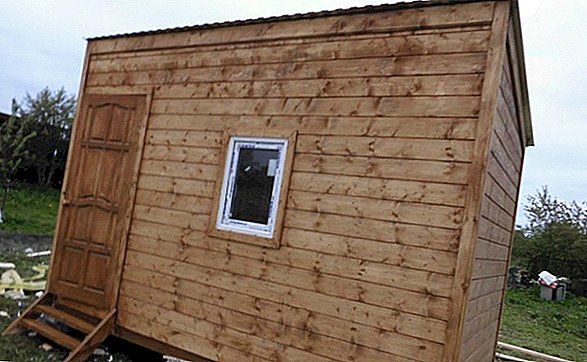
 Another option - frame trim
Did you know? Science knows more than seven hundred chicken breeds, thirty-two of which have already disappeared, and two hundred and eighty-six are on the verge of extinction.
For the house, a suitable form of the roof will be double-slope, which will allow precipitation not to linger on the roof. Floor construction technology:
- Fix the ceiling beams on the side walls.
- From the inside of the room, attach plywood plates or particle boards (DVP) to beams.
- Build a gable crate and install on top of the structure on the frontal sides.
- To erect the truss structure of the roof frame from the wooden bars according to the size of the building to be overlapped and the angle of inclination of the gable trim.
- Lay the ridge beam on both gable sides of the structure.
- Attach the truss structure with nails to the ridge beam and side walls.
- On the roof frame overlap to nail the slate.

Floor
Flooring in the chicken coop should be warm. For this, cut and unedged boards are used 2-2.5 cm thick and a 10x10 cm beam.
Familiarize yourself with the different options for arranging the floor in the hen house.
Technology of the correct arrangement of a floor:
- To upholster the bottom layer of the flooring with unedged board, on which to lay steam-waterproofing.
- Top lay timber at an equal distance of 75-80 cm from each other. Between them the insulation is poured.
- On top of the timber sheathed floors with edged boards, pushing them tightly one to another.
 Lagging floor insulation scheme
Ventilation
In the hen house you can arrange both natural ventilation and forced:
- Natural. Place two holes on two opposite walls: on one wall - at the top (20 cm from the ceiling), on the other - at the bottom (20 cm from the floor). Equip each hole with a door or gate so that the flow of air mass can be controlled.
 A simple example of natural ventilation in a chicken coop
 - Forced. It is arranged like a natural one, but an electric fan mounted on the hood is placed in the hole under the ceiling. The hole with the fan must be equipped with a door so that in winter it can be closed and opened as needed.
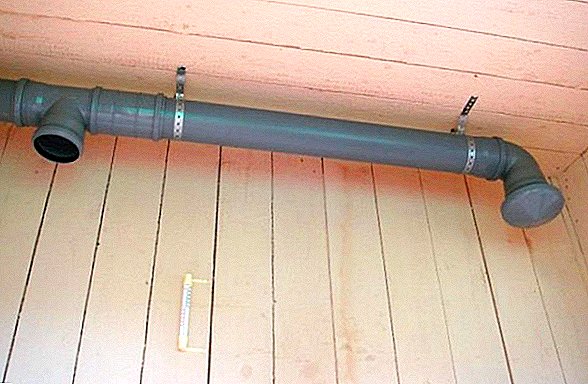
 A simple example of natural ventilation in a chicken coop
Familiarize yourself in detail with the types of ventilation and methods of making it yourself.
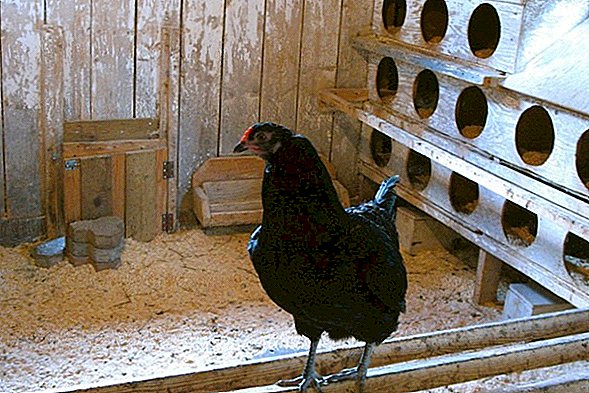
Nest
When setting up cozy nests for chicks, it is important to take into account the breed of birds. The table below shows the indicators of the breed of chickens and the size of nesting cells for them:
| Breed of chickens | Cell width, cm | Cell depth, cm | Cell height, cm |
| Layer | 25 | 35 | 35 |
| Egg and meat | 30 | 40 | 45 |
Did you know? Chickens are able to memorize their fellows, one might say, "by sight" If the chicken is removed from the hen house for several days, other pets will be her remember, and upon return, learn and be safely accepted into the team.
Laying nests come in two varieties:
- In the form of a box. The design allows you to arrange several cells in a row.
- With egg collector. The egg gets into a special tray as soon as the chicken has taken it down.

Drawer nests
You will need the following tools and materials:
- plywood sheets;
- timber;
- fasteners;
- hammer;
- screwdriver;
- jigsaw.
Learn more about nest manufacturing technology.
Instructions for making:
- Calculate the number of nests and calculate the sizes of all parts. Multiply the number of nests by the width of one nest (at least 25 cm).
- According to this scheme, calculate the height of the cell.
- If the population of chickens is large, nests can be made in several floors.
- Cut blanks from plywood.
- Connect all the parts cut.
- For greater structural strength inside the resulting box, you can fasten a timber in the corners.
- The entrance is left open or sheathed with plywood, in which holes are cut according to the number of cells.
- The threshold is made of a 10-centimeter plank. It is attached at the bottom along the entire box, divided into cells.
- Retract 10-15 cm from the entrance to each cell and secure the platform for takeoff.
- If the construction is obtained in several floors, it is necessary to attach ladders to each tier.
Recommendations for making nests for layers: video
Nest with egg digger
Such tools and materials will be required:
- nails;
- plywood sheet and chipboard;
- hammer;
- hacksaw;
- any soft material;
- egg tray.
Learn how to make roosts for chickens.
Works are performed in the following order:
- Knock a plywood box into several sections, cover with a lid, and attach the bottom at an angle of 10 degrees.
- Cut openings to enter the nests.
- On the back wall of the bottom cut a slot a little larger than the size of the egg, so that it can easily slide into the pan.
- Build an egg tray from fiberboard, cover it with soft material and attach it under the bottom of the box with a slope of 10 degrees in the opposite direction from the bottom slope.
How to make a nest with an egg digger: video
Important! Be sure to need a slope of the roof above the nests. It should be at least 45 degrees so that the birds do not sit on the roof over the nests, but prefer to visit the nests from the inside
How to warm
It is important to warm the walls, floor, ceiling and doors of the chicken coop, so that the pets feel comfortable at any time of the year. Let us dwell on the insulation of each part of the chicken coop.
Selection of materials
It is possible to warm a small house for chickens with any insulating materials, stuffing them from the inside or outside. Here are a few options for insulation:
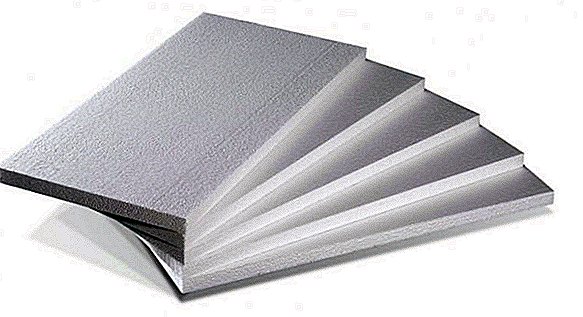
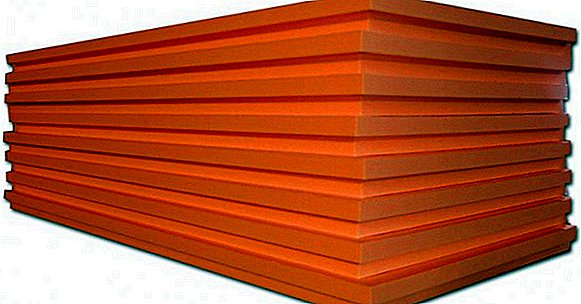
- Styrofoam. The material is inexpensive, with heat insulating ability: one 5-cm plate can replace a 60-centimeter brick wall. It is attached to the wall with glue or long nails with plastic washers.
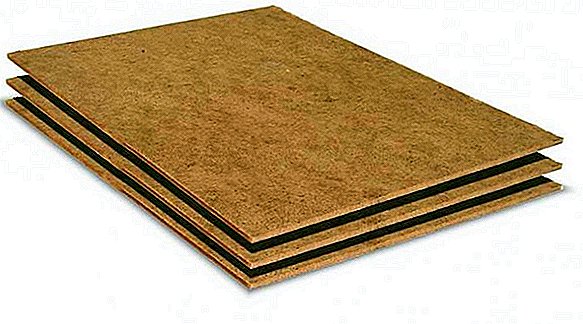
- Mineral wool with protective membranes. From the street there is a hydro and windproof, having one-sided vapor permeability, inside - vapor tight.

- Moisture resistant drywall. The material is treated with special hydro-resistant and antifungal agents.

- Styrofoam. Characteristics, as at polyfoam, but at the price are much more expensive. Outside does not require sheathing.
- Any slab material (DVP, ZHSP, plywood, OSB, etc.). The plates keep warm well.
- Decoration Materials - wooden board, siding (vinyl lining).


Box warming
Having decided on a material of a heater, it is possible to start finishing of the room.
Learn how to build a beautiful chicken coop.
Walls
It is necessary to warm the walls of the chicken coop both outside and inside, this will allow to keep the heat indoors for a long time. Step-by-step guide for wall insulation:
- Punching sheets or other slab material to the walls inside the chicken coop, leaving the door and window openings uncovered.
- Beat the outside of the sheets of foam plastic with nails, pushing one sheet against another, or fasten mineral wool or polystyrene foam with staples.
- When warming walls with mineral wool or polystyrene foam, wooden slats are packed on top to create the required distance with the outer skin.
- The upper cladding material can be well fitted boards or siding.
 Minwat has excellent thermal insulation properties, but requires plating
Floor
Floors in the coop are insulated with deep bedding. In such a litter, heat is produced due to chemical and biological processes that produce temperatures up to + 25-30 degrees. This forms an acidic environment, slowing the decomposition of the litter.
Learn how to use chicken manure as a fertilizer.
The insulating layer for the litter inside the house can be the following raw materials:
- Moss peat. Perfectly adsorbs moisture and chicken droppings, suppressing unpleasant odor.
- Wood sawdust and chips. Acceptable proportion - two parts of sawdust and one part of chips. It is best to use sawdust from the needles, as they have disinfecting properties. The material absorbs moisture well and does not peel off. For better moisture permeability, sawdust can be mixed with peat in any quantity.
- Straw or grass cutting. The material has moderate thermal insulation properties. The optimal length of the straws is 3-5 cm, the initial layer is 20 cm. With pollution, you need to pour the litter with a layer of 10-15 cm, and also periodically loosen the entire depth.

These bedding after use can be applied in the form of fertilizer for the garden.
Familiarize yourself with the use of fermentation litter.
Ceiling
Ceiling insulation technology in the house:
- Fix the plywood sheets or moisture-resistant drywall on top of the floor beams on the side of the attic.
- Lay mineral wool between the beams.
- On top of the mineral wool, tension the vapor barrier membrane.
- From above to beat plywood or boards, pushing them close to each other.
- Inside ceiling pave chipboard or fiberboard.

Door insulation
Entrance doors are insulated as follows:
- Outside around the perimeter upholstered doors with felt, and then covered with foil.
- The inner surface of the door upholstered with an old blanket or carpet.
- From the inside during heavy frost the door can be curtained with old blankets.
- A small free-standing door to warm and close tightly at the time of extreme cold.
Learn how to sheathe the door.

Heating the chicken coop
There are two ways to ensure comfortable conditions for the hens with the help of the heating of the chicken coop:
- With electricity.
- Without electricity.
Find out what should be a light day in the hen house, how to organize lighting in the winter.
With electricity
The following electrical appliances are used for this:
- Heaters.
- Heaters.
- Oil radiators.
- Convectors.
- Fans.
- Infrared heaters.
- Infrared lamps.
- Gas heat generators.

Features of the choice of lamps for heating
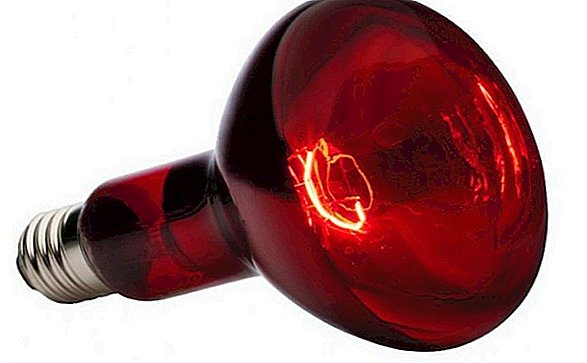
Infrared lamps are the most popular heaters for the chicken coop, because they do not burn oxygen indoors and maintain a balance of moisture and dryness. They also serve as lighting. Their soft, red glow soothes the birds, and has a positive effect on their growth and productivity.
Did you know? There are long-livers among the light bulbs: in the small town of Livermore (California, USA) a light bulb that has been working since 1901, which was only sometimes turned off for a short time, hangs on the fire station. Её долгую "жизнь" подтвердила компания General Electric, которая провела для неё специальный технический аудит.На рынке существует широкий ассортимент этой продукции. But some manufacturers have proven themselves best:
- Philips. Products have red and transparent flasks made of durable glass. You can adjust the intensity of light. These lamps are reliable and durable. Minus - a rather high price.

- Osram. Lamps with transparent flasks and a mirror element. They have similar characteristics with Philips models.

- IKZK, IKZ. The qualities are similar to Western models, are red or transparent. Have a more affordable price.


Learn how to heat a chicken coop with IR lamps in the winter.
Installation
To organize the heating of the chicken coop with an infrared lamp, you will need:
- Determine the place where the platform with the cartridge will be located and mark it with chalk.
- Pull the wiring to the designated place and attach the platform with the chuck.
- Build a protective barrier for the lamp (mesh cover) from non-flammable materials to protect the device itself from damage, and birds from the danger of fire or destruction of the bulb.
- To extend the life of infrared lamps, it is not recommended to switch them on and off frequently.

Without electricity
There are other heating options for chickens:
- Oven heating (brick stove).
- Furnaces such as the stove or buleryan.
- With the help of water heating system.
- Gas-burners.
- Heat guns.
Learn how to heat a chicken coop.
Choosing a suitable option for yourself, you must consider the following requirements:
- The heater must comply with all fire safety requirements.
- Duration of operation (the more - the better).
- The ability to maintain optimal temperature conditions even in extreme cold.
- Cost effective to use.
To obtain the desired results in the process of breeding poultry, you need to create a comfortable environment for them. To do this, we can build, according to our recommendations, a cozy and warm house with comfortable nests, using suitable materials for insulation, as well as equipping an acceptable heating for the coop during the winter months.
How to build a chicken coop: video
Insulation of the chicken coop: reviews