If you are breeding chickens and you have a large population of birds, you will definitely need an incubator to help you. It can also be useful to those poultry farmers whose hens have lost their incubation instinct. And if for a small number of chickens you can easily purchase an industrial-manufactured device, then units with large capacity will be expensive. Therefore, it is better to make them yourself.
General rules of manufacture
There are rules that are the same for all devices of this kind:
- The material from which the incubator will be made must be dry and clean (without dirt, dyes, fats, mold).
- The size of the incubator is directly proportional to the number of eggs (it is calculated in advance).
- The internal size of the base of the product must be equal to the size of the tray with eggs (taking into account the gap).
- There should be a gap of 5 cm between the tray and the walls of the device for ventilation.
- There must be space for water. The fluid will help control the level of humidity.
- It is necessary to make holes in the design for the hood.
- When assembling a structure, it is impossible to leave a gap between the parts, otherwise it will be difficult to maintain the necessary microclimate inside. All connecting seams are best treated with sealant.
- To better control the process of incubation, it is necessary to equip the device with a viewing window and a thermometer.

Did you know? Egg with double yolk for incubation will not work. Even one chicken you do not get them.
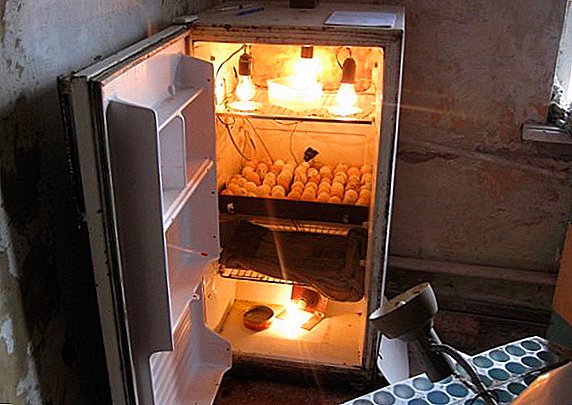
We make an incubator from the refrigerator of the old sample
If you decide to build an incubator yourself, it is best to take as a basis an idle fridge. After all, this type of household appliances is designed to maintain a certain microclimate, which is extremely important for the incubation process. In addition, the incubator from the refrigerator will have a number of other advantages:
- The device will have a significant capacity, but at the same time will cost its owner a more modest amount than the purchase of a new incubator of a similar capacity.
- The costs of other components of the incubator will also be negligible.
- Transform the old refrigerator under the desired device is not difficult. The material from which it is made is very malleable.
- Having made a roomy incubator, you will greatly facilitate the process of breeding the young, thereby increasing the profitability of the case.
 The refrigerator can keep not only cold, but also heat
For the manufacture of the incubator you will need:
- a fridge (the freezer must be removed);
- 4 10 W bulbs;
- 4 rounds;
- wires;
- trays for eggs (plastic);
- water tank;
Learn how to choose a thermostat for an incubator.
- a metal grid on which trays with eggs will stand;
- thermostat;
- plywood in the size of the door;
- drill;
- Scotch;
- simple tools - pliers, screwdriver, etc.

Step-by-step process of creating an incubator:
- Place the refrigerator so that its back wall is the bottom.
- Remove all shelves and wash off grease and dirt thoroughly. Disinfect.
- In the door cut a hole under the thermostat. Insert the device into it and fix with scotch tape.
- On a sheet of plywood, fix the lamp holders with self-tapping screws, pre-supplying power to them. Screw the lamp into the cartridges.
- Fix the resulting structure on the inside of the refrigerator door.
- At the bottom of the future incubator, put the trays with water. You can use a plastic pallet.
- Above the humidification system, fix the metal grid. On it are installed trays with eggs.

Important! In this type of incubator, there is no egg turning system. Everything must be done manually. Therefore, in order not to forget which tray needs to be turned, take notes.
Making a vertical incubator from the refrigerator
This type of construction is more convenient than the previous one. First, it turns out more roomy. Secondly, it is more convenient to control the process of incubation.
For the construction of the device you will need:
- old fridge;
- sheet fiberboard;
- temperature measuring device;
- thermistor;
- egg trays;
- fan with motor;
Learn how to make a thermostat for an incubator.
- tubular heating element;
- putty knife;
- glue;
- wire d = 6 mm (if you make trays under the eggs);
- putty knife;
- drill;
- welding machine.
 Instructions for making:
- Remove all shelves, trays and thoroughly wash the refrigerator from grease and dirt. Disinfect.
- If irregularities and cracks appear in the refrigerator from time to time, level and seal them with fiberboard and glue (if necessary, use self-tapping screws for more reliable fixation).

- In the ceiling of the refrigerator, make holes for the installation of instruments that measure and control the temperature.
- Install the fan on the back wall so that its engine is outside.
 At the door, around the perimeter, make holes through which fresh air will flow.
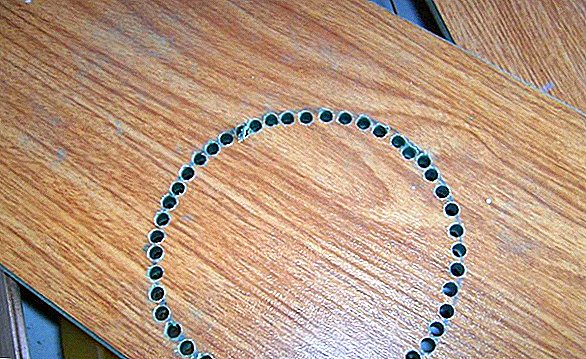
- Place a heating element near the fan (tubular or incandescent lamp).
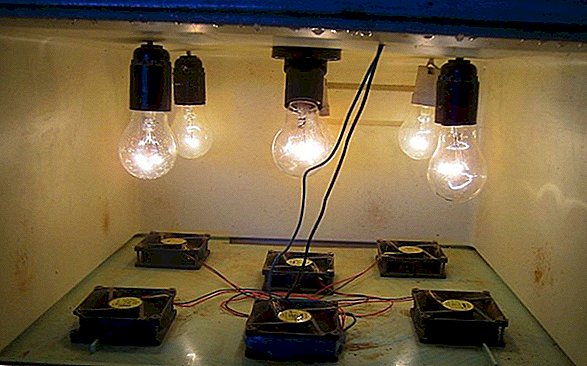 Incandescent lamps - the simplest heating element
 The role of the heater can perform nichrome wire
 - Install egg trays.
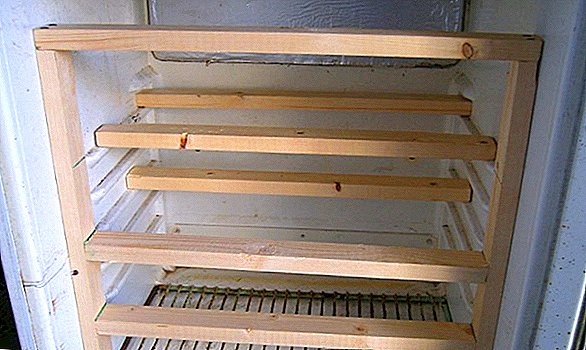 Install rails for trays When self-manufacturing trays, use wooden boxes.
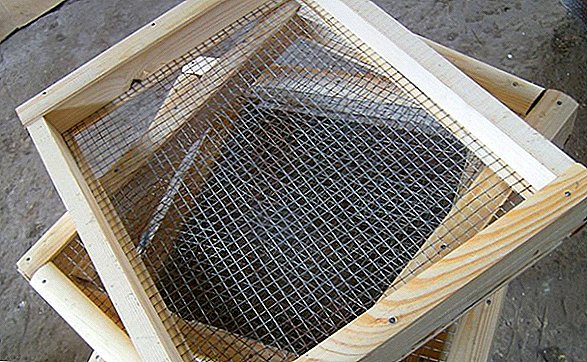 It is possible to make trays for eggs from wooden slats and galvanized mesh. In them, stretch the wire, creating a mesh. The size of the cell must match the size of the egg.
- At the bottom of the incubator, install a pan or trays of water.

 At the door, around the perimeter, make holes through which fresh air will flow.
 Incandescent lamps - the simplest heating element
 The role of the heater can perform nichrome wire
 Install rails for trays When self-manufacturing trays, use wooden boxes.
 It is possible to make trays for eggs from wooden slats and galvanized mesh. In them, stretch the wire, creating a mesh. The size of the cell must match the size of the egg.
Important! It is necessary to constantly monitor the level of liquid in the tray in order to provide the necessary humidity indicators in the unit.
Incubator from the refrigerator with semi-automatic turning eggs
This type of construction will significantly save time spent on turning eggs in an incubator.
For the device you will need:
- old fridge;
- thermostat;
- metal rods d = 8-9 mm (for the axis);
- egg trays;
- metal racks (4-5 cm thick);
- metal plate with holes d = 6 mm (the number of holes must match the number of axes and trays);
Check out two more ways to build your own incubators.
- a heating element;
- fan;
- water tank;
- 500 g load;
- metal screws;
- two breathing tubes d = 3 cm;
- electric and hand tools.

Instructions for the manufacture of homemade incubator (the first two points are the same as when creating the previous unit):
- Draw a vertical axis of symmetry on each side wall.
- On it, using screws, attach the rack to the floor and to the ceiling. In the racks, make holes under the axis according to the number of trays.
- Insert a metal bar into each tray as a rotation axis. Around it will turn the tray.
- Secure the ends of the bars in the racks.
- At one end of the egg boxes, fasten the hole plate using screws or screws. It is necessary to leave a gap of 2 mm between the bar and the wall of the box.

- At the lower end of the strap is attached cargo.
- The top end of the plank is outside the refrigerator. A pin is inserted into one of its holes, which acts as a stopper and allows you to adjust the position of the bar.
- At 1/3 the height of the refrigerator, above and below, holes are drilled on the side wall for the tubes.
- At the bottom of the incubator, on its back wall, heating elements are mounted. The thermostat is connected to them.
- Install the fan in such a way that air flows from it through thermoelements.
- At the bottom of the refrigerator, place a bowl of water.
 You can drill a hole in the wall and insert a tube to add water without opening the incubator.
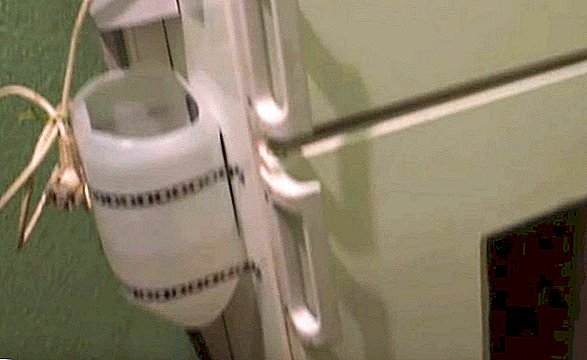 Attach water topping tank

 You can drill a hole in the wall and insert a tube to add water without opening the incubator.
 Attach water topping tank
Did you know? To determine whether the embryo develops normally in the egg, you can use the device called "ovoskop". It shines through the egg, making its internal structure visible.
Incubator out of the fridge with automatic egg turning
With this device you will only install trays with eggs, monitor the water level and pick up hatched chicks. Everything else will do for you technology.
To create an aggregate you need:
- old refrigerator, preferably with a top location of the freezer (you can not remove);
- aluminum or wooden frame;
- glass or clear plastic;
- sealant;
- heat-reflecting material;
- small motor;
- profile pipes for racks;
Find out what characteristics the incubators of the AI-48, Ryabushka 70, TGB 140, IFH 500, Stimul-1000, Сovatutto 108, Nest 100, Nestling, Ideal hen, Cinderella, Titan, Blitz, Neptune, Kvochka.
- metal grates under the boxes with eggs;
- metal rods (for the axis);
- asterisks from a bicycle chain;
- engine timer;
- pin;
- thermostat;
- Limit switches;
- 4 incandescent lamps up to 100 W;
- 4 small fans;
- instruments.
Incubator from the fridge: video
The process of creating the unit:
- Remove all shelves, trays and thoroughly wash the refrigerator from grease and dirt. Disinfect.
- In the partition between the refrigerator and freezer, cut the holes for the four fans.
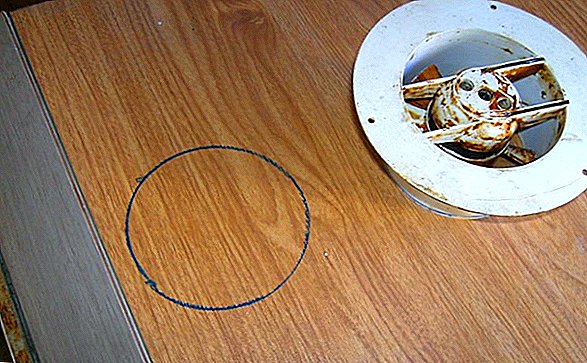
- In the door of the refrigerator, cut a window of a size that is convenient for you. Grind it around the perimeter. The window is designed to monitor the incubation process.
- Insert the frame with glass or plastic into the hole. All gaps smear sealant.
- Warm the door with heat-reflecting material to keep the heat inside the device.
- From profile tubes, weld two ladders with a refrigerating chamber. Install them near the side walls of the unit.
- Attach the gratings to the “steps” of the stairs so that they can move relative to their horizontal axis.
- Mount the turning mechanism. To do this, on a sheet of metal secure the asterisks from the bike. They play the role of a drive. The leading star is mounted on the pin, driven - on the outer side of the sheet. The sheet is welded at the bottom of the construction with grilles under the eggs.
- The power supply of the system is regulated by limit switches.
- The motor is forced to move two timers. The resumption of their work should take place at intervals of 6 hours.
- From the top of the refrigerator, set aside a third of its height and mount the thermostat.
- Lamps set inside the freezer. For their on-off relay answers.
- Install the fans into the prepared holes in the partition between the chambers, fixing them with metallized adhesive tape. Bring power to them.
Results for the manufacture
You are familiar with the manufacture of several types of incubators from an unnecessary refrigerator. Of course, from the first time to create the perfect device will not be so easy - you need some skills and knowledge, do not interfere with patience and perseverance. Also, you may have to make some design changes to suit your specific needs.
Find out what parameters to follow when incubating duck eggs, ostrich eggs, chicken eggs, guinea fowl eggs, goose eggs, turkey eggs, indoutin eggs.
Useful tips:
- Be prepared to customize the details for your product.
- Selecting the necessary material for the unit, monitor its condition.
- Do not use too leaky parts. This will lead to the fact that after a short period of time you will have to redo the device. A breakdown may occur at the most inopportune moment.
The described methods for the manufacture of incubators are simple and inexpensive. But to make the product durable, you should approach its creation with full responsibility. It is better to pre-think everything, calculate and make a drawing of the device. And then everything will work out for you.
Incubators do-it-yourself: video