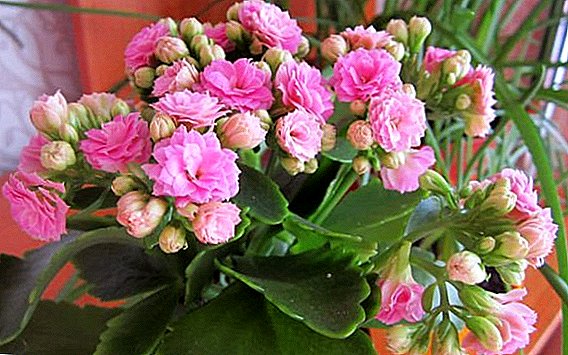
Among the popular indoor plants, succulents, combining the decorative and healing properties, occupies a special place Kalanchoe. Although this culture is quite common among flower growers, it is often grown or propagated in the wrong way. If you do not arrange the flower proper care, he will not be able to fully disclose his decorative effect. The article will tell about how to propagate Kalanchoe, as well as about the proper subsequent care of the plant.
Suitable period for succulent reproduction
Although most of the garden and indoor flower crops are transplanted, grafted and rooted in the spring, Kalanchoe can be rooted at any time of the year. To do this, it is only necessary to maintain proper conditions for its care and maintenance.
How to propagate Kalanchoe at home
Reproduction Kalanchoe carry out several methods:
- grafting;
- with the help of babies;
- leaflets;
- offspring;
- kidneys, sitting in the axils of the leaves;
- seeds.
Did you know? The ancient tribes of the island of Madagascar Kalanchoe leaves used as a component for ritual burns. The priests crushed the dry leaves of succulent into powder, and then set it on fire: the aborigines believed that this rite would help them to bring rain during droughty periods.
Cuttings in water
For grafting Kalanchoe, cuttings are prepared and rooted as follows:
- From developed strong apical shoots in length from 8 to 12 cm cut cuttings.
- For rooting, cut material is first dried for 24 hours.
- From the bottom of each shoot remove foliage.
- Place the cuttings in the water to about half of their length.
- Avoid contact with planting material of abundant solar radiation.
- After 2-3 weeks, the cuttings are ready for planting.
Video: Reproduction Kalanchoe cuttings
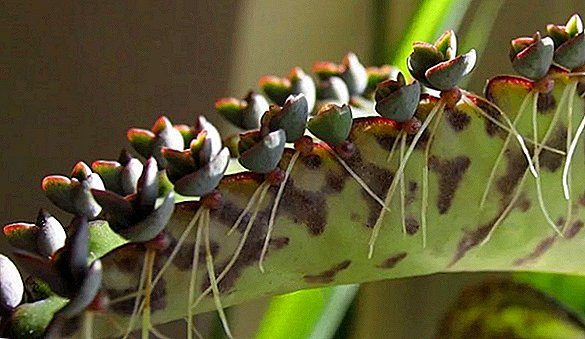
Children
To use the method of succulent reproduction, children carry out the following actions:
- They are waiting for small individual plants (children) with their own root system and leaves to appear on the outer edges of the leaf blades.
- After a short time, the children will separate from the sheets, fall to the ground in the flowerpot and take root in it.
- After that, young plants are removed from the pot and planted in plastic cups (0.2-0.5 l) as separate plants, and later - in separate containers.

Leaf
It is also quite simple to reproduce the described succulent using a piece of paper:
- The cut leaf is placed in a container with a well-moistened soil mixture.
- They create conditions for the future plant with high humidity, covering it with the cut off upper part of a plastic bottle in the form of a mini-greenhouse.
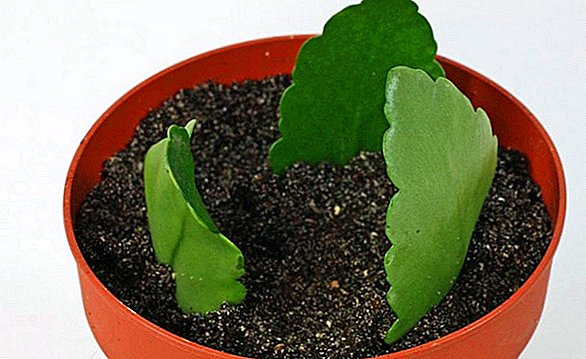
- The leaf rooted already on the third or fourth day.
- The fallen leaves are also allowed to root (not dried): the leaf is dipped in a container with water with the addition of a pinch of soda and left to form roots, after which they are planted in the soil mixture.

Important! All breeding and transplantation procedures of Kalanchoe are recommended outside the flowering period.
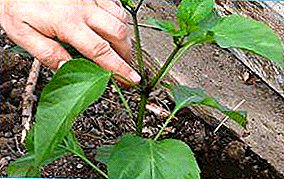
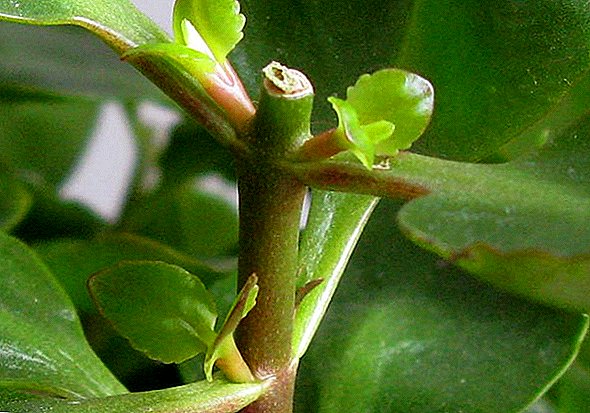
Offshoots
To propagate the culture of offspring, it is necessary to stimulate their appearance:
- Immediately after the flowering of the culture, the top of the plant is pinched.
- In the near future, new offspring will begin to grow out of the ground near the maternal escape.
- After the shoots reach 1/3 of the size of the maternal shoot, they should be separated and planted in a separate container with the ground.
- Young specimens grown from offspring, subsequently have a good development and rather quickly grow.


Sinus buds
To propagate Kalanchoe axillary buds, you must:
- Wait until one or several leaves disappear, and in their place there will appear small rudiments, similar to miniature cabbage cabbage.
- When the embryos reach a height of approximately 2–3 cm, they must be carefully cut and planted in pots with sandy soil.

Seeds
The culture has small seeds, which are sown according to the following technology:
- Light soil is pre-prepared in a container (the commercial mixture is diluted with flowering crops by 25% coarse sand).
- Sow the seed material in rows (the distance between the rows - 5 cm, between the seeds - 1-2 cm), slightly pressing the seeds to the soil.
- Landings are immediately watered with light streams of water (possible from a children's watering can), which will provide the seeds with the necessary depth.
- Seeds need greenhouse conditions, so the container covered with film material and put on the windowsill, preventing contact with direct radiation of the sun.
Important! Kalanchoe does not tolerate acidic soils, therefore, to reduce acidity, lime should be added to the prepared soil mixture.
- After the emergence of seedlings they grow a little, still covering the film.
- After regrowth of 4-5 leaves, saplings dive into separate small pots.
- After sufficient rooting of saplings, they need to pinch the tops - they do it twice with an interval of 1.5-2 months (this helps to form a good bush, which is then transferred by transfer method into a new container).
- Young plants bloom only a year after sowing.


Transplant features
There are some features of Kalanchoe transplantation:
- Periodic transplantation of the plant into a slightly larger previous pot is needed - this will improve the nutrition of the culture and provide its root cell with oxygen.
- A new pot should be 2-3 cm wider than the previous one. Before use it should be doused with boiling water and then with a solution of manganese for disinfection.
- This procedure is also necessary for the occurrence of various diseases of the culture, as well as if it is necessary to divide the bush.
- A shrub is transplanted predominantly in spring, after a period of flowering and subsequent cutting off all flower stalks from it.
- Transplantation is carried out very carefully, because the flower has very fragile foliage.
- Choosing the soil for transplanting, you can use several options: buy a mixture for flowering plants, adding coarse sand (1/4 of the total volume of the mixture), apply ready-made soil for succulents, prepare soil mixture from coarse sand, garden soil and humus with your own hands (1: 1: 1).
- The succulent flowerpot should be deep, with a wide neck, made of natural, breathable materials (ceramics, wood) to improve moisture exchange.
- At the bottom of the pot it is necessary to lay a non-toxic drainage layer (expanded clay, clay shards) that helps the free penetration of moisture and air.
Read more about how to properly transplant Kalanchoe at home.
The process of transplantation Kalanchoe is as follows:
- Lay a drainage layer on the bottom of the tank (up to 1/4 of the height of the pot).
- Abundantly pour the transplanted plant, and then get it out of the old tank, tilting the pot on its side, tapping along its walls and at the same time squeezing it from the earthen clod.
- After removing the plant from the old pot, you need to carefully examine its root for diseases and parasites (if necessary, cut off the rotten part).
- Place the bush in a new container (the root neck should be on the ground level, and the top of the pot should be a couple of centimeters above this level).
- Cover the ground and slightly condense it, and then water the plant.
- From above pour small pebbles on the surface of the ground (this will not allow children to grow uncontrollably in the future).
Video: Kalanchoe Transplant
Aftercare
At first, after succulent transplanting, the bush undergoes acclimatization, so it needs careful care.
Care Kalanchoe is in compliance with the following rules:
- Excessive irrigation flower can not tolerate and can begin to hurt, so some underfilling of the plant is allowed.
- The optimal temperature regime for growing succulents at home will be an indicator of mercury within + 19 ... + 21 ° C.
- Regular airing of the room with a growing Kalanchoe is necessary.
- It is necessary to feed the crop annually using special succulent fertilizers, which can be purchased at a specialty store.
- Outside the schedule, only diseased or weakened plants are fed (best in summer, but possible in autumn or spring). Succulent feeding is not recommended in winter.
- To give Kalanchoe beautiful forms, you can cut high shoots (as low as possible). Do this procedure exclusively in the summer, at the end of flowering. Circumcision of the shoots will be an obstacle to their rotting.
- Since the described culture is a regularly flowering plant, during this period the flower is very vulnerable to the effects of the external environment (especially humidity and light). Consequently, the pot with flowering culture can not be transferred to another room or change the schedule of watering.
Did you know? Kalanchoe has special tissues designed for fluid accumulation, so if it lacks watering, the flower is able to consume the life-giving moisture from its own reserves.
Common mistakes during reproduction of Kalanchoe
Although the indoor flower in question is unpretentious, but if the rules for its care are not followed, it can lose its decoration and healthy appearance.
Here are some of the errors allowed in its reproduction:
- if the cut is badly made by cuttings, then at increased soil moisture, the cutting may rot;
- wrong temperature conditions (below + 19 ° С);
- insufficient or excessive illumination;
- excessive humidity of air and soil;
- lack of airing;
- arrangement of seedlings in the draft;
- oversupply or lack of fertilizing;
- fertilization in winter.

As you can see, the reproduction of Kalanchoe does not require much work. The plant is quite easy to form the root system, while you can not use additional stimulants. Any of the described breeding methods are simple to use and are available even to a beginner florist. The main thing - to comply with the above recommendations.