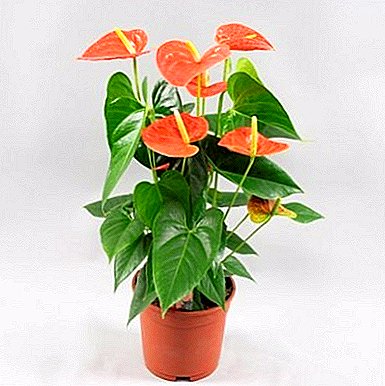
Hibiscus is a very popular plant among flower growers. Often they are decorated with an interior in public institutions and offices.
Therefore, the reproduction process of an unpretentious flower is extremely relevant. One of its most common methods is grafting.
How to grow a flower at home using this method will be discussed in our article. We will tell you what the advantages and disadvantages of this method are, as well as how to properly conduct hibiscus cuttings.
Advantages and disadvantages of grafting
Grafting is a vegetative way of plant reproduction. This method is quite simple, it can even beginner grower. Another important advantage of this method is the fact that hibiscus grown from a cutting plant will delight in flowering within a year, while retaining all the varietal characteristics of the mother plant (the color of the flower, its terry). The root system formed by grafting is stronger and more powerful than those plants that were propagated by other means, for example, seeds (how to grow a room hibiscus from seeds, as well as further care for the flower after planting, read here).
Learn more about reproduction, planting and further care of hibiscus in the house and garden, as well as see photos of the flower, here.
What time of year is it best to propagate the plant?
The best time to cut the cuttings is from April to August. Experienced growers recommend rooting to be carried out in May, since it is in this month that the plant is as active as possible: new cells appear and develop, all metabolic processes take place at an accelerated rate. If the hibiscus is rooted in the last month of spring, then the likelihood that the plant will take root will be close to 100%.
The grafting can be carried out in winter, but the rooting process will take place more slowly and it will not always be possible to achieve a positive effect, since in winter there is no such lighting, those temperatures that are necessary to escape.
How to prepare for landing?
Next, we consider how to properly cut a room flower and plant a cutting, how to choose and prepare the ground and the pot for planting.
The earth
 For rooting cutting is used peat, to which you can add sphagnum moss: peat will give the soil looseness and airiness, and the moss will maintain an optimal level of moisture in the pot (how to prepare the soil for hibiscus and whether you can buy it in the store, read here). You can use a mixture of garden land with river sand and peat in equal proportions. Also rooting hibiscus can just be in the wet coarse sand.
Another used and purchased soil on the basis of peat. The main condition is that the substrate should be light and breathable. The soil that is poured into a pot for permanent habitat of hibiscus, should consist of:
- 4 pieces of turf land;
- 3 pieces of leafy ground;
- 1 parts of humus;
- 1 part of coarse sand.
As an option: turf soil, humus, sand in a ratio of 2: 1: 1.
Pot
- Material. For rooting the cutting in the soil, it is important to use plastic transparent containers in order to observe the development of its root system. If there are no special pots, you can use large plastic glasses.But it must be remembered that any container should contain a drainage hole to drain excess moisture.
- The size. Most often, for rooting in the soil flower growers take the capacity from 200 to 500 ml, it all depends on the size of the cutting. Its diameter should be close to 9 cm.
Hibiscus blooms when its roots grow freely in a pot. Therefore, after rooting should be transplanted indoor flower in a spacious pot.
Planting material
Cut hibiscus cuttings should occur only after the plant has faded. A young, developed shoot with half-lignified bark is cut obliquely with a clean, sharp knife or shears. The stalk should be about 15 cm long and with 3-5 interstices.
Lower leaves are completely removed from the stalk and the top ones are cut in half to reduce evaporation, the upper part of the shoot is shortened by a direct cut. The lower part of the stalk before rooting in the substrate is dipped in "Kornevin."
How to root at home?
In water
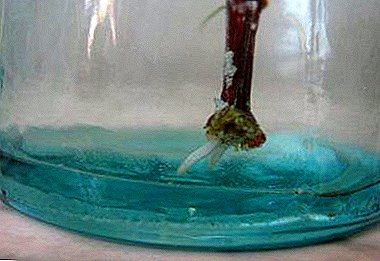 Distilled water of room temperature is poured into an opaque container (or from dark glass), a little “Kornevina” is added, a tablet of activated carbon, a cutting is dipped in water. As the water evaporates, it must be poured.
- From above, the container with the handle is covered with a transparent cap (cut plastic bottle, plastic bag) to create an increased level of humidity (80% - 85%), which will contribute to the formation of the root system of the stem. From time to time (once every 2 weeks) the greenhouse needs to be aired so that the shoots do not rot.
- Capacity is placed in a bright place, but without direct sunlight. The optimum temperature for rooting is + 22С - + 25С.
- After the roots appear in the size of 5 cm (approximately 1 month), the young plant can be planted in the ground.
 Distilled water of room temperature is poured into an opaque container (or from dark glass), a little “Kornevina” is added, a tablet of activated carbon, a cutting is dipped in water. As the water evaporates, it must be poured.
In the ground
- A drainage layer is placed at the bottom of a transparent plastic pot, the rest of the space is filled with soil.
- The stalk, pretreated with Korneovin, is buried 2 cm in the moistened soil and lightly crushed by hands for better fixation.
- On top of the container is covered with a plastic bag, which is fixed with an elastic band, or a plastic bottle, placed in a well-lit place, but without direct sunlight.
The temperature, which is necessary for a young plant, is + 22С - + 25С. Watering should be done as the soil dries out, systematically ventilate the "greenhouse".
Attention! If the plastic bag is covered with condensate from the inside, then it should be carefully removed, shake off the water and placed back on the container with the handle.
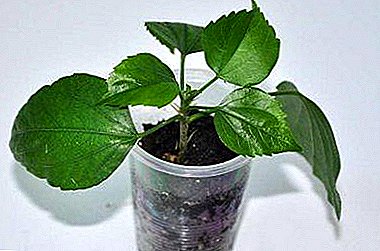
When after about 1.5 months the plant releases the roots, it can be transplanted into a permanent pot and looked after as an adult plant.
If we compare the two methods of rooting, the preference is always on the side of growing the roots in the substrate. Compared with fragile and brittle roots, sprouted in water, the root system, grown in the soil, is already adapted to obtain moisture and nutrition. It is stronger and adapted to the new habitat. As a result, such a plant will start to gain strength and growth faster, and will quickly release flower buds. In addition, plant such a plant will be much easier, using the method of transshipment.
Also rooting the stalk of hibiscus can be in the peat tablet.
- In a plastic cup with a volume of 300 ml a little drainage is filled up, and then a tablet is placed. It is necessary to pour boiled water over it, which will make the tablet swell.
- Cut and processed by a growth stimulator, the cuttings go deeper into a 2–3 cm tablet.
- Top capacity is covered with a package.
As the substrate dries out, it needs to be watered. After the roots grow, the plant can be planted in a permanent pot.
How to care for the first time?
 Care for hibiscus that has been transplanted into a permanent container after rooting should be the same as for an adult plant.
- Hibiscus is a light-loving plant. It is preferable to put it to the window or to another well-lit place.
- The recommended temperature in summer is + 20С - + 22С, in winter - + 14С - + 16С.
- It is necessary to systematically spray the plant to maintain a high level of humidity, so necessary for hibiscus. Also, the humidity can be increased by a container with water located next to the plant.
When spraying with a spray bottle, it is necessary to ensure that water does not fall on the flowers, otherwise they may become stained and fall off.
- The flower likes abundant watering. It should be carried out with separated water at room temperature. Water the plant should be as the drying of the top layer of soil. In winter, the frequency of watering can be reduced.
- Fertilization can be a solution of water and nitroammofoski (5 - 10 g per 1 liter of water), also suitable and complex fertilizers from a flower shop (for example, "Biohumus").
What to do if the indoor plant does not take root?
Possible problems arising during grafting include the following:
- The leaves on the handle turned yellow and fell off. This is nothing wrong, it is a natural process. If the plant is safely rooted, then be sure to release new foliage.
- Rooted in the water stalk fades after transplanting into the ground. Most likely, when planting a young plant, its root system was disrupted. Hibiscus will have to be cut again, since there is practically no chance of survival for such a cutting.
- The young hibiscus shows signs of infectious diseases (rot, mealy spots, etc.). For the prevention of this phenomenon, it is recommended to disinfect the soil, the pot into which the cuttings will be planted (fungicide treatment, heat treatment).
On how to plant hibiscus in the open ground and the secrets of plant care, read our material.
It is important to remember that not only successful grafting is the key to active growth of a healthy plant, but systematic care for him is also an integral part of the successful development of hibiscus. Having provided it to a young plant, it will be possible to enjoy lush flowering for many more years.