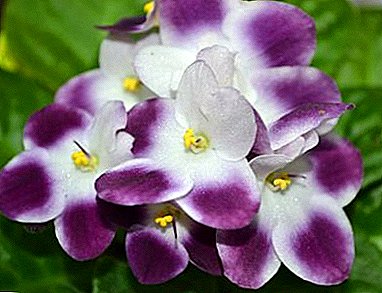
Irises - cute flower with a "delicious" name. This plant - a representative of the genus Kasatikov, for which it received the popular name "kasatiki". Most often in natural conditions, the plant is found in Europe, Asia, North Africa, as well as in North America. In our area grows more than 250 species.
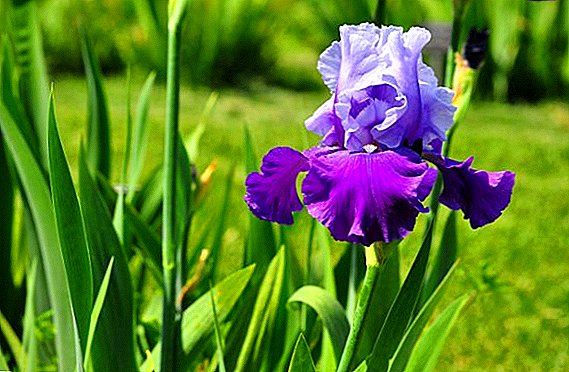
Irises - the very plant that will make your garden blooming in between the flowering of early spring and summer flowers.
The roots of iris - filiform. Peduncles on one plant can be both several and one; they are annuals. On flat, sword-shaped leaves there is a slight patina. The leaves are located next to the peduncle in the form of a fan, but on the stem of the leaves almost none.
 The iris flowers are usually either single 6-lobed flowers, or they are collected in inflorescences. Iris flower can be completely different colors.
And how to grow this miracle on your site, we will tell in this article.
Features of planting irises in spring
Iris is a plant that can winter in the ground, but the iris propagate most often in the spring. If you decide to decorate your garden with these flowers, you need to know exactly how to plant irises in the spring.
Did you know? Among florist professionals there is a large classification, botanists divide irises into bearded or non-bearded. Bearded iris has many subspecies, but ordinary growers are used to the fact that all bearded irises simply have a different size.
For planting irises, you can use material grown by yourself or purchased in a store: in both cases, you need to treat the roots of the plant with “Ecogel” or “Zircon”. This will contribute to the early germination of the root system.
 Before planting a plant, it is necessary to examine the roots, remove diseased or damaged ones, and also cut off long roots. After pruning, the root system should be immersed in a fairly concentrated solution of potassium permanganate (dark pink) and kept in it for 20 minutes.
The soil should not be too wet, loamy, with a high level of acidity. Root water - close to the rhizome. The landing process is very simple. Pour the sand into the shallow holes in a hill, carefully place the rhizome in a horizontal position on the sand and sprinkle it on top with the ground, but so that the upper part of the root system remains above the ground.
From above the plant should be watered plentifully. It is not necessary to tamp the soil around the flower. The distance between the flowers should be at least 50 cm. If the weather outside is too hot, the bush should be drenched. Re-watering is carried out on day 5 after planting.
Features of planting irises in autumn
Florists vied with each other about whether it is possible to plant the irises in the fall in the ground. Experienced flower growers say it is possible, but there are nuances in this planting.
Did you know?The sooner irises are planted after flowering, the greater the likelihood that the plant will grow and develop to the desired size.
Preparing the plant for planting in the fall is the same as preparing for spring planting.

The roots should be divided into annual links, carefully cut off the longest, rotten and diseased, then lower the root system into a solution of potassium permanganate saturated pink. Leave on for 15-20 minutes.
Then the roots need to be dried in the sun for 4-5 hours. The plant is lowered into the hole with sand, sprinkled with soil and watered. It is necessary to maintain the distance between plantings: from 15 to 50 cm, depending on the selected grade.
Before the onset of cold weather, young plants should be covered with spruce leaves, sawdust, or a shelter made of scrap materials: boards, roofing felt, films.
The combination of irises in a flower bed with other plants
Irises amaze with their beauty, variety of colors of violet, lilac, lavender, fuchsia. Considering the fact that the root system of the iris is horizontal and is located very close to the surface of the earth, it is better to select plants that “sit” deeper in the company of these flowers.
Iris looks good in the design of tracks and alleys, in the "company" with marigolds, chives, peonies, spikes, tulips.
Did you know? The timing of iris flowering allows these flowers to be used in the design of man-made ponds and lakes, and the love of the flower for wet soils also contributes to this.
Irises look very beautiful in combination with low-growing plants, which it sets off favorably. To do this, it is better to choose single-colored irises of the same type. A successful landing will be a place with stones or an artificially created composition with large cobblestones that can be put around a flower. 
On the flowerbed, you can place the plant with undersized coniferous bushes and trees. If you want to diversify the composition, you can add Dunford iridicodums to it - this plant looks very similar to iris and is representative of the same species. These two flowers very favorably emphasize the beauty of each other.
Subtleties care for irises in the period of budding and flowering
Growing irises in the open field involves the observance of some rules in the care of them. Irises - Undemanding plants, they just need a warm, bright place, moist soil and timely feeding.
Iris is a flower that normally tolerates drought, but during flowering and budding it is better not to allow the soil to dry out. To do this, water the plant immediately, as soon as you notice a dry "crust" of soil around the bush. It is also necessary to loosen the soil from time to time.
Important! In the care of irises, it is important to prevent stagnation of water, because the roots of the plant can rot.For iris, it is necessary to carry out the removal of damaged leaves and shoots from time to time, as they are a breeding ground for diseases and germs for the flower. Feeding is recommended to be carried out in 3 stages:
- the first feeding should be done at the beginning of the growing season, immediately after the snow has melted;
- the second feeding is carried out at the very peak of budding;
- the third time the plant is fed 3 weeks after flowering.

Fertilizer need to measure: one flower - no more than 15 g. If you decide not to fertilize the plants, then be prepared for the fact that after 3-4 years of growth in one place the irises will begin to lose their lush colors and die.
If the iris grows in a place where strong winds blow, it must be protected from them by building a shelter, for example, from a film.
Harmful to irises and weeds, so you need to get rid of them.
Care for irises after flowering
After flowering, in the middle-end of August (depending on the variety), the irises pass into the second phase of the growing season and prepare for wintering. During this period, it is important not to re-moisten the plant, since it needs less power than during flowering.
 Also, many are interested in: whether to cut irises after flowering. The answer is: you need it. So your flowerbed will look more aesthetic, besides microbes and bacteria like to live on faded buds. It is necessary to remove not only flowers, but also leaves that are damaged.
For irises, it is important to loosen the soil after flowering, but this should be done by hand. Supplemental feeding is also necessary (nitrogen-potassium-magnesium + trace elements), which will support the "vitality of the plant."
Did you know? In the case of irises, organic fertilizers are not the best solution, since they have a higher moisture level. Therefore, it is better not to use manure and compost.
After flowering, young plants better cover for the winter leaves.
Storing iris rhizomes
Frequently on the forums they ask: is it necessary to dig up irises for the winter? This is not necessary, but if you have already dug them out, then we will tell you how to properly store the dug root. If you want to keep your material safe and sound, then it is best to sanitize it, remove thin and long roots and plant it in the ground. However, the iris can be saved as a root.
Important! Despite the fact that the iris is a moisture-loving plant, it is impossible to keep it "wrapped up" in polyethylene! The root will rot and will not be suitable for planting.
Preparation of rhizomes of irises for storage consists of several simple steps:
- cleaning (it is necessary to clean the root from the ground)
- pruning (prune all diseased areas, remove long and thin roots)
- disinfection (you can use a solution of potassium permanganate)
- drying (the root should not be packed while wet)
- packaging (to choose the right material for packaging)

Separately taken each delenka (even the smallest) should be wrapped in natural fabric or paper, placed in a box, but not too close one to one. Such storage will allow you in the spring not to think about where to get healthy and high-quality planting material.
Transplantation and reproduction of irises
Transplanting irises to another place is a controversial issue among gardeners. Some say that it is possible to replant all year round, while others argue that it is better to replant in early spring or early autumn. Most experts are inclined to the second opinion. Then in spring the plants will bloom.
Iris transplant - The process is rather complicated, but entertaining. The action algorithm for transplanting irises is as follows:
- Carefully dig up the bush and clean it from the ground. If the bush is too thickly smeared with earth, you can rinse it with water without damaging the roots.
- The root system and the entire bush should be examined for mechanical damage or disease.
- The rhizome is cut with a very sharp blade, but so that each division has a back and several leaves.
- The roots should be cut with sharp scissors at an angle and dip the layers in a medium concentration of potassium permanganate solution.
- Sections on the plant need to be powdered with sulfur mixed with activated charcoal.
- Dry the material in the sun, occasionally turning it over.
- Plant irises in harvested wells at a distance of 40-50 cm from each other.

The ground in the hole should be moderately fertilized and hydrated. After transplanting the ground around the bush is not necessary to tamper, but a little water - necessarily.
Iris propagated vegetatively, dividing the rhizome of the bush into smaller fragments. When cutting, the knife must be constantly disinfected with a solution of potassium permanganate. For landing units, it is better to choose shares with several annual units joined together.
 You can also use not young plants, and old irises. Each slice should be treated with potassium permanganate, you can also crush the coal and wipe the cut place with it. The material is planted in the sand (necessarily dry) 2-3 cm deep.
It is better to plant the iris immediately after it has faded, because this period is the best for the development of the roots - they will take root faster.
Irises can be propagated by the seed method, but this path is usually chosen by those who want to grow a new “hybrid” of the plant, since such a seedling will bloom only after 2 years, therefore gardeners often use the vegetative method.
Irises - flowers of incredible beauty and very unpretentious both when planting and in caring for them in the open field. Irises will be a wonderful decoration of any yard and a real joy for their host. It is enough, as in any living creature, to invest in it a piece of the soul.